“`html
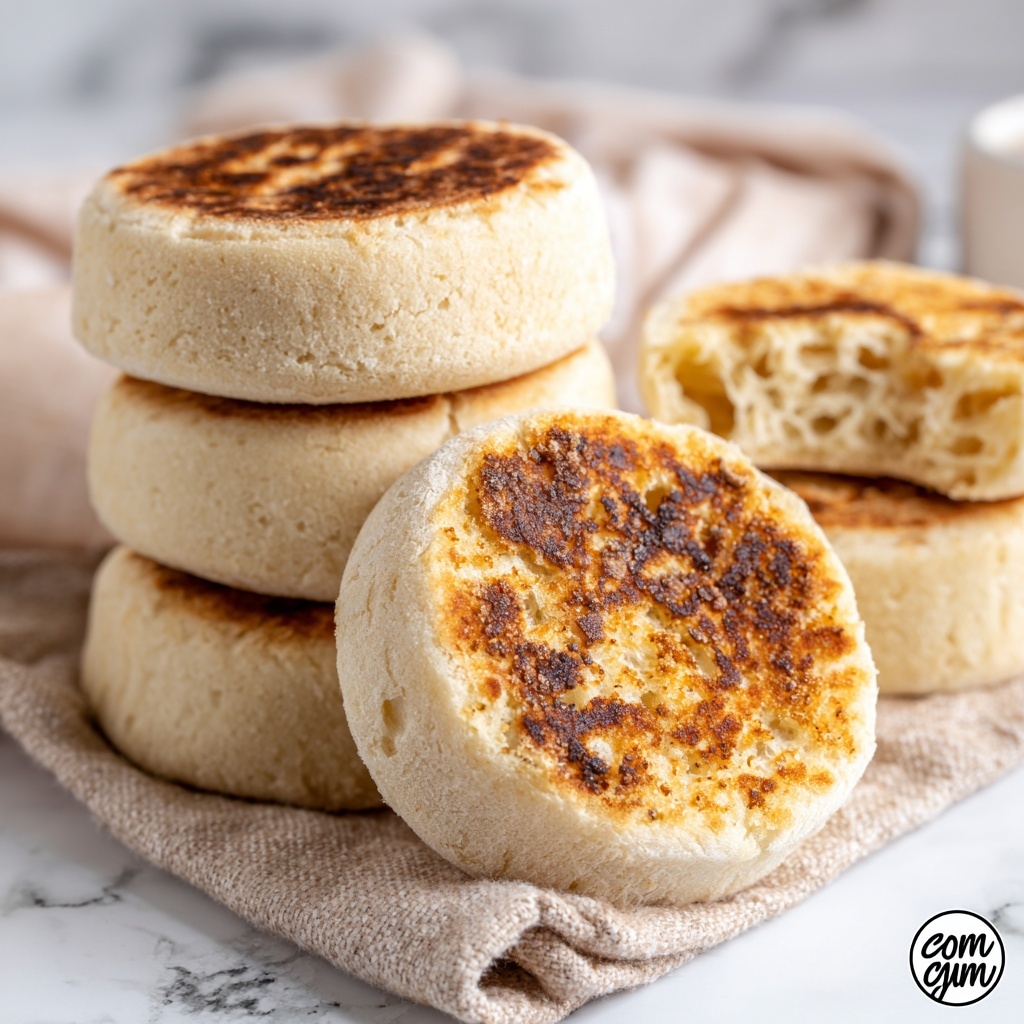
If you love that perfect combination of a tender inside with those iconic craggy nooks and a lightly crisp exterior, you are in for a treat with this Sourdough Discard English Muffins Recipe. Using sourdough discard not only reduces waste but also adds a subtle tang and depth of flavor that commercial yeast can’t quite match. These English muffins come out fluffy, golden, and wonderfully textured, perfect for everything from slathering with butter and jam to building your dream breakfast sandwich. Let me show you how easy and rewarding it is to make these in your own kitchen!
Ingredients You’ll Need
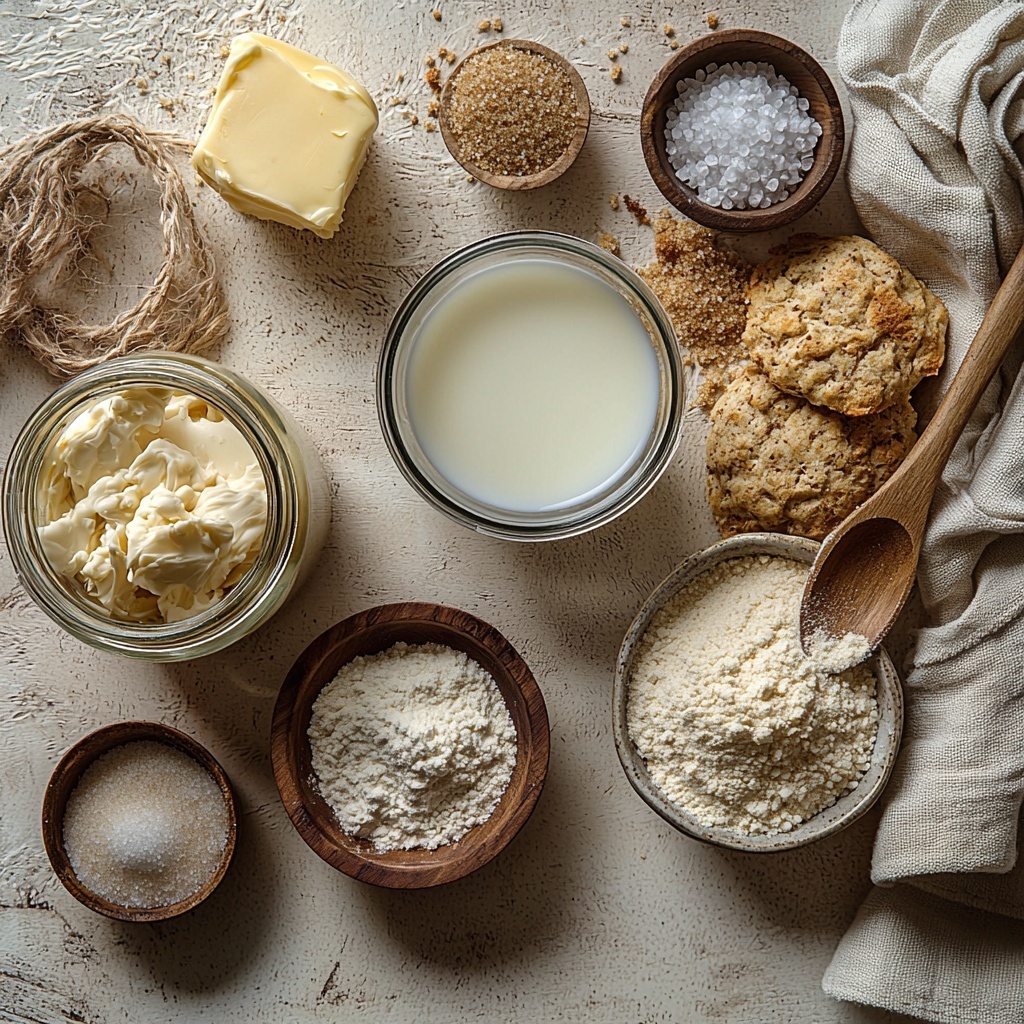
These ingredients might be simple, but each one plays a critical role in creating the perfect texture and rich flavor of your Sourdough Discard English Muffins. From creamy whole milk to hearty bread flour and just the right amount of sugar and salt, everything works together to yield muffins that are fluffy yet satisfyingly chewy.
- 1 cup whole milk (240 grams), warmed to 110 degrees F: Warm milk helps activate the yeast for a beautiful rise and adds a subtle creaminess.
- 2 tablespoons (28 grams or 1 ounce) unsalted butter, melted: Butter enriches the dough, keeping the muffins tender and flavorful.
- 2 tablespoons (30 grams) brown sugar (or sweetener of choice): Brown sugar adds a gentle sweetness and deep caramel notes that enhance the crumb.
- 1 teaspoon (3 grams) active dry yeast: Yeast ensures a good rise alongside the natural leavening in the sourdough discard.
- ½ cup (140 grams) sourdough discard: This is the star! It adds complex tang and a lovely chew to the muffins.
- 2 ½ cups (300 grams) bread flour: Bread flour gives structure and chewiness thanks to its higher protein content.
- 2 teaspoons (6 grams) kosher salt: Salt balances flavors and tightens gluten for a perfect crumb.
- Cornmeal or semolina flour (for dusting): This creates that classic crunchy bottom and prevents sticking.
How to Make Sourdough Discard English Muffins Recipe
Step 1: Mix Ingredients
Start by combining warm milk, melted butter, sourdough discard, brown sugar, and yeast in a large mixing bowl. Let this sit for a few minutes so the yeast can awaken and mingle with the other ingredients. Then, add the bread flour and kosher salt, stirring with a dough whisk or wooden spoon until you get a slightly sticky dough where everything is well incorporated. This initial step is all about creating the foundation for your muffins to rise beautifully.
Step 2: Let Dough Rise
Cover your bowl with a clean kitchen towel or plastic wrap and let the dough rest at room temperature until it doubles in size. This usually takes about 60 to 90 minutes. If you have some extra time and want to deepen the flavor even more, refrigerate the dough overnight instead. This slow fermentation really brings out those tangy, sourdough notes that make this recipe stand out.
Step 3: Prepare Dough for Shaping
When the dough is ready, gently dump it onto a floured surface. Press or roll the dough out to about one-inch thickness. Now comes the fun part: cutting your muffins! Use a biscuit cutter, drinking glass, or jar to cut rounds from the dough. Don’t worry about the scraps – just stack, re-roll, and cut again. Depending on how thick you make them, this recipe typically yields 9 to 10 muffins. Thick or thin, they promise delicious results!
Step 4: Shape Muffins
Place your cut rounds onto a baking sheet generously dusted with cornmeal or semolina flour, which will give you that satisfying crunchy base. Dust both tops and bottoms of the muffins with more cornmeal. Cover them again and give these little beauties about an hour to rise until they puff up and feel light and airy. If your dough was chilled overnight, expect this rise to take around 2 hours.
Step 5: Cook Muffins
Heat an electric skillet to 300°F or a heavy skillet over medium-low heat. Arrange your risen muffins on the pan, making sure to leave space between them. Cover and cook for 5 minutes, then flip and cook another 5 minutes covered. Lower the heat to about 250°F if you notice they’re browning too fast. Flip the muffins multiple times until their internal temperature reaches about 195-200°F, ensuring they’re cooked through. If you prefer, you can finish them in a 350°F oven for around 10 minutes, especially if your muffins are on the thicker side.
Step 6: Cool and Serve
Transfer your cooked muffins to a cooling rack and let them cool to room temperature. The magic moment is when you separate each muffin with a fork and your fingers to expose those classic textured nooks and crannies. This step makes all the difference, giving you pockets perfect for trapping melted butter and jam when toasting. The result? Pure breakfast bliss.
Alternative Shaping Option
If you want to skip the rolling and cutting, simply divide the dough into 8-12 equal pieces, shape each into a ball, then flatten into disks. This method reduces scraps and is perfect if you’re looking for a quicker prep without sacrificing any taste or texture.
How to Serve Sourdough Discard English Muffins Recipe
Garnishes
Classic is king with these muffins. Try a generous smear of butter paired with fruit preserves or honey for a simple yet decadent treat. For something savory, top with cream cheese and smoked salmon, or even an herbed ricotta spread. Fresh herbs like chives or dill can add an unexpected pop!
Side Dishes
These muffins shine alongside breakfast favorites like scrambled eggs, crispy bacon, or a fresh fruit salad. They also easily complement a bowl of warm soup or a crisp green salad for a light lunch or dinner. Their versatility makes them an all-day favorite.
Creative Ways to Present
Get creative by turning your muffins into mini sandwiches. Fill them with scrambled eggs, avocado, and spicy sausage for a hearty breakfast. Or build a sweet sandwich by layering peanut butter, banana slices, and a drizzle of honey. You can even use halves as a base for mini pizzas—just add marinara, cheese, and your favorite toppings then broil until bubbly!
Make Ahead and Storage
Storing Leftovers
Leftover Sourdough Discard English Muffins keep beautifully when stored in an airtight container at room temperature for 3 to 4 days. This helps maintain their chewy texture and prevents them from drying out. You can also wrap them tightly if you want to keep them fresh and ready for later indulgence.
Freezing
If you want to enjoy these muffins longer-term, freezing is your friend. Wrap each cooled muffin individually in plastic wrap or foil, then place them in a freezer-safe bag. They can be frozen for up to 3 months without losing their texture or flavor. Just thaw at room temperature or toast straight from frozen.
Reheating
To revive your English muffins, split them using a fork to preserve the signature texture and toast gently until crispy and warmed through. You can also heat them in a skillet over low heat with a lid on to keep them moist inside while achieving a crispy surface. Avoid microwaving if possible, as that can make them rubbery.
FAQs
Can I use regular flour instead of bread flour?
Yes, you can substitute all-purpose flour, but expect a softer texture with less chew. Bread flour’s higher protein content encourages gluten development, which is key for that classic English muffin bite.
What if I don’t have sourdough discard?
If you don’t have sourdough discard, this recipe can still work with a bit more yeast and a bit less liquid, but you’ll miss out on the subtle tang and complexity sourdough brings. It’s a great way to use up discard if you’re already feeding a starter!
Can I prepare the dough the night before?
Absolutely! Refrigerating the dough overnight after the first rise not only fits nicely into a busy schedule but also enhances flavor through slow fermentation. Just remember to allow extra time for the second rise after shaping, as the dough will be colder.
Why do I need to dust the pans with cornmeal or semolina?
Dusting prevents sticking and creates that signature crispy, slightly gritty crust on the bottom of the muffins, giving them an authentic texture reminiscent of bakery-style English muffins.
How thick should I roll out the dough?
Rolling to about 1 inch thickness strikes a good balance between fluffy interior and sufficient cooking through. Thicker muffins will take longer to cook; thinner ones may be crisper but less airy inside. Feel free to experiment to find your perfect thickness!
Final Thoughts
Making your own Sourdough Discard English Muffins Recipe is such a satisfying experience, and the results are truly worth every minute spent. From the delightful taste of that mild sour tang to the joy of breaking open those nooks to catch plenty of butter, this recipe turns simple ingredients into a breakfast staple you’ll love sharing. Give it a try, and soon homemade will be your only way to enjoy English muffins!
“`
Print
Sourdough Discard English Muffins Recipe
- Prep Time: 15 minutes
- Cook Time: 20 minutes
- Total Time: 1 hour 35 minutes to 2 hours 5 minutes (including rising time)
- Yield: 9 to 10 English muffins
- Category: Breakfast
- Method: Stovetop
- Cuisine: American
- Diet: Vegetarian
Description
These rustic Sourdough Discard English Muffins are delightfully soft with a signature craggy texture, perfect for toasting and slathering with butter or jam. Made using sourdough discard along with yeast for a reliable rise, this recipe offers a fantastic way to reduce waste and enjoy fresh, homemade muffins bursting with flavor and character.
Ingredients
Dough Ingredients
- 1 cup whole milk (240 grams), warmed to 110°F
- 2 tablespoons (28 grams) unsalted butter, melted
- 2 tablespoons (30 grams) brown sugar or sweetener of choice
- 1 teaspoon (3 grams) active dry yeast
- ½ cup (140 grams) sourdough discard
- 2 ½ cups (300 grams) bread flour
- 2 teaspoons (6 grams) kosher salt
For Dusting
- Cornmeal or semolina flour
Instructions
- Mix Ingredients: Combine warm milk, melted butter, sourdough discard, brown sugar, and active dry yeast in a large mixing bowl. Allow to sit for a few minutes to activate the yeast. Next, add bread flour and kosher salt, stirring with a dough whisk or wooden spoon until a slightly sticky dough forms and all ingredients are well incorporated.
- Let Dough Rise: Cover the bowl and let the dough rise at room temperature until it doubles in size, about 60 to 90 minutes. For enhanced flavor, you can optionally refrigerate the dough overnight at this stage to ferment slowly.
- Prepare Dough for Shaping: After the dough has doubled in size or after chilling, turn it out onto a floured surface. Press or roll the dough out to roughly 1-inch thickness. Use a biscuit cutter, drinking glass, or jar to cut rounds. Collect scraps, stack them, re-roll, and cut again. Adjust the thickness if you want larger or smaller muffins; this recipe yields about 9 to 10 muffins depending on thickness.
- Shape Muffins: Place the cut rounds on a pan heavily coated with cornmeal or semolina flour. Dust the tops of the muffins as well, cover them, and allow to rise for about 1 hour until puffy and light. If chilled, this rise may take around 2 hours.
- Cook Muffins: Preheat an electric skillet to 300°F or heat a heavy skillet over medium-low. Place the risen muffins in the skillet, leaving space between each. Cover and cook for 5 minutes. Flip the muffins, cover again, and cook for an additional 5 minutes. Reduce heat to about 250°F if necessary and flip the muffins several more times until their internal temperature reaches 195 to 200°F, ensuring they are fully cooked. Alternatively, you may finish the cooking in a 350°F oven for about 10 minutes, depending on muffin thickness.
- Cool and Serve: Transfer the cooked muffins to a cooling rack and let them cool to room temperature. To maximize the classic English muffin texture with many nooks and crannies, separate the halves by prying them apart gently with a fork before toasting and serving.
- Alternative Shaping Option: Instead of rolling and cutting rounds, divide the dough into 8 to 12 equal pieces, shape each into a ball, then press flat into disks. This method minimizes scraps and makes preparation easier.
Notes
- Use bread flour for better gluten development and texture; all-purpose flour may yield softer muffins.
- Letting the dough rest overnight in the fridge enhances flavor but is optional.
- Adjust the thickness of the muffins before cooking to match your desired muffin size.
- Maintaining a moderate temperature during cooking prevents burning while ensuring thorough cooking.
- Separating the cooked muffins with a fork before toasting helps develop the signature nooks and crannies texture.


