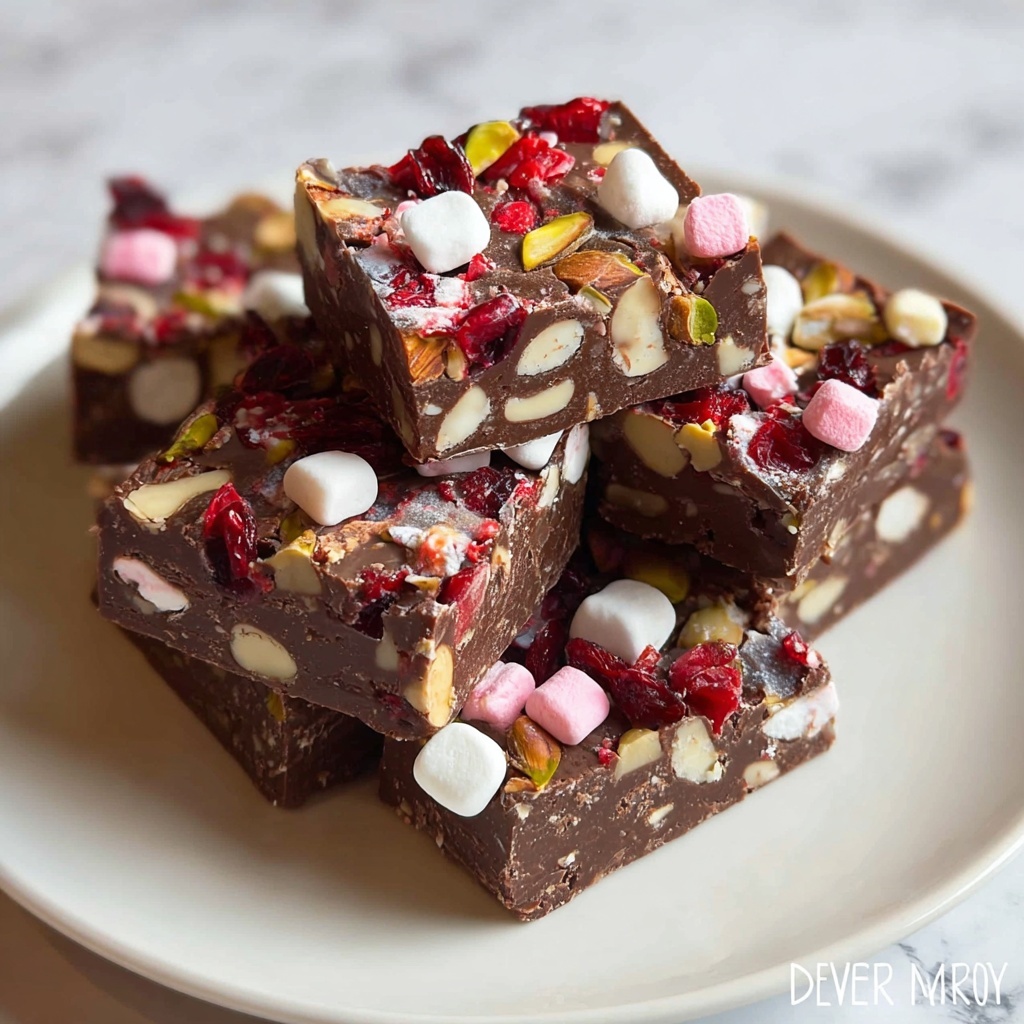
If you’re searching for a festive treat that perfectly blends rich chocolate, chewy marshmallows, crunchy nuts, and bursts of fruity sweetness, then this Rocky Road Christmas Fudge Recipe is exactly what your holiday celebrations need. It’s a delightful mix of textures and flavors that come together effortlessly, delivering a cozy, nostalgic bite every time. Whether you’re gifting it, sharing it at a family gathering, or simply indulging yourself, this fudge feels like the ultimate Christmas hug in dessert form.
Ingredients You’ll Need
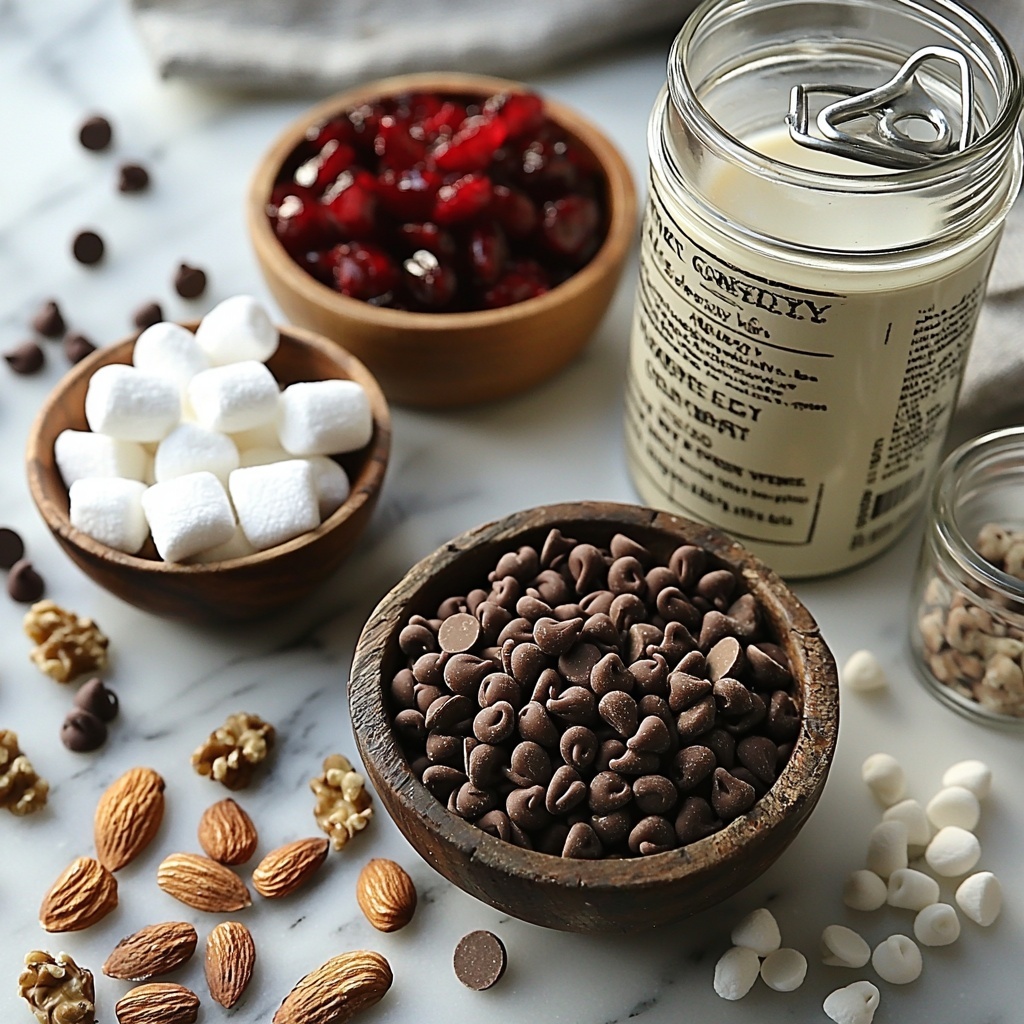
Believe it or not, the magic of this Rocky Road Christmas Fudge Recipe comes from just a handful of simple, yet essential ingredients. Each element plays a key role: from the creamy sweetness of condensed milk to the luscious depth of chocolate chips, and the festive pop that dried cherries add. Together, they create a balance of flavors that’s as beautiful as it is delicious.
- 2 cups chocolate chips: Use good quality semi-sweet or milk chocolate for rich, smooth results that melt perfectly.
- 1 can sweetened condensed milk: This brings the creamy sweetness that holds all the flavors and textures together beautifully.
- 1 cup mini marshmallows: These add a soft, chewy texture that’s signature to any great Rocky Road fudge.
- 1 cup chopped nuts (walnuts or almonds): Choose your favorite nut for a satisfying crunch and a nutty undertone.
- 1/2 cup dried cherries: These little bursts of tartness brighten the fudge and add a festive red contrast.
- 1/2 teaspoon vanilla extract: Enhances the overall flavor and adds a warm, comforting aroma.
How to Make Rocky Road Christmas Fudge Recipe
Step 1: Prepare Your Pan
Start by lining an 8×8 inch baking dish with parchment paper. This simple step ensures your fudge will lift out easily once it’s set, making cutting into perfect squares hassle-free.
Step 2: Melt the Chocolate Mixture
In a saucepan over low heat, gently melt the chocolate chips together with the sweetened condensed milk. This slow melting process allows the chocolate to soften evenly without scorching, giving the fudge a luxuriously smooth base.
Step 3: Combine and Smooth
Stir continuously until the mixture becomes completely smooth and glossy. This is the heart of your fudge—when these two ingredients meld into a silky blend that promises indulgence in every bite.
Step 4: Add Vanilla
Remove the pan from heat and stir in the half teaspoon of vanilla extract. This little boost enhances the flavor and invites a warm, festive note to the fudge.
Step 5: Fold in the Goodies
Now it’s time to stir in the mini marshmallows, chopped nuts, and dried cherries. Each addition adds its own delightful texture and burst of flavor, giving this fudge its signature rocky road character.
Step 6: Set the Mixture
Pour the mixture into the prepared baking dish and spread it out evenly with a spatula. Getting an even layer helps you slice perfect squares later and lets the fudge chill uniformity.
Step 7: Chill to Perfection
Refrigerate the fudge for at least 2 hours, allowing it to firm up completely. This patience will reward you with fudge that holds together beautifully but melts in your mouth.
Step 8: Slice and Enjoy
Once set, lift the fudge out of the dish using the parchment paper, cut into 16 squares, and prepare to wow everyone. Each bite is a festive celebration of sweet, chewy, nutty, and fruity goodness!
How to Serve Rocky Road Christmas Fudge Recipe
Garnishes
While the fudge shines on its own, a light dusting of powdered sugar or a sprinkle of crushed peppermint candy can add an extra layer of holiday cheer and texture. For parties, a few whole nuts or extra dried cherries on top make it look inviting and festive.
Side Dishes
This fudge pairs wonderfully with a warm mug of spiced hot chocolate or peppermint tea. The creamy richness of the fudge compliments the warm, aromatic drinks perfectly, making an ideal treat for cozy winter evenings.
Creative Ways to Present
Wrap individual squares in colorful cellophane tied with a festive ribbon for charming homemade gifts. Alternatively, arrange them on a holiday platter with fresh evergreen sprigs and cranberries for an eye-catching dessert table centerpiece.
Make Ahead and Storage
Storing Leftovers
You can store any leftover Rocky Road Christmas Fudge in an airtight container in the refrigerator for up to 3-4 days. Keeping it chilled maintains the perfect fudge texture and flavor until you’re ready to enjoy more.
Freezing
If you want to keep this treat longer, Rocky Road Christmas Fudge freezes beautifully. Wrap the pieces individually in plastic wrap and place them in a freezer-safe container for up to 1 month. Thaw in the fridge before serving to retain the best texture and taste.
Reheating
Fudge is best enjoyed cold or at room temperature, so reheating is not necessary. If you prefer it slightly softer, leave it out at room temperature for 10-15 minutes before indulging.
FAQs
Can I use different types of nuts in this recipe?
Absolutely! Walnuts and almonds are classic choices, but pecans, hazelnuts, or even pistachios can add unique flavors and crunch. Just be sure to chop them finely to mix smoothly into the fudge.
Is it okay to substitute dried cherries with other dried fruits?
Yes, dried cranberries, raisins, or chopped dried apricots work wonderfully as substitutions. Each fruit gives a slightly different sweetness profile, so feel free to experiment based on your preference.
Can I make this fudge vegan or dairy-free?
Traditional Rocky Road fudge relies on sweetened condensed milk and chocolate chips that contain dairy. To make it vegan, look for dairy-free sweetened condensed milk alternatives and vegan chocolate chips—just keep in mind the texture might vary slightly.
How long does it take for the fudge to set properly?
The fudge needs to chill in the refrigerator for at least 2 hours to firm up fully. If your fridge is particularly cold, giving it a bit more time won’t hurt and can make cutting easier.
Can I prepare this fudge in advance for holiday parties?
Definitely! Rocky Road Christmas Fudge Recipe is perfect for make-ahead treats. Prepare it a couple of days before your event, store it properly in the fridge, and it will taste fresh and delicious when the time comes to serve.
Final Thoughts
This Rocky Road Christmas Fudge Recipe is a must-try for anyone wanting to spread some holiday joy in the form of a rich, chewy, and utterly scrumptious treat. It’s simple enough for busy days but impressive enough to wow guests. Once you try it, you’ll understand why it becomes a cherished holiday favorite year after year!
Print
Rocky Road Christmas Fudge Recipe
- Prep Time: 10 minutes
- Cook Time: 10 minutes
- Total Time: 2 hours 20 minutes
- Yield: 16 servings
- Category: Dessert
- Method: Stovetop
- Cuisine: American
Description
Rocky Road Christmas Fudge is a rich and decadent holiday treat combining smooth chocolate, sweet marshmallows, crunchy nuts, and tart dried cherries. Perfect as festive gifting or indulgent snacking, this no-bake fudge brings together classic flavors in an easy-to-make, crowd-pleasing dessert.
Ingredients
Fudge Base
- 2 cups chocolate chips
- 1 can sweetened condensed milk (14 oz)
- 1/2 teaspoon vanilla extract
Add-ins
- 1 cup mini marshmallows
- 1 cup chopped nuts (walnuts or almonds)
- 1/2 cup dried cherries
Instructions
- Prepare the pan: Line an 8×8 inch baking dish with parchment paper to prevent sticking and make it easier to remove the fudge once set.
- Melt chocolate and milk: In a saucepan over low heat, combine the chocolate chips and sweetened condensed milk. Stir constantly to slowly melt the chocolate without burning it, until the mixture is smooth and fully combined.
- Add vanilla: Remove the saucepan from heat and stir in the vanilla extract to enhance the fudge’s flavor.
- Incorporate mix-ins: Fold in the mini marshmallows, chopped nuts, and dried cherries evenly into the melted chocolate mixture.
- Transfer to pan: Pour the fudge mixture into the prepared baking dish and spread it out evenly to ensure uniform thickness.
- Chill: Refrigerate the fudge for at least 2 hours, or until fully set and firm enough to cut.
- Serve: Once set, lift the fudge from the pan using the parchment paper, cut into squares, and serve or package for gifting.
Notes
- Use good-quality chocolate chips for best flavor and smooth texture.
- For a nut-free version, omit the nuts or substitute with seeds.
- Store the fudge in an airtight container in the refrigerator for up to 2 weeks.
- Ensure the heat is low when melting chocolate to prevent burning.
- Allow fudge to fully cool before cutting to maintain clean edges.


