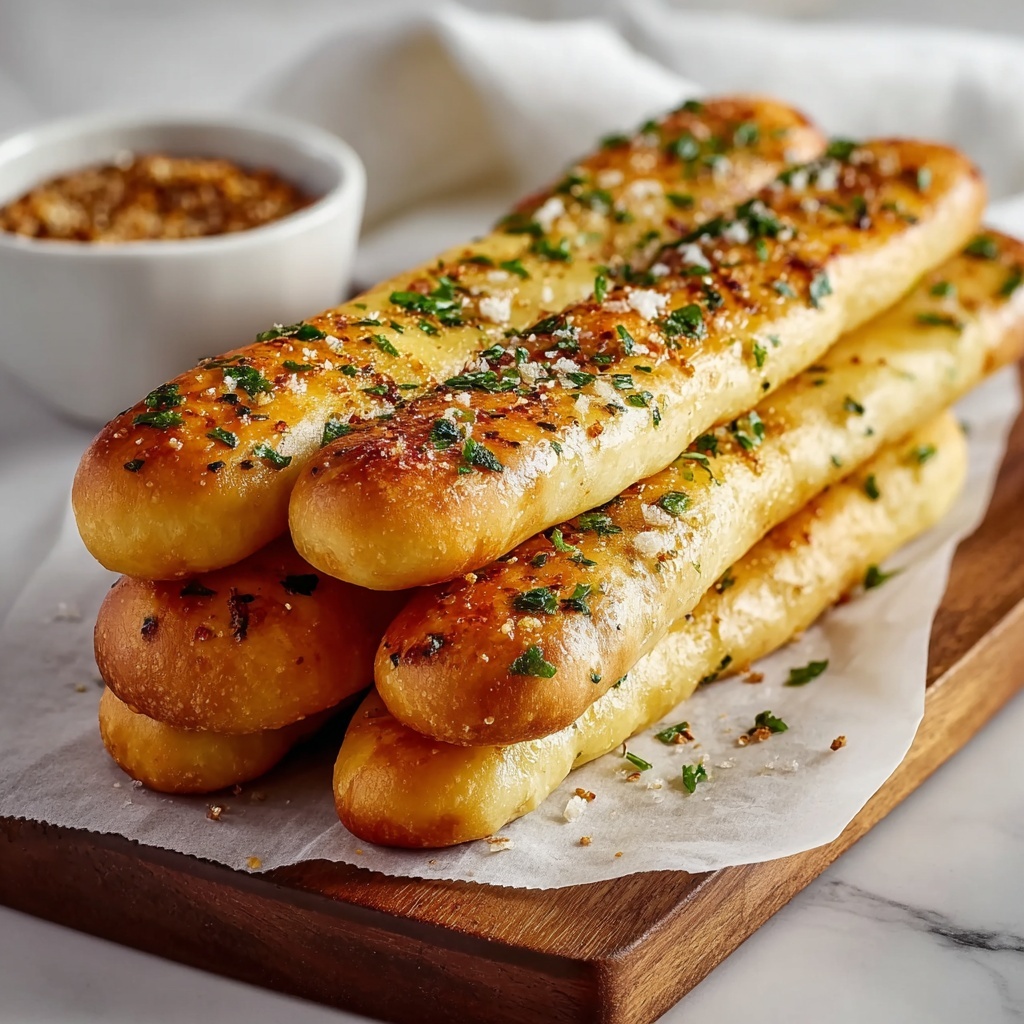
If you’ve ever found yourself dreaming of those soft, buttery, garlicky breadsticks at your favorite Italian restaurant, this Olive Garden-Style Homemade Breadsticks Recipe is here to make those cravings vanish. There is something truly magical about replicating restaurant classics in your own kitchen, and these breadsticks are no exception. They come out golden brown on the outside, pillowy soft inside, with that irresistible garlic butter glaze that everyone raves about. Whether you’re planning a family dinner, a cozy date night, or just craving a comforting snack, this recipe will quickly become your go-to for easy, delicious breadsticks that wow every time.

Ingredients You’ll Need
The beauty of this Olive Garden-Style Homemade Breadsticks Recipe lies in its simple yet carefully balanced ingredients. Each one plays a crucial role—from activating the yeast that gives the dough its beautiful rise to the garlic and butter that infuse every bite with flavor and richness.
- Warm water (1 1/2 cups, 110°F/45°C): The perfect temperature to gently wake up the yeast without killing it.
- Active dry yeast (2 1/4 tsp): The rising agent that creates that fluffy texture everyone loves.
- Granulated sugar (2 tbsp): Just enough sweetness to feed the yeast and slightly balance savory flavors.
- All-purpose flour (4 cups): Provides structure with just enough protein for tender chewiness.
- Unsalted butter, softened (2 tbsp): Adds richness directly into the dough.
- Salt (1 tbsp): Enhances all the flavors without overpowering.
- Unsalted butter, melted (1/4 cup): For that luscious garlic butter glaze.
- Garlic powder (1 tsp): Infuses the breadsticks with classic savory garlic notes.
- Additional salt (1/2 tsp): To sprinkle on after glazing for a perfect finishing touch.
How to Make Olive Garden-Style Homemade Breadsticks Recipe
Step 1: Activate the Yeast
Start by mixing warm water, yeast, and granulated sugar in a small bowl. This delicate blend needs to sit for 5 to 10 minutes until it becomes frothy and bubbly—this signals the yeast is alive and kicking, which means your breadsticks will rise beautifully.
Step 2: Mix and Knead the Dough
In a large bowl or using your stand mixer, combine the all-purpose flour, softened butter, and salt. Pour in the activated yeast mixture and knead—by hand or mixer—until the dough feels smooth and elastic, usually 8 to 10 minutes. This kneading process is essential for developing gluten that gives your breadsticks that delightful chew.
Step 3: First Rise
Transfer the dough to a lightly greased bowl, cover with a clean kitchen towel, and let it rest in a warm spot for about an hour. This slow rise allows the dough to double in size, creating the perfect light texture that will make each breadstick melt in your mouth.
Step 4: Shape the Breadsticks
After the dough has risen, gently punch it down to release any air bubbles. Divide it into 12 to 14 equal portions, then roll each piece into a 6 to 7 inch rope. Neatly place these on a greased or parchment-lined baking sheet, ready for their final rise.
Step 5: Second Rise
Cover your shaped breadsticks again with a towel and allow them to rest for 20 to 30 minutes until they look puffy. This second rise ensures they bake up soft and airy on the inside while developing just the right crust on the outside.
Step 6: Preheat the Oven
While your breadsticks are puffing up, preheat your oven to 400 degrees Fahrenheit (200 degrees Celsius). Getting the oven ready now guarantees you’ll bake them at the perfect temperature for that golden finish.
Step 7: Bake Until Golden
Place your breadsticks in the oven and bake for about 12 to 15 minutes. You’ll know they’re done when the tops turn a beautiful golden brown, giving you that inviting bakery look and crispness on the crust.
Step 8: Prepare the Garlic Butter Glaze
While the breadsticks bake, melt the butter and stir in garlic powder and salt. This simple but powerful mixture will be your secret weapon to elevate these breadsticks from delicious to absolutely crave-worthy.
Step 9: Brush and Serve
As soon as the breadsticks come out of the oven, generously brush the warm garlic butter all over them. This final step ensures each bite is bursting with savory, buttery goodness that keeps you reaching for more.
How to Serve Olive Garden-Style Homemade Breadsticks Recipe
Garnishes
For a touch of freshness and visual appeal, sprinkle chopped fresh parsley or a little grated Parmesan cheese on top of the garlic butter glaze. It adds color and a subtle flavor boost that pairs perfectly with these breadsticks.
Side Dishes
These breadsticks are perfect companions to classic Italian dishes like a rich marinara sauce, zesty alfredo pasta, or a hearty minestrone soup. Their mild yet flavorful profile complements a wide variety of dishes without overshadowing them.
Creative Ways to Present
Try serving your breadsticks in a basket lined with a cozy linen napkin or arrange them standing upright in a tall glass for a fun twist. You can also make mini breadstick skewers by threading small pieces alternating with cheese cubes or cherry tomatoes—great for parties or family dinners.
Make Ahead and Storage
Storing Leftovers
Once completely cooled, store leftover breadsticks in an airtight container at room temperature for up to two days. This keeps them soft and fresh enough to enjoy the next day without losing their charm.
Freezing
If you want to save some for later, wrap cooled breadsticks tightly in plastic wrap and place them in a freezer-safe bag or container. They can be frozen for up to two months, making meal prepping or last-minute snacks super convenient.
Reheating
To bring frozen or leftover breadsticks back to life, reheat them in a preheated oven at 350 degrees Fahrenheit (175 degrees Celsius) for about 5 to 7 minutes. Brush with a little extra garlic butter afterward if you want to refresh their buttery goodness.
FAQs
Can I use instant yeast instead of active dry yeast?
Absolutely! If you use instant yeast, you can mix it directly with the flour and skip the activation step with warm water. Just reduce the warm water slightly to account for the freeze-dried nature of instant yeast.
How can I make these breadsticks gluten-free?
While this exact recipe uses all-purpose flour, you can try a gluten-free flour blend designed for bread baking. Keep in mind that texture might differ slightly, and you may need to adjust the liquid amounts accordingly.
What if I like a stronger garlic flavor?
Feel free to increase the garlic powder in the butter glaze or even add some finely minced fresh garlic for a more intense, punchy garlic experience. Just be cautious not to overwhelm the balance of flavors.
Can I use salted butter instead of unsalted?
You can, but remember to reduce the added salt slightly to keep the breadsticks from becoming too salty. Unsalted butter gives you better control over seasoning.
Is it possible to make these breadsticks vegan?
Yes! Substitute the butter with a plant-based spread or coconut oil, and replace the sugar with a vegan-friendly alternative if needed. The dough will still rise beautifully and taste delicious.
Final Thoughts
I just love how this Olive Garden-Style Homemade Breadsticks Recipe brings a little slice of that cozy Italian restaurant vibe right into your kitchen. The process is fun, the ingredients are simple, and the end result is simply irresistible. Trust me when I say once you try making these breadsticks yourself, you’ll never go back to store-bought ones again. So grab your mixing bowl, preheat your oven, and get ready to bake your way to breadstick bliss!
Print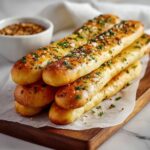
Olive Garden-Style Homemade Breadsticks Recipe
- Prep Time: 1 hour 20 minutes
- Cook Time: 15 minutes
- Total Time: 1 hour 35 minutes
- Yield: 12-14 breadsticks
- Category: Bread
- Method: Baking
- Cuisine: Italian-American
- Diet: Vegetarian
Description
This Olive Garden-Style Homemade Breadsticks recipe yields soft, buttery breadsticks with a garlicky finish, perfect for serving alongside your favorite Italian dishes or enjoying as a flavorful snack. The dough is made from scratch using yeast, sugar, flour, and salted butter, then baked to golden perfection and brushed with a savory garlic butter topping.
Ingredients
Dough Ingredients
- 1 1/2 cups warm water (110°F/45°C)
- 2 1/4 tsp active dry yeast
- 2 tbsp granulated sugar
- 4 cups all-purpose flour
- 2 tbsp unsalted butter, softened
- 1 tbsp salt
Topping Ingredients
- 1/4 cup unsalted butter, melted
- 1 tsp garlic powder
- 1/2 tsp salt
Instructions
- Activate Yeast: In a small bowl, combine warm water, yeast, and granulated sugar. Stir gently and let sit for 5-10 minutes until frothy to activate the yeast.
- Prepare Dough: In a large bowl or stand mixer, combine flour, softened butter, and salt. Add the yeast mixture and knead by hand or with a dough hook on medium speed for 8-10 minutes until the dough is smooth and elastic.
- First Rise: Transfer the dough to a lightly greased bowl, cover with a kitchen towel, and let it rise in a warm place for 1 hour or until doubled in size.
- Shape Breadsticks: Punch down the dough and divide it into 12-14 equal pieces. Roll each piece into 6-7 inch ropes and place them on a greased or parchment-lined baking sheet.
- Second Rise: Cover the shaped breadsticks with a kitchen towel and let rise for another 20-30 minutes until puffy.
- Preheat Oven: Preheat the oven to 400°F (200°C) while the breadsticks rise.
- Bake: Bake the breadsticks for 12-15 minutes until they become golden brown on top.
- Prepare Garlic Butter: While baking, melt the butter and mix in garlic powder and salt to create the garlic butter mixture.
- Brush Breadsticks: Immediately after baking, brush the warm breadsticks generously with the garlic butter mixture for delicious flavor.
Notes
- Make sure the water is warm (around 110°F/45°C) to properly activate the yeast but not so hot that it kills it.
- Allowing the dough to rise in a warm, draft-free environment helps achieve a good rise.
- You can store leftover breadsticks in an airtight container and reheat them in the oven for best texture.
- For a cheesier variation, sprinkle parmesan cheese over the breadsticks before baking.
- If you prefer softer breadsticks, cover them with a damp cloth during the second rise to prevent drying out.
