
If you have a soft spot for delightful little treats that melt in your mouth and bring back nostalgic memories, you are going to adore this Old-Fashioned Butter Mints Recipe. These classic candies are rich, creamy, and bursting with peppermint flavor, making them the perfect sweet bite for any occasion. Whether you’re looking to surprise your guests or simply indulge yourself, these butter mints deliver that old-fashioned charm and buttery texture that feels like a hug in candy form.
Ingredients You’ll Need
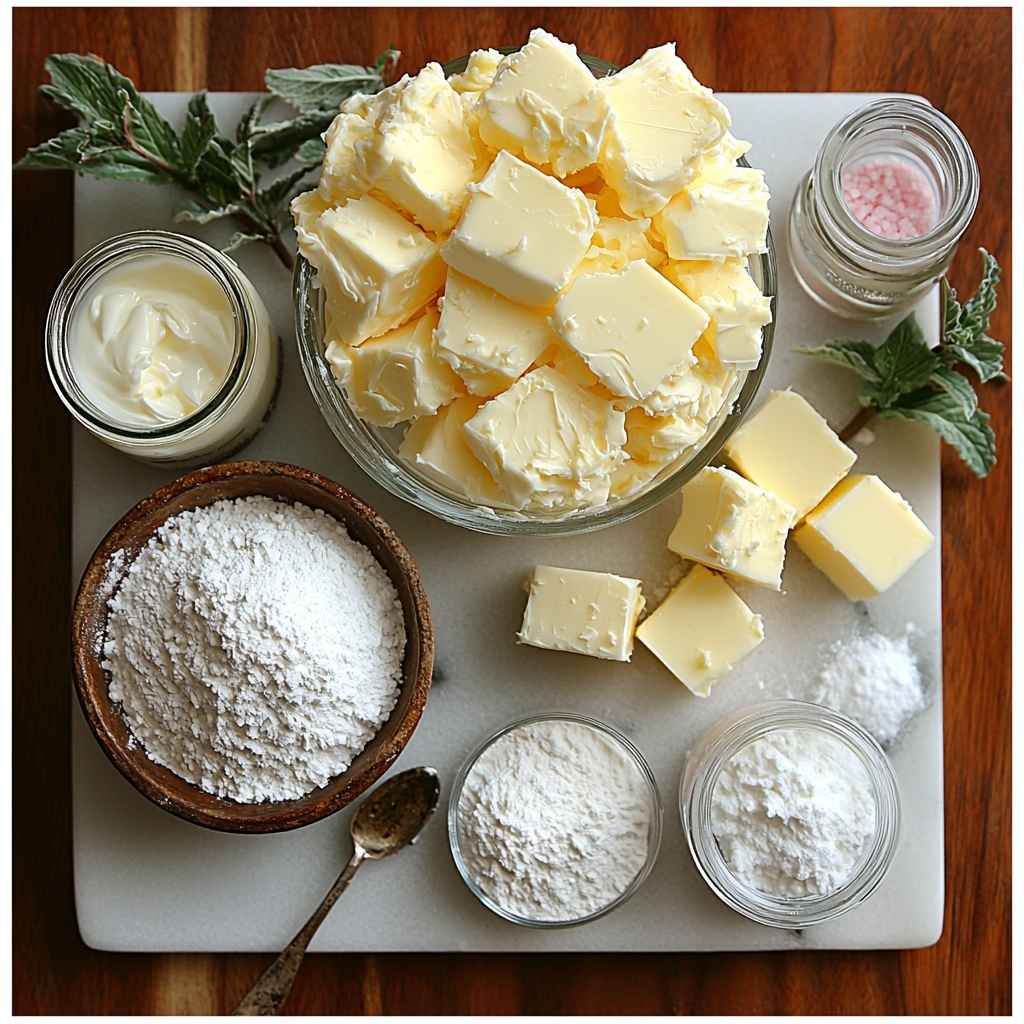
This recipe calls for just a handful of staples, each playing an essential role in creating the smooth texture and nostalgic taste of the mints. The balance of butter, sugar, cream, and peppermint makes all the magic happen, while a pinch of salt enhances the overall flavor. Optional food coloring lets you add a bit of festive flair if you’re feeling creative.
- ½ cup unsalted butter (soft): Provides the creamy, rich base that makes these mints melt so beautifully in your mouth.
- 4 cups powdered sugar: Sweetens and gives these mints their classic smooth, dusted appearance and texture.
- 2 tbsp heavy cream: Adds moisture and helps bind everything together for that perfect consistency.
- ½ tsp peppermint extract: The star flavor that brightens the entire candy with a refreshing peppermint punch.
- Food coloring (optional): Allows you to customize the mints for holidays or parties with a splash of color.
- Pinch of salt: A subtle enhancer that deepens the buttery sweetness, balancing the flavors.
How to Make Old-Fashioned Butter Mints Recipe
Step 1: Soften the Butter
Start by letting your unsalted butter come to room temperature. It should be soft enough to scoop and blend easily but not melted. This softness ensures the butter mixes perfectly with the powdered sugar to create a smooth, creamy base.
Step 2: Mix Butter and Powdered Sugar
In a large bowl, combine the softened butter with the powdered sugar. Use a sturdy spoon or an electric mixer on low speed to blend them until the mixture becomes crumbly but starts to hold together. This step is crucial for the classic texture of your butter mints.
Step 3: Add Heavy Cream and Peppermint Extract
Pour in the heavy cream and peppermint extract, then continue mixing. The heavy cream adds moisture, while the peppermint gives these candies their signature flavor. Mix until you get a dough-like consistency that isn’t too sticky.
Step 4: Incorporate a Pinch of Salt
Sprinkle a tiny pinch of salt into the mixture. This might sound unusual, but salt rounds out the sweetness and enriches the buttery flavor, making the candy taste even more indulgent.
Step 5: Add Food Coloring (Optional)
If you want to add a pop of color, now is the time to mix in a few drops of your chosen food coloring. Whether soft pastel shades or vibrant hues, coloring can make the mints even more delightful — especially for special occasions.
Step 6: Shape the Mints
Pinch off small portions of the dough and roll them into tiny balls or shape them into little cylinders about an inch long. Place them on parchment-lined trays to keep them from sticking and to set their shape nicely.
Step 7: Chill the Mints
Pop the shaped mints into the refrigerator for at least 1 hour. Chilling helps them firm up so they hold their shape and develop that perfect melt-in-your-mouth texture.
Step 8: Serve and Enjoy
Once chilled, your butter mints are ready to be savored. They’re perfectly tender, refreshingly minty, and just the right amount of buttery sweet to make your taste buds dance with joy.
How to Serve Old-Fashioned Butter Mints Recipe
Garnishes
While these mints stand beautifully on their own, you can sprinkle a few with finely crushed peppermint candy for a festive touch or roll them lightly in colored sugar crystals to add sparkle and extra texture. These little finishing touches elevate your presentation and make each mint feel special.
Side Dishes
Butter mints are such a charming accompaniment to a cup of hot coffee or tea, offering a cool, refreshing contrast to warm drinks. They also pair wonderfully with a cheese platter or served alongside light cakes and cookies for a delightful dessert spread.
Creative Ways to Present
Try placing your mints in small glass jars tied with pretty ribbons as gifts, or serve them on vintage-style glass dishes at parties. You can also sandwich two mints between small edible flowers for a whimsical and elegant look that’s sure to impress your guests.
Make Ahead and Storage
Storing Leftovers
Keep your Old-Fashioned Butter Mints Recipe fresh by storing them in an airtight container at room temperature. They will stay soft and flavorful for up to two weeks. Avoid humid places to maintain their perfect texture.
Freezing
If you want to make them in advance, these mints freeze wonderfully. Place them in a single layer on a baking sheet before transferring to a freezer-safe container. They’ll last up to three months. Thaw them at room temperature before serving for best results.
Reheating
Because butter mints don’t require cooking, there’s no reheating involved. If they’ve chilled too long and feel too firm, simply let them sit at room temperature for 10 to 15 minutes to soften back up to that delightful, melt-in-your-mouth consistency.
FAQs
Can I use salted butter instead of unsalted butter?
It’s best to use unsalted butter for this recipe to control the saltiness precisely. If you use salted butter, reduce or skip the added pinch of salt to prevent the mints from becoming too salty.
Is there a substitute for heavy cream?
You can substitute heavy cream with whole milk or half-and-half, but it may affect the texture slightly. The mints might be less creamy and hold together differently, so heavy cream is recommended for the best results.
How long do these butter mints last?
Stored properly in an airtight container, your Old-Fashioned Butter Mints Recipe will stay fresh for up to two weeks at room temperature. Keep them away from heat and humidity to maintain their softness and flavor.
Can I use a different flavor extract?
Absolutely! While peppermint extract is traditional, you can experiment with vanilla, almond, or even lemon extracts to create unique flavor twists. Just remember to adjust the amount to avoid overpowering the mints.
Why are my butter mints too dry or too sticky?
If your mints feel dry, try adding a bit more heavy cream, one teaspoon at a time. If they’re sticky, add a little more powdered sugar to balance the moisture until you get that perfect dough-like consistency.
Final Thoughts
There is something truly special about making and sharing this Old-Fashioned Butter Mints Recipe. It’s simple, nostalgic, and incredibly satisfying. Whether for holidays, parties, or a sweet treat to brighten your day, I encourage you to try making these little treasures. I promise they’ll become a beloved classic in your recipe collection and a delightful way to add a touch of old-fashioned sweetness to any moment.
Print
Old-Fashioned Butter Mints Recipe
- Prep Time: 20 minutes
- Cook Time: 0 minutes
- Total Time: 20 minutes plus 4-6 hours drying time
- Yield: 40 mints
- Category: Candy
- Method: No-Cook
- Cuisine: American
- Diet: Gluten Free, Vegetarian
Description
Classic Old-Fashioned Butter Mints are a sweet, creamy, and minty homemade candy that dissolve delightfully in your mouth. Made with simple ingredients like butter, powdered sugar, heavy cream, and peppermint extract, these mints are perfect for holiday gifts, party favors, or a nostalgic treat anytime.
Ingredients
Butter Mint Candy Ingredients
- ½ cup unsalted butter, softened
- 4 cups powdered sugar
- 2 tbsp heavy cream
- ½ tsp peppermint extract
- Pinch of salt
- Food coloring (optional)
Instructions
- Prepare the Butter: Start by softening the unsalted butter to room temperature so it mixes easily. This step ensures a smooth, creamy texture for your mints.
- Cream the Butter and Salt: Using a mixing bowl, beat the softened butter with a pinch of salt until it becomes light and fluffy, incorporating air to create a smooth base.
- Add Heavy Cream and Peppermint: Gradually mix in the heavy cream and peppermint extract into the butter mixture. This infuses the candy with a creamy texture and classic mint flavor.
- Incorporate Powdered Sugar: Slowly sift and add the powdered sugar in batches, blending well after each addition to form a pliable dough-like consistency suitable for shaping.
- Color the Mixture (Optional): If desired, divide the mixture and add food coloring to create festive colored mints. Knead the color evenly through the dough.
- Shape the Mints: Pinch off small pieces of the dough and roll them into tiny balls or shape them into your preferred mint shapes using your hands or molds.
- Dry the Mints: Place the shaped mints on a parchment-lined baking sheet and allow them to air dry at room temperature for about 4-6 hours or until firm enough to handle without sticking.
- Store Properly: Once firm, store the butter mints in an airtight container at room temperature. They will keep well for up to two weeks.
Notes
- For best results, ensure the butter is properly softened but not melted before mixing.
- If the mixture feels too sticky, add a little more powdered sugar gradually until manageable.
- Use high-quality peppermint extract for the best flavor.
- These mints are naturally gluten-free and vegetarian.
- Allow adequate drying time so mints hold shape and don’t stick together.


