
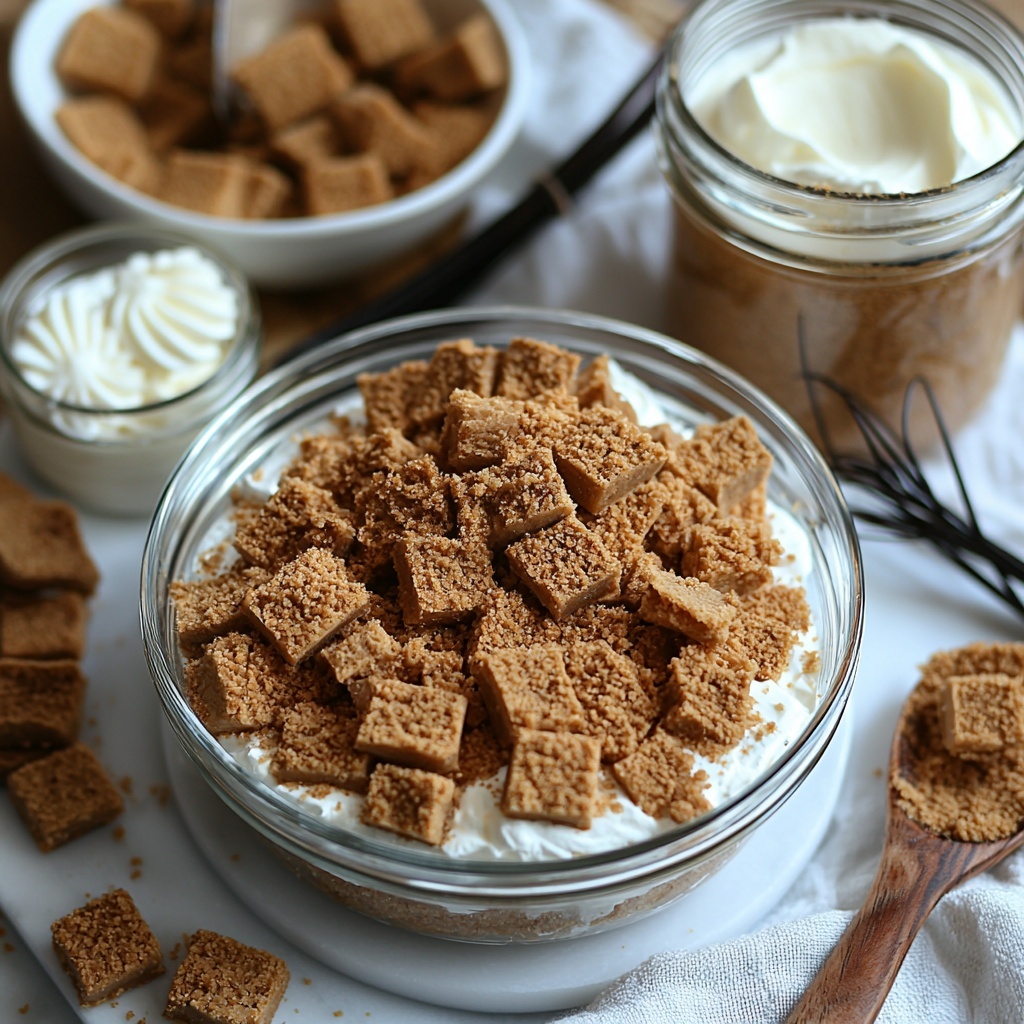
If you have a sweet tooth and a love for all things Biscoff, you are in for an absolute treat with this No-Bake Mini Biscoff Cheesecakes Recipe. These delightful little cheesecakes combine the irresistibly spiced crunch of Biscoff cookie crumbs with creamy, luscious layers of Biscoff spread and cream cheese. They’re perfectly sized for a bite of pure joy, no oven required, and every bite delivers that wonderfully unique caramelized flavor that only Biscoff can bring. Whether you’re whipping these up for a gathering or just because, this recipe is sure to become a fast favorite in your dessert rotation.
Ingredients You’ll Need
Gathering the right ingredients is so important for these No-Bake Mini Biscoff Cheesecakes Recipe. Each component plays a crucial role, from building the perfect buttery crust to infusing the filling with a creamy, smooth texture and that unmistakable Biscoff flavor.
- Biscoff cookie crumbs (1.5 cups): The heart of the crust, adding crisp texture and that signature spiced caramel taste.
- Unsalted butter (5 tablespoons): Melted to bind the crumbs into a firm, golden crust that holds everything together beautifully.
- Cream cheese (16 oz): Creates a rich, velvety filling that’s the foundation of cheesecake dreams.
- Biscoff spread (1 cup + 0.5 cup): Adding deep, luscious flavor both inside the filling and as a decadent topping.
- Powdered sugar (0.5 cup): Sweetens up the filling to balance the spice notes from the cookies and spread.
- Vanilla extract (1 teaspoon): Enhances and rounds out the flavors with a subtle floral hint.
- Heavy cream (1 cup): Whipped to stiff peaks to lighten the cheesecake filling for a fluffy, airy texture.
- Whipped cream (1 cup): For a gorgeous, creamy topping that keeps things light and inviting.
- Biscoff cookies (6): Crumbled on top to add crunch and extra visual appeal.
How to Make No-Bake Mini Biscoff Cheesecakes Recipe
Step 1: Prepare the Crust
Start by crushing the Biscoff cookies into fine crumbs until you have about 1.5 cups. Mixing these with 5 tablespoons of melted unsalted butter creates a buttery, spiced base. Press this mixture into muffin tin liners, making sure the bottoms are evenly covered. Chilling the crust in the freezer for 10 minutes helps it set nicely, giving your mini cheesecakes a firm foundation to build upon.
Step 2: Whip the Heavy Cream
Whip 1 cup of heavy cream until stiff peaks form, which usually takes around 3 to 4 minutes. This step is key to achieving that light and airy texture that balances the dense cream cheese filling. Set the whipped cream aside so you can gently fold it in later without losing that fluffiness.
Step 3: Make the Cheesecake Filling
In a large mixing bowl, beat together the softened cream cheese, 1 cup of Biscoff spread, powdered sugar, and vanilla extract until the mixture is perfectly smooth and creamy. The combination of these ingredients creates that signature rich, spiced cheesecake flavor. Then, gently fold in the whipped heavy cream to keep the filling light and luscious.
Step 4: Assemble and Chill
Spoon the dreamy Biscoff cheesecake filling over the chilled crusts in your muffin tin. Take your time to fill each liner generously for that decadent bite. Cover and refrigerate the mini cheesecakes for at least 6 hours so they can set properly and develop that perfect creamy texture we all crave.
Step 5: Add the Finishing Touches
Once chilled, melt an additional 0.5 cup of Biscoff spread and drizzle it over each cheesecake like liquid gold. Top with a dollop of whipped cream and sprinkle with crumbled Biscoff cookies for irresistible texture and presentation. This step is where your mini cheesecakes transform from delicious to downright show-stopping.
How to Serve No-Bake Mini Biscoff Cheesecakes Recipe
Garnishes
When it comes to garnishing, simplicity is magic. A swirl of whipped cream and a sprinkle of crumbled Biscoff cookies enhance both flavor and look, creating a delightful mix of creamy, crunchy, and sweet sensations that make every bite memorable. For extra flair, a small dusting of cinnamon or a drizzle of caramel sauce can add a touch of visual and taste magic.
Side Dishes
These mini cheesecakes stand wonderfully on their own, but pairing them with fresh fruit like sliced strawberries or a handful of raspberries brightens the plate and adds a juicy burst that complements the rich Biscoff filling perfectly. A cup of rich coffee or chai tea also makes a splendid accompaniment, soaking up the warm, spiced flavors with every sip.
Creative Ways to Present
For a festive table, place your mini cheesecakes on a tiered serving tray, garnishing each tier with edible flowers or a sprinkle of crushed nuts. You can also serve them in clear mini jars to show off their layers, making them as beautiful as they are delicious. Another fun idea is to skewer a mini cheesecake alongside fresh fruit for an interactive dessert pop that’s sure to impress guests.
Make Ahead and Storage
Storing Leftovers
Leftover No-Bake Mini Biscoff Cheesecakes keep beautifully in the fridge for up to 3 days when covered tightly with plastic wrap or stored in an airtight container. This makes them fantastic for prepping ahead or enjoying in smaller doses later without sacrificing any flavor or texture.
Freezing
You can freeze these cheesecakes for up to one month. Just make sure to place them on a baking sheet first until frozen solid, then transfer to an airtight container or freezer bag. Thaw in the fridge overnight before serving to maintain their creamy, smooth consistency without any unwanted ice crystals.
Reheating
Since these treats are no-bake and best served cold, reheating is not recommended. If you want to bring out the flavors or soften the texture slightly, simply let them sit at room temperature for 10 to 15 minutes before indulging. This keeps their delightful creaminess intact while making them easier to enjoy.
FAQs
Can I use another cookie for the crust instead of Biscoff cookies?
Absolutely! While Biscoff cookies give a unique caramelized spice flavor, graham crackers or gingersnap cookies work well too. Just choose a cookie that complements the creamy filling without overpowering it.
How long do the No-Bake Mini Biscoff Cheesecakes need to chill?
They need at least 6 hours in the refrigerator to set properly. Overnight chilling actually works best to achieve that perfectly firm yet creamy texture.
Can I make these cheesecakes vegan or dairy-free?
Yes, with some swaps! Use dairy-free cream cheese, coconut cream whipped to stiff peaks, and vegan butter. Keep in mind flavors and textures might differ slightly, but they’ll still be delicious.
Is it possible to make larger cheesecakes instead of minis?
Definitely! Just increase the filling and crust proportionally and use a larger springform pan. Adjust chilling time to ensure it sets well—usually longer than with minis.
How do I prevent cracks in the cheesecake filling?
Since these are no-bake, cracks are uncommon, but to keep the filling smooth, make sure to beat the cream cheese mixture well and fold in whipped cream gently. Avoid overheating the spread when melting for topping, too.
Final Thoughts
There is something truly special about a dessert that feels both effortless and lavish, and this No-Bake Mini Biscoff Cheesecakes Recipe fits that description perfectly. With its rich flavors, smooth textures, and beautiful presentation, it’s a guaranteed crowd-pleaser and a heartfelt gift to anyone who tries it. So next time you want to wow someone or treat yourself, give this recipe a go — you really can’t go wrong with these delightful, fuss-free cheesecakes!
Print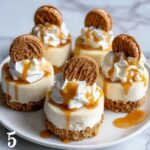
Delicious Recipe
- Prep Time: 30 minutes
- Cook Time: N/A
- Total Time: 6 hours 30 minutes
- Yield: 12 mini cheesecakes
- Category: Dessert
- Method: No-Cook
- Cuisine: American
Description
These No-Bake Mini Biscoff Cheesecakes are a delightful treat featuring a crunchy Biscoff cookie crust topped with a creamy, smooth Biscoff-flavored cheesecake filling. Perfectly portioned in a muffin tin, these cheesecakes require no baking, making them an easy and elegant dessert for any occasion.
Ingredients
Crust
- 1.5 cups Biscoff cookie crumbs
- 5 tbsp unsalted butter, melted
Cheesecake Filling
- 16 oz cream cheese, softened
- 1 cup Biscoff spread
- 0.5 cup powdered sugar
- 1 tsp vanilla extract
- 1 cup heavy cream
Topping
- 0.5 cup Biscoff spread, melted
- 1 cup whipped cream
- 6 Biscoff cookies, crumbled
Instructions
- Prepare the crust: Crush Biscoff cookies to make 1.5 cups of crumbs. In a medium bowl, mix the crumbs with 5 tablespoons of melted butter until fully combined. Line a muffin tin with paper liners and evenly press the crumb mixture into the bottoms. Place the muffin tin in the freezer for about 10 minutes to set and harden the crust.
- Whip the cream: In a separate bowl, whip 1 cup of heavy cream until stiff peaks form, approximately 3 to 4 minutes. Set aside for folding into the cheesecake mixture.
- Make cheesecake filling: In a large mixing bowl, beat together 16 oz softened cream cheese, 1 cup Biscoff spread, 0.5 cup powdered sugar, and 1 teaspoon vanilla extract until smooth and creamy. Gently fold in the whipped heavy cream to maintain a light texture.
- Assemble cheesecakes: Spoon the prepared cheesecake filling evenly over each chilled crust in the muffin tin. Cover and refrigerate for at least 6 hours to allow the filling to set properly.
- Add toppings and serve: Melt an additional 0.5 cup of Biscoff spread and drizzle it over each mini cheesecake. Top with a dollop of whipped cream and sprinkle crumbled Biscoff cookies for garnish before serving.
Notes
- Ensure the cream cheese is softened to room temperature for easy mixing and a smooth filling.
- Use cold heavy cream to achieve better whipping results.
- Chilling time is crucial for the cheesecakes to set properly, so do not rush this step.
- These cheesecakes can be stored in the refrigerator for up to 3 days, best enjoyed within that time.
- For easier removal from muffin liners, gently peel the liners away or serve directly in them.

