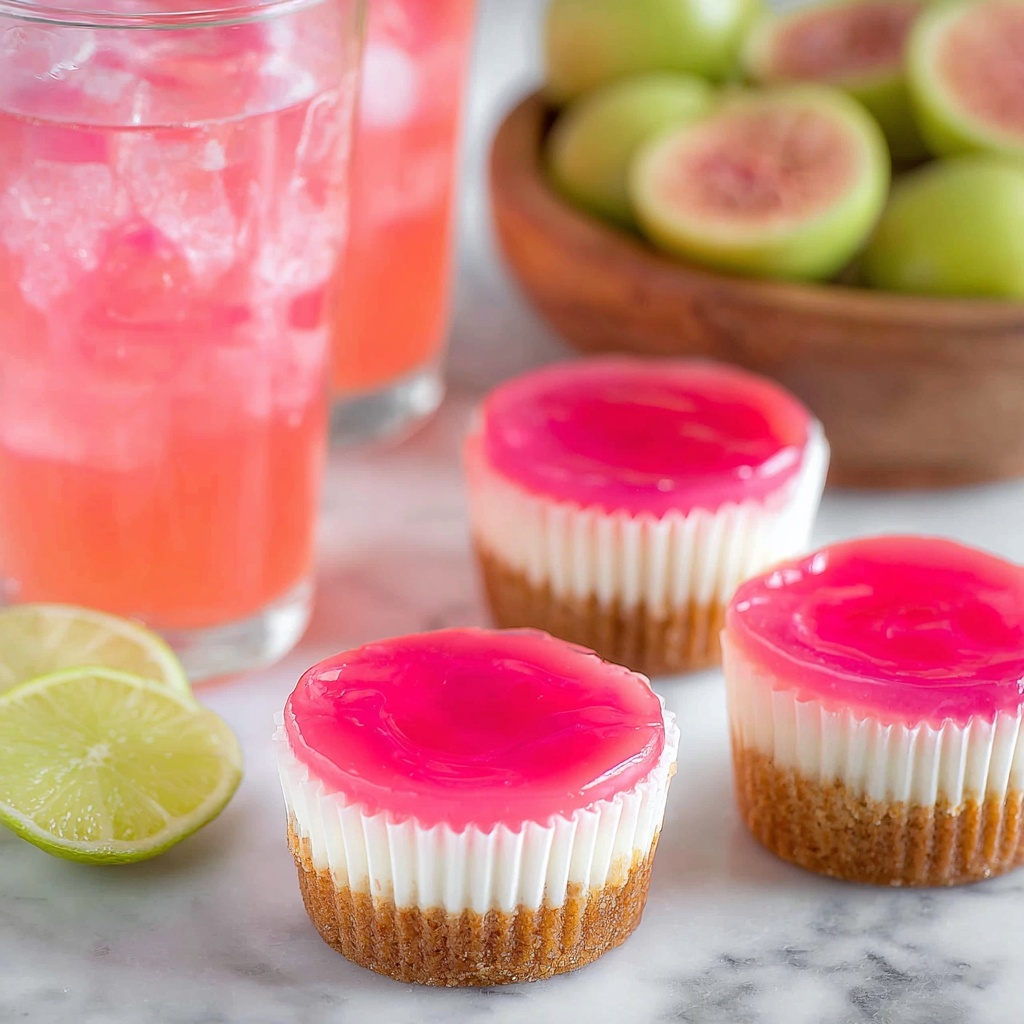
If you’re looking for a delightful treat that bursts with tropical flavors and brings a slice of island paradise right into your kitchen, this Hawaiian Mini Guava Cakes Recipe is exactly what you need. These moist, fluffy cakes are infused with the sweet and tangy essence of guava, enhanced by subtle coconut undertones and topped with a luscious cream cheese layer that perfectly balances every bite. Whether you’re hosting a party or craving a personal indulgence, these mini cakes deliver a taste of Hawaii’s vibrant spirit in every mouthful.

Ingredients You’ll Need
Gathering the right ingredients is key to achieving the true tropical magic of this Hawaiian Mini Guava Cakes Recipe. Each component plays a crucial role, from the moist cake base to the glossy guava glaze that crowns each mini cake, creating a harmony of flavors and textures.
- Strawberry cake mix: Acts as the flavorful base with a hint of berry that complements the guava perfectly.
- Guava nectar or guava juice (1 1/3 cups + 2 cups): The star ingredient that infuses the cake and the glaze with that unique tropical sweetness.
- Eggs (3, room temperature): Provide structure and richness, ensuring the cake is light and tender.
- Coconut oil (1/3 cup, liquid, room temperature): Adds a subtle tropical richness and enhances moistness.
- Sugar (1/2 cup + 1/4 cup): Sprinkles sweetness into the guava glaze and cream cheese frosting.
- Cornstarch (1/4 cup): Thickens the guava glaze to a perfect consistency.
- Water (3 tablespoons): Used to make the cornstarch slurry for the glaze.
- Cream cheese (6 ounces, softened): Brings creamy tanginess to the topping.
- Vanilla extract (1 teaspoon): Adds warm depth to the cream cheese frosting.
- Cool Whip (6 ounces, thawed): Lightens the cream cheese layer for a fluffy finish.
How to Make Hawaiian Mini Guava Cakes Recipe
Step 1: Prep Your Oven and Cake Pans
Start by preheating your oven to 350°F. Then, line either jumbo or regular-sized cupcake pans with cupcake liners. This simple prep step sets the stage for perfectly baked, easy-to-handle mini cakes that will cool evenly and be super easy to remove after baking.
Step 2: Mix the Cake Batter
Combine the strawberry cake mix, 1 1/3 cups guava nectar or juice, eggs, and coconut oil in your mixer. Begin mixing on low speed for 30 seconds, then scrape down the sides of the bowl to ensure everything is incorporated. Increase the speed to medium and mix for 2 minutes until the batter is smooth and luscious—this is your tropical base ready to shine.
Step 3: Bake the Mini Cakes
Evenly distribute the batter into the cupcake liners, filling each one to about one-third full—no more, to allow space for rising without overflow. Bake for 19 to 22 minutes, or until the tops turn a lovely light golden and a toothpick inserted in the center comes out clean. Once baked, transfer the cakes to a wire rack to cool completely before moving to the next steps.
Step 4: Prepare the Guava Glaze
Pour 2 cups of guava nectar or juice and the 1/2 cup sugar into a medium saucepan. Bring this mixture to a boil over medium heat, stirring occasionally. Meanwhile, combine cornstarch and water in a small bowl to create a smooth slurry. Once boiling, remove the guava mixture from the heat and whisk in the slurry, then return the pan to medium heat and bring it back to a boil. Let it boil for one full minute, thickening into a glossy, vibrant glaze. Cool this mixture in the fridge until you’re ready to use it.
Step 5: Whip Up the Cream Cheese Frosting
Using your mixer, beat the softened cream cheese until fluffy and smooth. Then add in 1/4 cup sugar and 1 teaspoon vanilla extract, mixing until combined. Gently fold in the thawed Cool Whip to lighten the texture, creating a creamy, dreamy frosting that balances tartness and sweetness perfectly. Keep this refrigerated until it’s time to frost the cooled cakes.
Step 6: Frost and Chill the Cakes
Once your mini cakes are fully cooled, spread a generous layer of the cream cheese mixture over each one. This step is crucial as it seals in moisture and provides that rich, creamy texture that elevates these guava cakes to a heavenly level. Pop the frosted cakes into the refrigerator to let the cream cheese layer set solidly before the final touch.
Step 7: Glaze and Finish
Finally, glaze the tops of your mini cakes with the chilled guava gel. This shiny, fruity finish not only adds beautiful color but also seals in freshness and delivers an extra burst of guava sweetness in every bite. Keep the cakes refrigerated until you’re ready to serve your tropical treat.
How to Serve Hawaiian Mini Guava Cakes Recipe
Garnishes
For an extra pop of color and textural contrast, try adding fresh guava slices or a sprinkle of toasted coconut flakes on top of these mini cakes. A few edible flowers or a mint leaf can make your presentation feel like a tropical escape. These small additions enhance the look and invite guests to dive right in with both eyes and taste buds.
Side Dishes
These mini cakes pair wonderfully with light, refreshing sides such as tropical fruit salads or pineapple sorbet. Pairing with something crisp and cool complements the richness of the cream cheese and the juicy sweetness of the guava, creating a balanced and memorable dessert experience.
Creative Ways to Present
Consider serving these mini guava cakes on a bright, tropical-themed platter or individual palm leaf plates for a festive touch. For a casual party, line them up on a tiered dessert stand to create an irresistible centerpiece. You could even add toothpick flags or small paper umbrellas to each mini cake for that perfect island-vibe flair!
Make Ahead and Storage
Storing Leftovers
These cakes keep beautifully in the refrigerator for up to 3 days. Store them in an airtight container to maintain moisture and keep the cream cheese frosting fresh and creamy. This makes them a fantastic make-ahead dessert for parties or weeknight treats.
Freezing
If you want to enjoy these cakes later, freezing is an option. Freeze the mini cakes without frosting or glaze first, wrapped tightly in plastic wrap and placed in a freezer-safe bag. Once you’re ready to eat them, thaw in the fridge and apply the cream cheese frosting and guava glaze fresh for best results.
Reheating
Since these are moist, delicate cakes with a cream topping, reheating is not recommended. Instead, serve them chilled or at room temperature to preserve their texture and flavor. If you prefer your cakes slightly less cold, let them sit out for 10 minutes before serving.
FAQs
Can I use fresh guava instead of guava nectar or juice?
Fresh guava can be quite fibrous and may not yield the same smooth texture in the cake batter or glaze. For this Hawaiian Mini Guava Cakes Recipe, using guava nectar or juice ensures the right flavor intensity and consistency.
Do I have to use coconut oil, or can I substitute with butter?
Coconut oil adds a subtle tropical flavor and keeps the cake moist. Butter can be used as a substitute, but it will slightly change the flavor profile away from the traditional island vibe.
Can I make these cakes into a larger cake instead of minis?
Absolutely! You can bake the batter in a standard round or square cake pan, adjusting the baking time accordingly. Just keep an eye on the cake and test for doneness as it bakes.
Is it possible to make the cream cheese frosting ahead of time?
Yes, the cream cheese frosting can be prepared a day in advance and stored in the refrigerator. Just give it a gentle stir before spreading if it thickens up.
How long do these mini cakes last at room temperature?
Because of the cream cheese frosting, it’s best to keep these cakes refrigerated. They should not be left at room temperature for more than 2 hours to maintain freshness and food safety.
Final Thoughts
This Hawaiian Mini Guava Cakes Recipe is truly a showstopper with its perfect balance of tropical sweetness, creamy frosting, and soft, moist crumb. It’s a joyful way to bring sunshine into your kitchen no matter the season. I encourage you to try this recipe and share it with your loved ones — it’s a delicious slice of paradise you won’t want to miss!
Print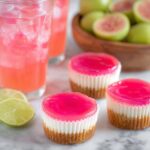
Hawaiian Mini Guava Cakes Recipe
- Prep Time: 30 minutes
- Cook Time: 20 minutes
- Total Time: 50 minutes
- Yield: 24 cupcakes
- Category: Dessert
- Method: Baking
- Cuisine: Hawaiian
Description
These Hawaiian Mini Guava Cakes are delightful bite-sized treats featuring a moist strawberry cake infused with tropical guava nectar. Topped with a creamy guava-flavored cream cheese frosting and a glossy guava glaze, these cupcakes offer a perfect balance of fruity sweetness and creamy texture, ideal for festive occasions or everyday indulgence.
Ingredients
Cake Batter
- 1 box strawberry cake mix
- 1 1/3 cups guava nectar or guava juice
- 3 eggs, room temperature
- 1/3 cup coconut oil, room temperature (liquid)
Guava Gel
- 2 cups guava nectar or guava juice
- 1/2 cup sugar
- 1/4 cup cornstarch
- 3 tablespoons water
Cream Cheese Frosting
- 6 ounces cream cheese, softened
- 1/4 cup sugar
- 1 teaspoon vanilla extract
- 6 ounces Cool Whip, thawed
Instructions
- Preheat and Prepare: Preheat your oven to 350°F (175°C). Line a jumbo or regular cupcake pan with cupcake liners to prevent sticking and ease cleanup.
- Mix Batter: In a mixer bowl, combine the strawberry cake mix, 1 1/3 cups of guava nectar, eggs, and coconut oil. Mix on low speed for 30 seconds, scrape down the bowl, then continue mixing on medium for 2 minutes until the batter is smooth and well blended.
- Fill and Bake: Evenly divide the batter into the cupcake liners, filling each about one-third full to avoid overflow. Bake the cupcakes for 19-22 minutes, or until they turn light golden and a toothpick inserted comes out clean. After baking, transfer them to a wire rack to cool completely.
- Prepare Guava Gel: In a medium saucepan over medium heat, combine 2 cups guava nectar and 1/2 cup sugar and bring to a boil. Meanwhile, make a slurry by mixing the cornstarch with water. Remove the guava mixture from heat and whisk in the cornstarch slurry. Return the pan to heat, bring to a boil again, and let it cook for 1 minute to thicken. Place in the refrigerator to cool.
- Make Cream Cheese Frosting: Using a mixer, beat the softened cream cheese until fluffy. Add 1/4 cup sugar and 1 teaspoon vanilla extract, mixing thoroughly. Gently fold in the thawed Cool Whip to maintain the light texture. Refrigerate the frosting until you’re ready to use it.
- Frost Cakes: Once the cupcakes are cooled, spread the cream cheese frosting evenly over each cake. Refrigerate to allow the frosting to set firmly.
- Glaze with Guava Gel: Top each cupcake with the chilled guava gel glaze for a shiny, flavorful finish. Keep refrigerated until serving to maintain freshness and texture.
Notes
- Room temperature ingredients help create a smoother batter and better texture.
- Filling cupcake liners only one-third full helps prevent batter overflow during baking.
- Chill the guava gel thoroughly to ensure it sets properly and provides a glossy finish.
- Use a wire rack for cooling cupcakes to prevent soggy bottoms.
- Refrigerate frosted cupcakes to keep the cream cheese frosting stable and fresh.

