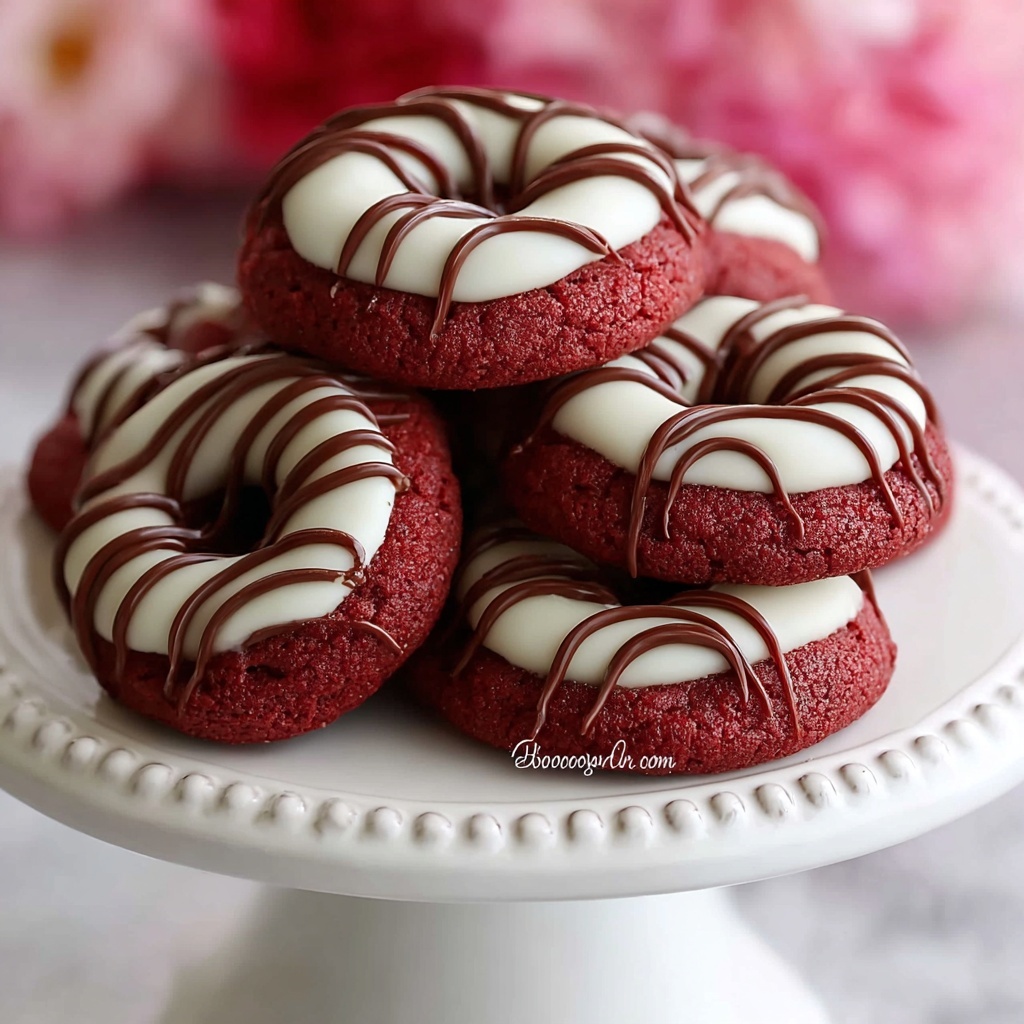
If you are searching for a whimsical and delightful treat to surprise your loved one this February, look no further than this Easy No-Bake Non-alcoholic Valentine’s Day Oreo Pops Recipe. This fun, colorful, and utterly tasty dessert combines the classic crunch and creaminess of Oreos with vibrant candy coatings and playful sprinkles, all mounted on lovable lollipop sticks. The magic here lies in its simplicity—no oven needed, just a handful of ingredients and a little creative flair to make a charming gift or party favor. It’s a guaranteed heart-stealer and an absolute joy to assemble with friends or family.
Ingredients You’ll Need
The beauty of this Easy No-Bake Non-alcoholic Valentine’s Day Oreo Pops Recipe is how straightforward yet vibrant the ingredient list is. Each item plays a vital role—from the irresistible cream-filled cookies to those eye-catching candy melts and sprinkles that make every bite a celebration of love and sweetness.
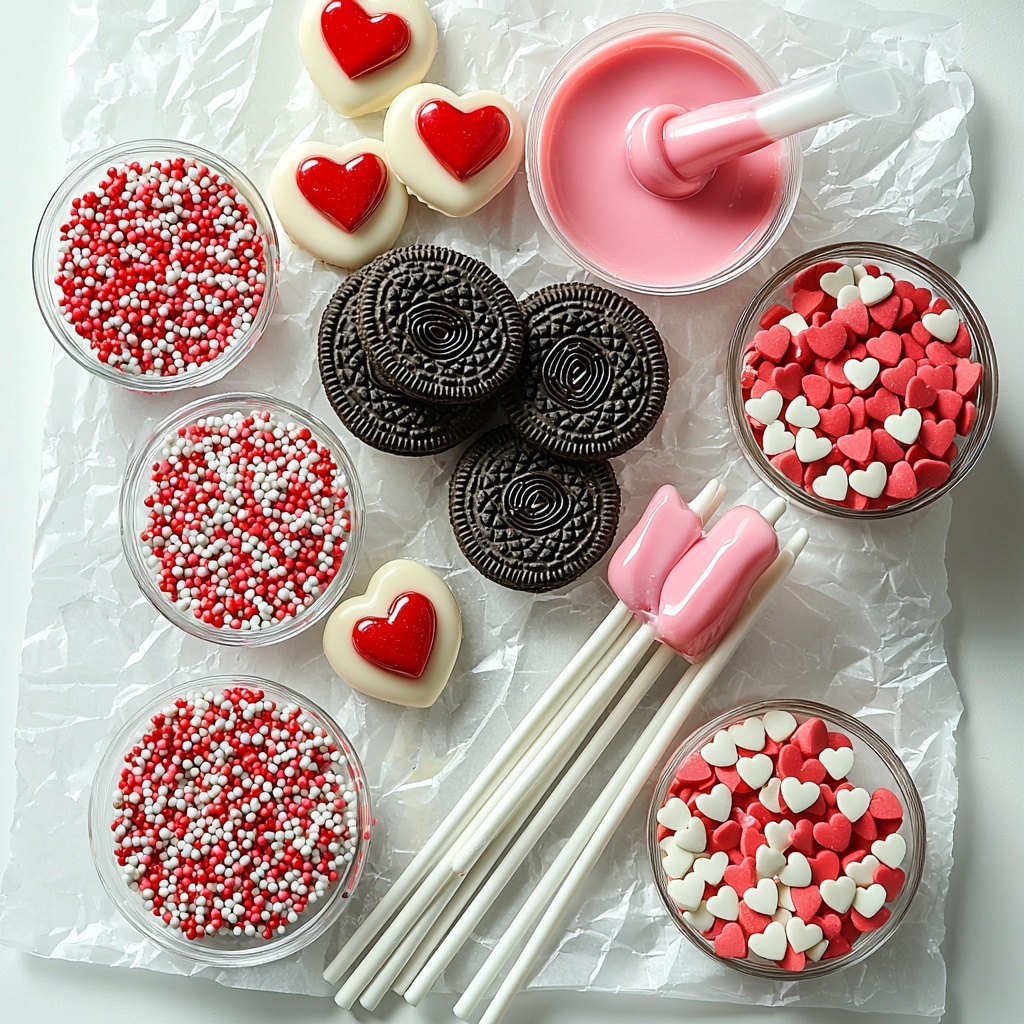
- Oreo Cookies (about 20-24 cookies): These iconic cookies provide the perfect balance of chocolate crunch and creamy filling to create that beloved Oreo flavor.
- 4-inch Lollipop Sticks: These sticks make the pops easy to hold and give them a playful, whimsical presentation perfect for Valentine’s Day.
- Candy Melts (red, bright pink, and bright white): These melts add a smooth, colorful coating, creating the classic Valentine’s palette that transforms the pops into edible gifts.
- Sprinkles (jumbo hearts, mini hearts, and sugar pearls): Sprinkles bring texture, sparkle, and extra love-themed flair to your pops.
- 3 Microwave-Safe Cups: These are essential for melting the candy melts safely and evenly.
- Disposable Candy Piping Bag (optional): A handy tool for adding professional-looking decorative drizzles of candy melts.
- Parchment Paper: This ensures your Oreo pops don’t stick while setting, making cleanup quick and easy.
How to Make Easy No-Bake Non-alcoholic Valentine’s Day Oreo Pops Recipe
Step 1: Preparing the Oreo Cookies
Start by lining a flat surface or baking sheet with parchment paper to prevent sticking later on. Then, gently twist apart each Oreo cookie, trying to keep the creamy filling intact on one half. Carefully scrape off the creme filling from the other half to make space for the lollipop stick. This step sets the base for your pops, so take your time for a neat finish.
Step 2: Securing the Lollipop Sticks
Insert the pointed end of a lollipop stick about halfway into the cream filling on one half of the cookie. Then firmly press the other half back onto it, sandwiching the cream and the stick inside. This ensures your Oreos stay together and transform beautifully into handheld pops.
Step 3: Melting Your Candy Coatings
Pour the red, bright pink, and white candy melts into separate microwave-safe cups. Microwave each in 30-second increments, stirring frequently until the melts are smooth and glossy. Be careful not to overheat; you want silky textures that will coat the Oreos evenly without clumping or burning.
Step 4: Dipping the Oreo Pops
Dip each Oreo pop into one of the melted candy colors, fully covering it with candy coating. Hold it over the cup for a moment to let any excess drip off, then carefully set the coated pop on your parchment-lined baking sheet. This step is where those classic Valentine’s colors come vibrantly to life.
Step 5: Adding the Sprinkles
While the candy coating is still wet and tacky, sprinkle generously with your choice of jumbo hearts, mini hearts, and sugar pearls. The sprinkles not only add delightful crunch and texture but also elevate the pop’s festive Valentine’s Day appearance.
Step 6: Creating Decorative Drizzles
If you want to add an extra pop of flair, fill a piping bag with a contrasting color of melted candy melts and snip a tiny corner off. Lightly drizzle over the coated pops in elegant lines. If you don’t have a piping bag, a small spoon works perfectly too. This finishing touch makes your Oreo pops feel professionally crafted and irresistibly charming.
Step 7: Setting the Pops Firmly
Allow your Oreo pops to set completely by leaving them at room temperature or refrigerating for about 10-15 minutes until the candy coating hardens. This ensures a clean bite and keeps your pops looking glossy and perfect for gifting or sharing.
How to Serve Easy No-Bake Non-alcoholic Valentine’s Day Oreo Pops Recipe
Garnishes
Once set, you can elevate these Oreo pops with additional garnishes like edible glitter or finely chopped freeze-dried strawberries for a burst of flavor and sparkle. Layering textures with different sprinkles or edible confetti makes every bite feel playful and special.
Side Dishes
Pair these colorful pops with simple sides such as a fresh berry bowl or a light pink strawberry milkshake to complement the chocolate richness with fruity brightness. They are perfect for Valentine’s brunches or dessert tables where a sweet, playful contrast is welcomed.
Creative Ways to Present
Present your pops standing up in a decorative foam block covered with tissue paper or nestled in a cute Valentine’s Day mug filled with candy. Wrapping each in clear cellophane tied with a red ribbon adds an extra personal touch that turns these treats into charming gifts or party favors everyone will treasure.
Make Ahead and Storage
Storing Leftovers
If you have leftover Oreo pops, store them in an airtight container at room temperature or in the refrigerator for up to 3 days. Ensure the storage space is cool and dry to prevent the candy coating from becoming sticky or melting.
Freezing
You can freeze the pops by wrapping each one individually in plastic wrap and placing them in a freezer-safe container. Frozen pops maintain their freshness for up to one month. When ready to enjoy, thaw them in the refrigerator to avoid condensation on the candy coating.
Reheating
Because these pops are no-bake and involve candy coating rather than baking, reheating isn’t necessary. If the coating softens, just place the pops in the refrigerator to firm back up before serving.
FAQs
Can I use different cookies instead of Oreos?
Absolutely! While Oreos are classic and delicious, feel free to experiment with sandwich cookies that you love. Just make sure they have a firm filling that can hold the stick and coating well.
What if I don’t have candy melts? Can I use chocolate instead?
Yes, melted chocolate chips or candy bars can substitute candy melts, but be mindful chocolate has a lower melting point and may be less colorful. White chocolate mixed with a dash of food coloring works well for vibrant hues.
How do I prevent the Oreo pops from breaking when inserting the stick?
Insert the stick gently into the cream filling halfway; avoid pushing too hard to prevent cracking the cookie. Twisting slightly as you insert can help ease the stick into place without damage.
Can I make these Oreo pops vegan or allergen-free?
There are vegan Oreo-style cookies and dairy-free candy melts available on many specialty store shelves, so with those substitutions, you can adapt this recipe to fit those needs.
How long do these Oreo pops stay fresh?
Typically, these pops are best eaten within 2-3 days for optimum freshness, taste, and texture. Storing in airtight containers helps keep them enjoyable for longer.
Final Thoughts
I hope this Easy No-Bake Non-alcoholic Valentine’s Day Oreo Pops Recipe inspires you to create a sweet, colorful treat that’s as fun to make as it is to eat. It’s perfect for impressing your Valentine, gifting to friends, or adding a playful vibe to any celebration. Dive in, get creative with those sprinkles and drizzle patterns, and enjoy every joyful bite of this utterly charming dessert.
Print
Easy No-Bake Non-alcoholic Valentine’s Day Oreo Pops Recipe
- Prep Time: 15 minutes
- Cook Time: 15 minutes
- Total Time: 30 minutes
- Yield: 24 Oreo Pops
- Category: Dessert
- Method: No-Cook
- Cuisine: American
Description
Celebrate Valentine’s Day with these easy, no-bake Oreo Pops that are beautifully coated in vibrant candy melts and decorated with festive sprinkles. Perfect for a fun and sweet treat, these pops are simple to make and require only a few ingredients, making them ideal for parties or gifts.
Ingredients
Oreo Pops
- 20–24 Oreo Cookies
- 24 4-inch Lollipop Sticks
Candy Coating and Decoration
- Candy Melts in red, bright pink, and bright white (enough to coat 24 pops)
- Sprinkles: jumbo hearts, mini hearts, and sugar pearls
- 3 Microwave-Safe Cups
- Disposable Candy Piping Bag (optional, for drizzle decorations)
- Parchment Paper
Instructions
- Prepare the Surface: Line a baking sheet or any flat surface with parchment paper to place the finished Oreo pops later. This will prevent sticking and make cleanup easier.
- Separate and Prepare Oreos: Gently twist apart each Oreo cookie so that the creme filling stays intact on one side. Use a spoon or knife to carefully scrape the creme filling off the other half of the cookie.
- Insert the Lollipop Sticks: Take one half of the Oreo with creme filling and insert a lollipop stick about halfway into the creme layer. Then, press the other cookie half firmly back onto the stick, re-sandwiching the creme filling.
- Melt the Candy Melts: Place the red, pink, and white candy melts separately in three microwave-safe cups. Microwave each in 30-second intervals, stirring well between intervals until the candy melts are smooth and fully melted. Be careful not to overheat to avoid burning.
- Coat the Oreo Pops: Dip each Oreo pop into the melted candy melt color of your choice. Ensure the pop is fully coated and allow any excess coating to drip off. Place the coated pops upright on the parchment-lined baking sheet.
- Add Sprinkles: While the candy coating is still wet, immediately decorate each pop with a combination of jumbo heart sprinkles, mini hearts, and sugar pearls for a festive look.
- Decorative Drizzle: For added decoration, fill a disposable piping bag with a contrasting color of melted candy melts, snip a tiny corner, and drizzle over the coated Oreo pops. If a piping bag is not available, use a spoon to drizzle the candy melts.
- Set the Pops: Allow the Oreo pops to set and harden at room temperature or place them in the refrigerator for 10-15 minutes until the coating is firm and dry.
Notes
- Be sure not to overheat candy melts to maintain smooth texture and avoid burning.
- You can use any color of candy melts and sprinkles to personalize the pops for different occasions.
- If you don’t have a piping bag, a small plastic sandwich bag with a corner snipped off works well for drizzle decorating.
- Store Oreo pops in an airtight container at room temperature or in the refrigerator to maintain freshness and coating texture.
- Handling Oreo cookies gently when separating will keep the creme intact for easier stick insertion.

