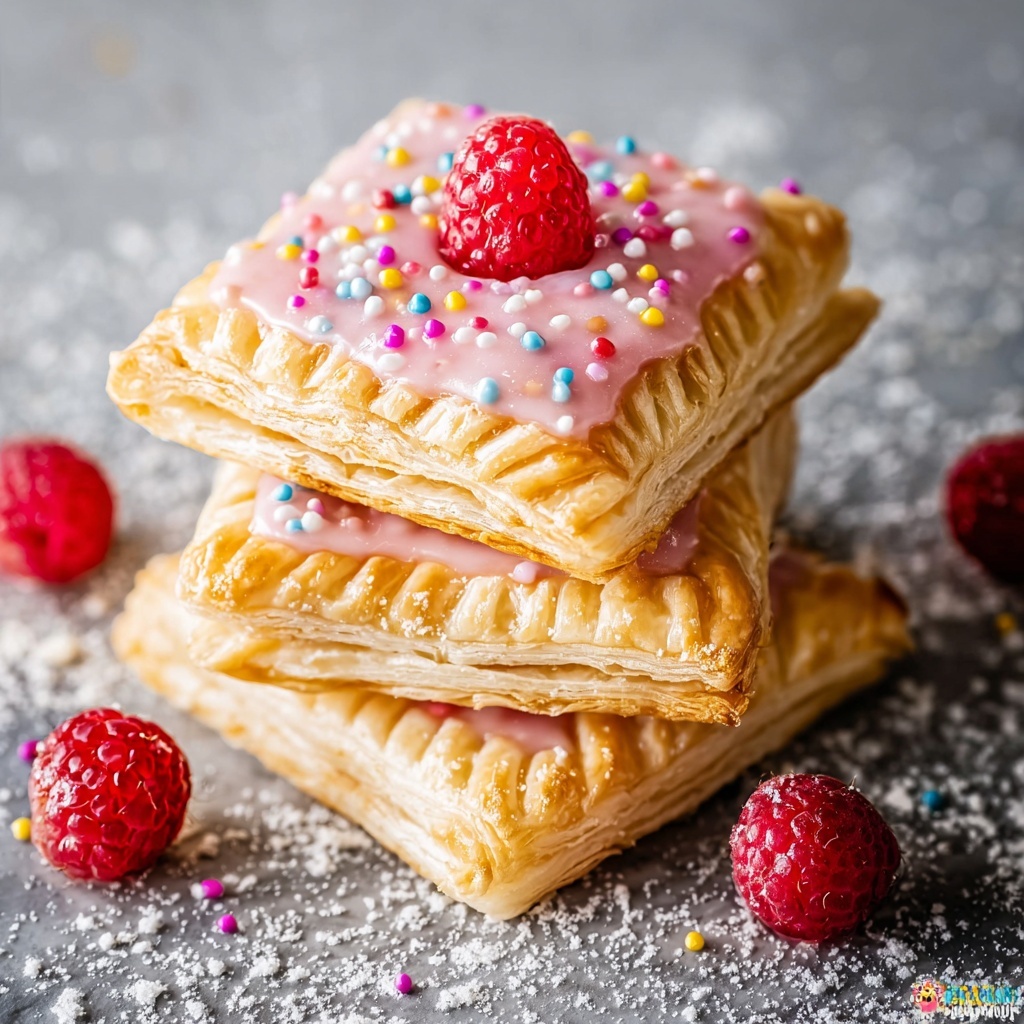
If you have a sweet tooth and a love for nostalgia, you are going to be head-over-heels for this Delicious Homemade Pop Tarts with Custom Fillings Recipe. These flaky, buttery pastries filled with your favorite jams or spreads bring back those childhood breakfast memories but elevated with a fresh touch of homemade love. Making pop tarts from scratch might sound ambitious, but trust me, it is incredibly rewarding and surprisingly simple. With each flaky bite, you’re treated to a tender crust that cradles luscious, vibrant fillings, and a sweet icing that adds the perfect finishing touch. Whether you want classic strawberry or a decadent Nutella surprise, this recipe lets you customize every tart to your heart’s desire.
Ingredients You’ll Need
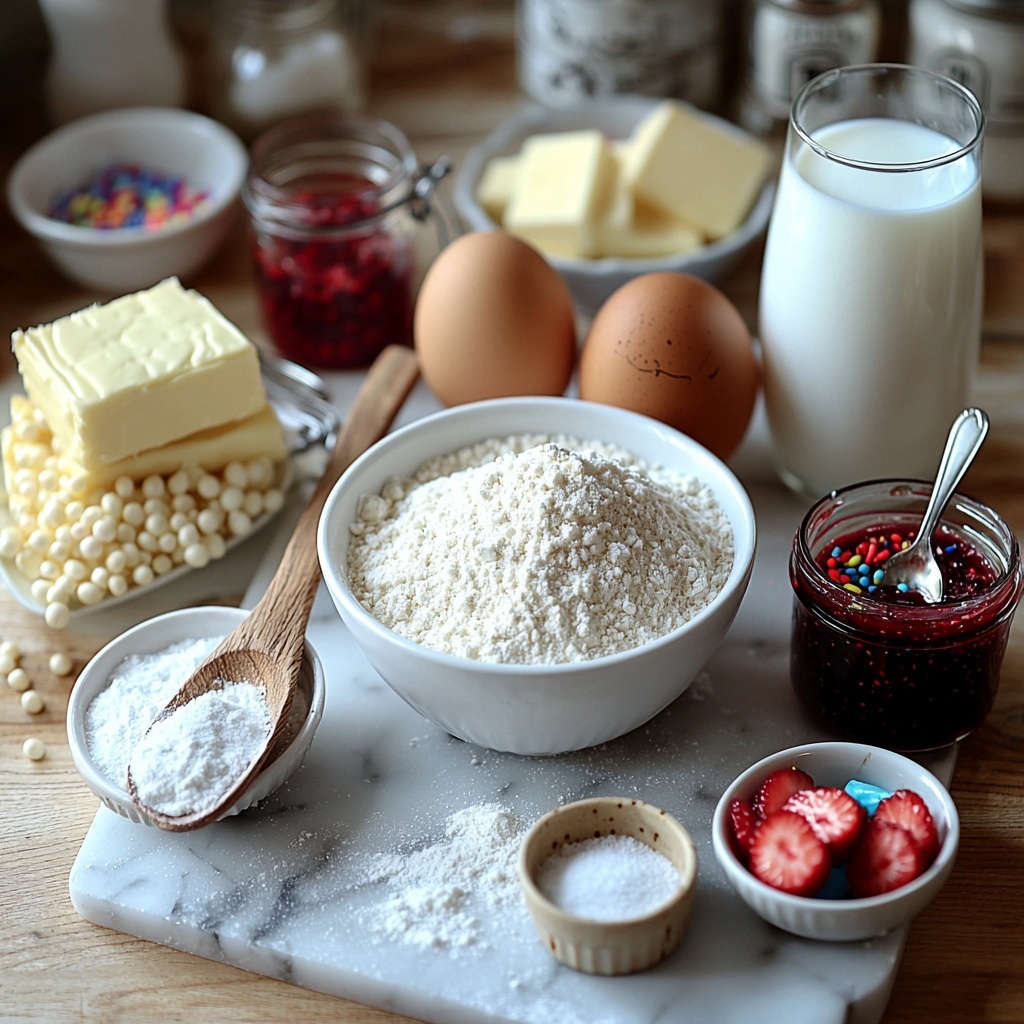
This recipe relies on simple pantry staples and a couple of fresh ingredients that create the perfect harmony of flaky pastry and sweet filling. Each element plays its role, from the rich butter that ensures a tender crust to the jam that delivers bursts of fruity goodness.
- 2 cups All-Purpose Flour: The foundation of the dough; for a gluten-free twist, swap with a gluten-free flour blend that bakes well.
- 1 tablespoon Granulated Sugar: Just enough sweetness in the dough; brown sugar works beautifully for a deeper, caramel-like flavor.
- 1 teaspoon Table Salt: Balances the sweetness and boosts the flavors of all ingredients.
- 2 large Eggs: One for the dough to bind, one for brushing to give that golden, shiny finish.
- 1 cup Unsalted Butter: Cut into chunks and kept cold for a flaky, tender crust.
- 3 tablespoons Ice Cold Water: Helps bring the dough together without warming it up.
- ½ cup Jam of Choice: Whether strawberry, raspberry, or rich Nutella, this is where you get to have fun customizing your filling.
- 1 cup Powdered Sugar: The base for the icing that adds sweetness and charm to your pop tarts.
- 2 teaspoons Whole Milk: Smooths the icing to perfection; almond milk is a great dairy-free alternative.
- Food Coloring (Optional): If you want to add a splash of color to your icing, this is your chance to get playful.
- Sprinkles (Optional): Adds texture and visual fun – think of it as the cherry on top!
How to Make Delicious Homemade Pop Tarts with Custom Fillings Recipe
Step 1: Mix the Dough Ingredients
Start by tossing the flour, sugar, and salt into your food processor. Crack in one egg and pulse it just until the mixture starts to come together. Then, add the cold, chunky butter and ice water. Pulse in short bursts until the dough forms but be careful not to overmix; you want small bits of butter to remain so the finished crust is delightfully flaky.
Step 2: Chill and Roll Out
Turn the dough onto a lightly floured surface and knead gently just to smooth it out, about a minute or two. Wrap it tightly in plastic wrap and pop it into the fridge for 30 minutes. Once chilled, roll the dough out into two large rectangles about a quarter inch thick. Use a knife or a pizza cutter to cut them into eight 3” by 4” rectangles—these will be your pop tart bases and tops.
Step 3: Assemble the Pop Tarts
Lay half of the rectangles on a parchment-lined baking sheet. Spoon about a tablespoon of your preferred jam or Nutella filling onto the center of each rectangle, spreading just slightly but leaving room to seal the edges. Cover with the remaining rectangles and press the edges firmly together with a fork. Don’t forget to gently poke a few holes in the tops so steam can escape while baking, and your pastries won’t puff up too much.
Step 4: Chill Again
Place your assembled pop tarts back into the fridge for another 30 minutes. This extra chilling helps them keep their shape and makes the final texture perfect after baking.
Step 5: Bake to Golden Perfection
Preheat your oven to 350°F. Beat the remaining egg and brush it generously over each tart to create that stunning golden glow. Bake on the middle rack for around 20 minutes, or until the tops are beautifully golden and the edges look cooked through. The smell alone will have you ready to dive in!
Step 6: Prepare the Icing
While the pop tarts cool slightly, whisk together powdered sugar and milk until silky smooth. This simple icing adds the perfect level of sweetness and can be customized with your favorite food coloring for a splash of personality. Once your tarts are fully cool, spread the icing over the tops and let it set a bit before adding sprinkles if you like.
How to Serve Delicious Homemade Pop Tarts with Custom Fillings Recipe
Garnishes
A simple drizzle of icing and a sprinkle of fun sprinkles are classic garnishes that never fail. You can also try a light dusting of powdered sugar or add chopped nuts for some crunch and extra flavor dimension. Garnishes make your pop tarts visually inviting and elevate the eating experience to special occasion status.
Side Dishes
Pop tarts are fantastic on their own but pairing them with a cup of rich coffee, smooth hot chocolate, or a glass of cold milk turns this treat into a full experience. For a fresh contrast, consider serving them alongside a small fruit salad or Greek yogurt with honey for breakfast or brunch.
Creative Ways to Present
Serve these pop tarts in a rustic basket lined with colorful napkins to bring warmth and charm to your table. For parties, arrange them on decorative platters or stack them with layers of parchment paper between for easy grabbing. You can also cut them into smaller bite-sized pieces to make fun mini pop tart sliders!
Make Ahead and Storage
Storing Leftovers
Leftover pop tarts keep well at room temperature in an airtight container for up to two days. To keep them fresh longer, store them in the refrigerator wrapped tightly in plastic wrap or kept in an airtight container for up to a week—just bring them back to room temperature before enjoying.
Freezing
These pop tarts freeze beautifully. Place them in a single layer on a baking sheet until frozen solid, then transfer to a freezer-safe bag or container. They can be stored frozen for up to three months. When you want a quick treat, just thaw at room temperature or reheat straight from frozen.
Reheating
To revive your Delicious Homemade Pop Tarts with Custom Fillings Recipe, the oven is your best friend. Pop them in a 350°F oven for about 5-7 minutes or until warm and slightly crispy again. You can also microwave them for about 20 seconds, but the oven method helps maintain that flaky crust texture you love.
FAQs
Can I use other fillings besides jam or Nutella?
Absolutely! This recipe is incredibly flexible. Try cream cheese mixed with a little sugar, peanut butter and honey, or even savory fillings like cheese and ham for an entirely different take.
What if I don’t have a food processor?
No worries! You can mix the dough by hand using a fork or pastry cutter to blend the butter into the flour mixture. It might take a bit longer but will still yield great results.
How do I make these gluten-free?
Simply swap the all-purpose flour for a gluten-free baking blend that includes xanthan gum or a similar binder. Keep in mind the texture might be slightly different, but still delicious!
Can I make these vegan?
Yes! Use a vegan butter substitute, flax or chia eggs (1 tbsp ground seed + 3 tbsp water per egg), and non-dairy milk in the icing. Just make sure your fillings are vegan-friendly too.
How long will the dough keep in the fridge?
The dough can be refrigerated for up to 2 days. Be sure to wrap it tightly with plastic wrap to prevent drying out, and bring it back to a cool temperature before rolling out.
Final Thoughts
This Delicious Homemade Pop Tarts with Custom Fillings Recipe is a joyful blend of nostalgia and innovation that everyone can enjoy. Making pop tarts at home allows you to tailor every bite to your cravings, turning a simple pastry into a heartfelt creation. So grab your favorite fillings and let your kitchen fill with buttery, fruity aromas that promise moments of pure comfort and delight.
Print
Delicious Homemade Pop Tarts with Custom Fillings Recipe
- Prep Time: 40 minutes
- Cook Time: 20 minutes
- Total Time: 1 hour
- Yield: 8 servings
- Category: Breakfast
- Method: Baking
- Cuisine: American
Description
Enjoy these delightful homemade Pop Tarts featuring a flaky buttery crust and customizable sweet fillings like strawberry, raspberry, or Nutella. This fun breakfast treat includes a simple homemade dough, easy jam filling, and a sweet powdered sugar glaze, perfect for a charming start to your day or a tasty snack.
Ingredients
Dough Ingredients
- 2 cups All-Purpose Flour (Use gluten-free flour for an alternative)
- 1 tablespoon Granulated Sugar (Substitute brown sugar for a richer flavor)
- 1 teaspoon Table Salt (Enhances overall flavor)
- 1 large Egg (for the dough)
- 1 cup Unsalted Butter (Cut into ½” chunks; keep cold)
- 3 tablespoons Ice Cold Water (Helps dough come together)
Fillings
- ½ cup Jam of Choice (Options include strawberry, raspberry, or Nutella)
Icing and Decoration
- 1 large Egg (beaten, for brushing)
- 1 cup Powdered Sugar (Base for icing)
- 2 teaspoons Whole Milk (Substitute almond milk for a dairy-free option)
- Food Coloring (Optional)
- Sprinkles (Optional)
Instructions
- Prepare the Dough: In a food processor, combine the all-purpose flour, granulated sugar, and table salt. Add one egg and pulse until mixed. Then add cold butter chunks and ice water, pulsing briefly until the dough just forms without overmixing.
- Knead and Chill: Transfer the dough to a floured surface and gently knead until smooth. Wrap it tightly in plastic wrap and refrigerate for 30 minutes to firm up.
- Shape the Dough: Roll the chilled dough into two rectangles about ¼ inch thick. Cut each rectangle into four 3” x 4” rectangles, making a total of eight pieces.
- Fill and Seal: Place one rectangle on a parchment-lined baking sheet. Spoon a generous tablespoon of your chosen jam onto it, then cover with another rectangle. Press edges together firmly with a fork to seal. Poke a few small holes on top to allow steam to escape during baking.
- Chill Again: Refrigerate the sealed tarts for an additional 30 minutes to help them maintain shape while baking.
- Preheat and Brush: Preheat the oven to 350°F (175°C). Brush the tops of the chilled tarts with the beaten egg to promote browning and shine.
- Bake: Bake the pop tarts for approximately 20 minutes, or until they turn golden brown and the crust is cooked through.
- Prepare Icing: While the tarts cool, whisk powdered sugar and whole milk together in a bowl until smooth. Add food coloring if desired for a decorative touch.
- Decorate: Once the pop tarts are completely cool, spread the icing over the tops and decorate with sprinkles if you like for a festive finish.
Notes
- For a gluten-free version, substitute the all-purpose flour with an equal amount of gluten-free flour blend.
- Use cold butter and ice water to ensure the dough stays flaky and tender.
- Do not overmix the dough in the food processor to avoid tough pastry.
- Allowing the dough to chill between steps helps prevent spreading and keeps the pop tarts crisp.
- Feel free to experiment with different fillings like Nutella, jam mixtures, or even savory options for variety.
- Ensure pop tarts are completely cool before icing to prevent the glaze from melting off.
- Store baked pop tarts in an airtight container at room temperature for up to 3 days or freeze for longer storage.

