
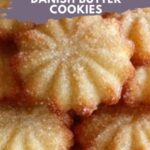
If you’re searching for a lovingly simple yet utterly delicious treat to brighten your day, the Danish Butter Cookies Classic Recipe is your new best friend in the kitchen. These buttery, delicate cookies bring a perfect balance of sweetness and that iconic melt-in-your-mouth texture everyone adores. Whether it’s a cozy afternoon tea or a festive gathering, this recipe delivers a timeless crunch and flavor that feels like a warm hug from a close friend. It’s charmingly straightforward yet so rewarding to make, turning ordinary ingredients into an extraordinary experience.
Ingredients You’ll Need
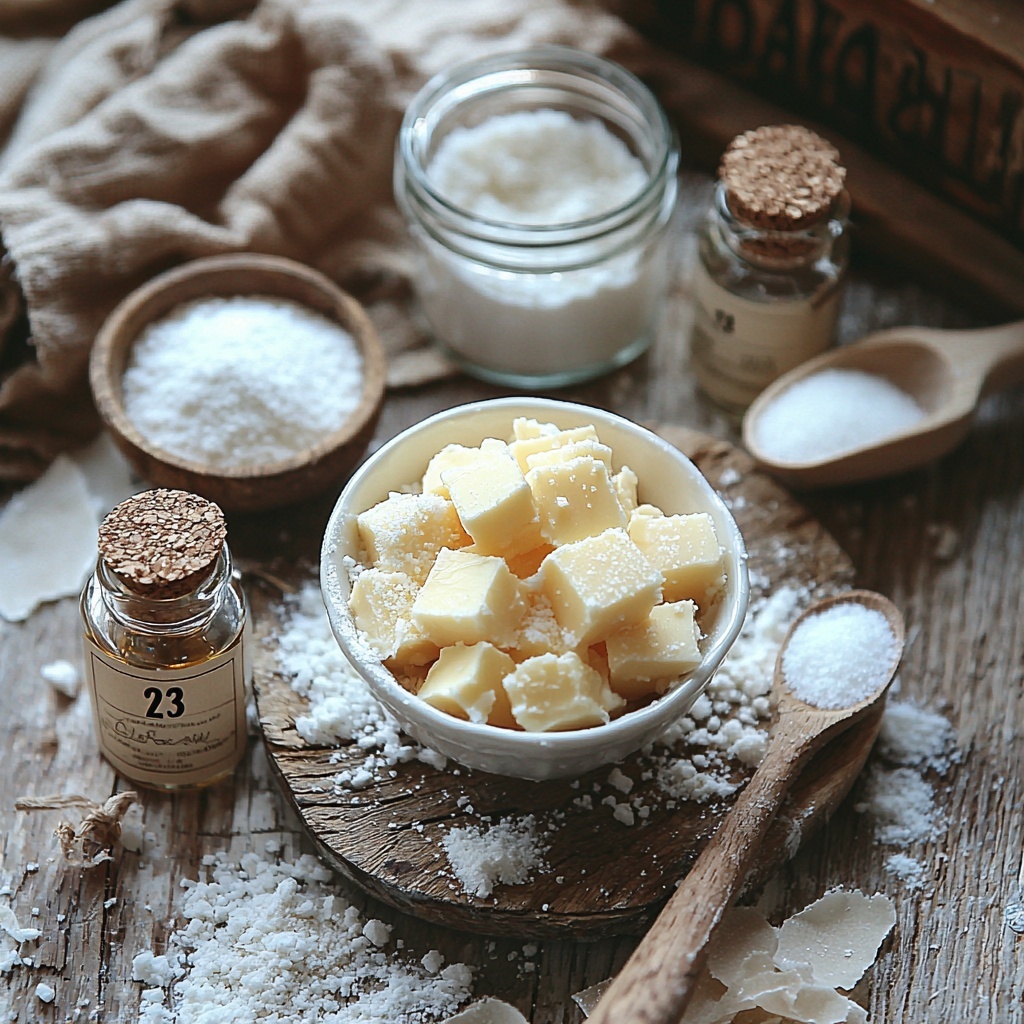
One of the best parts about the Danish Butter Cookies Classic Recipe is how incredibly simple the ingredient list is — nothing fancy, just essentials that come together beautifully. Each component is carefully chosen to create that perfect cookie texture and rich flavor that’s buttery with a hint of delicate aroma.
- Unsalted butter: Use softened butter to achieve that tender, melt-in-your-mouth consistency.
- Granulated sugar: Adds just the right amount of sweetness without overpowering the buttery base.
- All-purpose flour: The backbone of the cookie, providing structure and a satisfying crumb.
- Salt: Just a pinch to elevate and balance all the sweet flavors perfectly.
- Vanilla extract: A classic flavor enhancer that adds warmth and depth to the cookies.
- Almond extract: A subtle nutty note that’s traditionally part of Danish butter cookies, making them truly special.
How to Make Danish Butter Cookies Classic Recipe
Step 1: Preheat and Prepare
Start by preheating your oven to 350°F (175°C). This ensures that your oven reaches the perfect temperature before you begin baking, guaranteeing even cooking and those lovely golden edges that are signature to these cookies.
Step 2: Cream Butter and Sugar
In a large bowl, cream together the softened butter and granulated sugar until the mixture becomes light, fluffy, and almost velvety. This step is crucial for incorporating air into the dough, which leads to that delightful cookie texture everyone craves.
Step 3: Mix in Extracts
Add the vanilla and almond extracts to your bowl and mix well. These extracts infuse your cookies with that classic warm and inviting aroma that’s synonymous with Danish Butter Cookies Classic Recipe, making each bite fragrant and delectable.
Step 4: Incorporate Dry Ingredients
Gradually add the all-purpose flour and salt to your butter mixture, stirring gently until the dough just comes together. Avoid overmixing here; you want to keep the dough tender and workable without ending up with tough cookies.
Step 5: Shape Your Cookies
Using a piping bag or cookie press, pipe the dough onto ungreased baking sheets. The classic shapes—rings, pretzels, or simple circles—are more than just charming; they bake evenly and have a delightful crunch in every bite.
Step 6: Bake Until Perfect
Bake your cookies for 12-15 minutes until the edges are lightly golden. Watching these transformation moments is pure joy because that tiny bit of golden color means your cookies are perfectly crisp yet tender inside.
Step 7: Cool and Enjoy
Allow your cookies to cool for a few minutes on the baking sheets before transferring them to wire racks to cool completely. This resting time lets them firm up just right while you prepare for the best part—the tasting!
How to Serve Danish Butter Cookies Classic Recipe
Garnishes
While these cookies are heavenly on their own, consider a gentle dusting of powdered sugar for a festive touch or dipping half of each cookie in melted dark or white chocolate for an extra indulgence. A light sprinkle of finely chopped pistachios can also add a beautiful crunch and color contrast.
Side Dishes
Danish Butter Cookies Classic Recipe pairs wonderfully with a warm cup of tea, coffee, or even a creamy hot chocolate. For an elegant twist, serve alongside a fruit compote or a small bowl of whipped cream to soften the cookie’s buttery bite.
Creative Ways to Present
Arrange these cookies on a charming platter interspersed with fresh berries or edible flowers to make a stunning centerpiece for any gathering. You can also package them in decorative tins or jars, making perfect gifts that show you care and share your love of this classic recipe.
Make Ahead and Storage
Storing Leftovers
Store your Danish Butter Cookies Classic Recipe in an airtight container at room temperature to keep them crisp and fresh for up to a week. Placing parchment paper between layers helps prevent sticking and keeps them looking picture perfect.
Freezing
If you want to enjoy these cookies well beyond their baking day, freezing is a great option. Place baked and cooled cookies in a single layer on a baking sheet to freeze initially, then transfer to a freezer-safe container. They’ll keep for a couple of months and still taste just like fresh when thawed.
Reheating
To bring back that fresh-baked warmth, pop your cookies in a preheated 300°F oven for 3-5 minutes. This light reheating revives their buttery crunch and makes them feel newly made, perfect for unexpected guests or an extra cozy treat.
FAQs
Can I use salted butter instead of unsalted?
While you can substitute salted butter, it’s best to stick with unsalted for better control over the overall saltiness. If you only have salted butter, reduce or omit the additional salt to avoid an overly salty cookie.
Why is almond extract included in the recipe?
Almond extract adds a subtle nutty flavor that distinguishes Danish Butter Cookies Classic Recipe from other butter cookies. It’s a traditional ingredient that enhances the overall taste profile without overpowering the vanilla and buttery notes.
Can I bake these cookies without a piping bag or cookie press?
Yes! You can use a spoon to drop small mounds of dough onto the baking sheet or shape them by hand into rounds. While the shapes may be less consistent, the flavor and texture remain just as delightful.
How do I make the cookies crispier?
To get crispier cookies, bake them a couple of minutes longer until the edges are a deeper golden brown, but watch carefully to avoid burning. Also, letting them cool completely on wire racks ensures they set to a perfect crunch.
Can this recipe be made gluten-free?
Absolutely! Substitute the all-purpose flour with a gluten-free flour blend that measures cup-for-cup. Just keep an eye on the dough’s texture as you mix; you may need a slight adjustment in flour amount for the best consistency.
Final Thoughts
There’s something genuinely heartwarming about baking Danish Butter Cookies Classic Recipe, whether you’re making them on a quiet afternoon or sharing them during a celebration. This recipe brings out the best in simple ingredients, creating a treat that’s timeless, versatile, and irresistibly tasty. Give it a try—you’ll soon understand why these cookies are loved around the world and become a cherished staple in your own kitchen too.
Print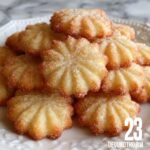
Delicious Recipe
- Prep Time: 15 minutes
- Cook Time: 15 minutes
- Total Time: 30 minutes
- Yield: 24 servings
- Category: Dessert
- Method: Baking
- Cuisine: Danish
- Diet: Vegetarian
Description
Classic Danish Butter Cookies combine rich, buttery flavor with a tender, crisp texture for an irresistible treat. Perfectly balanced with vanilla and almond extracts, these cookies are easy to make and delightful to share, ideal for holiday baking or everyday indulgence.
Ingredients
Cookies
- 1 cup unsalted butter, softened
- 1 cup granulated sugar
- 2 cups all-purpose flour
- 1/2 teaspoon salt
- 1 teaspoon vanilla extract
- 1/2 teaspoon almond extract
Instructions
- Preheat the oven: Preheat your oven to 350°F (175°C) to ensure it reaches the correct baking temperature while you prepare the dough.
- Cream butter and sugar: In a large bowl, use a hand mixer or stand mixer to cream together the softened butter and granulated sugar until the mixture becomes light, fluffy, and pale in color, which helps create the cookie’s tender texture.
- Add extracts: Mix in the vanilla extract and almond extract thoroughly to infuse the dough with their aromatic flavors.
- Combine dry ingredients: Gradually sift in the all-purpose flour and salt, mixing gently until the dough just comes together without overmixing to keep the cookies tender.
- Shape the cookies: Transfer the dough to a piping bag fitted with a decorative tip or use a cookie press to pipe the dough onto ungreased baking sheets, maintaining even spacing between each cookie for proper baking.
- Bake: Place the baking sheets in the preheated oven and bake the cookies for 12-15 minutes or until the edges turn a light golden brown, signaling they are perfectly baked.
- Cool: Let the cookies cool on the baking sheets for a few minutes so they firm up, then transfer them to wire racks to cool completely before serving or storing.
Notes
- Using softened butter is key to achieving the right dough consistency and cookie texture.
- Piping or using a cookie press gives the classic ridged shape typical of Danish butter cookies.
- Do not overbake to avoid dry and hard cookies; edges should be just lightly golden.
- For almond flavor enhancement, you may garnish with sliced almonds before baking, if desired.
- Store cooled cookies in an airtight container to maintain freshness for up to one week.
