
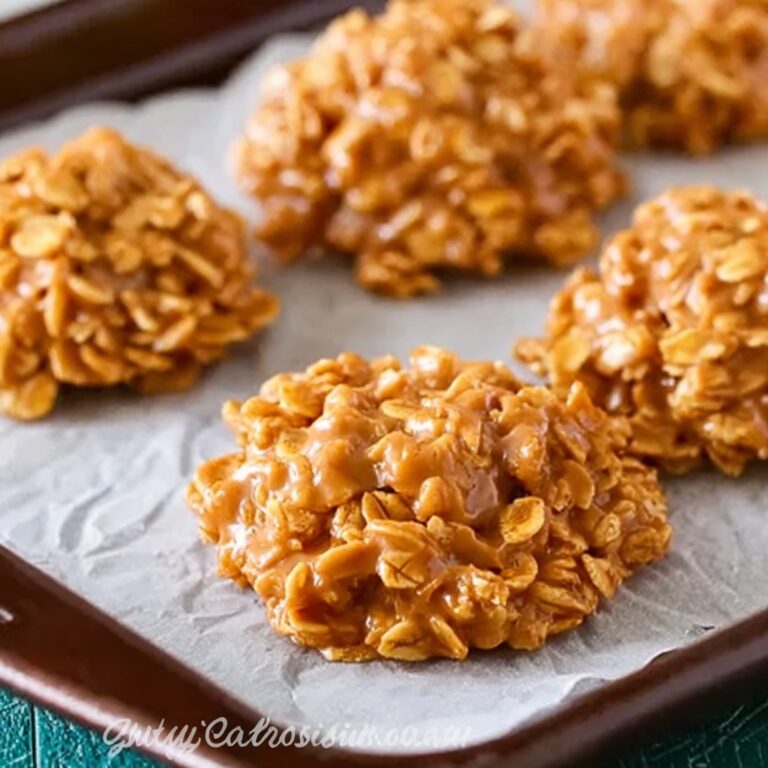
There is something truly magical about a classic treat that combines rich chocolate, a nutty surprise, and a sweet kiss right in the center. The Chocolate Thumbprint Cookies with Nut Filling and Chocolate Kisses Recipe brings together buttery dough, finely chopped walnuts, a luscious filling, and a perfect little chocolate kiss on top for an irresistible bite. This recipe is a timeless favorite for good reason—it offers layers of texture and flavor that will make you want to bake these cookies again and again. Whether for the holidays, special occasions, or just because, these thumbprint cookies are sure to bring joy to every cookie lover’s heart.
Ingredients You’ll Need
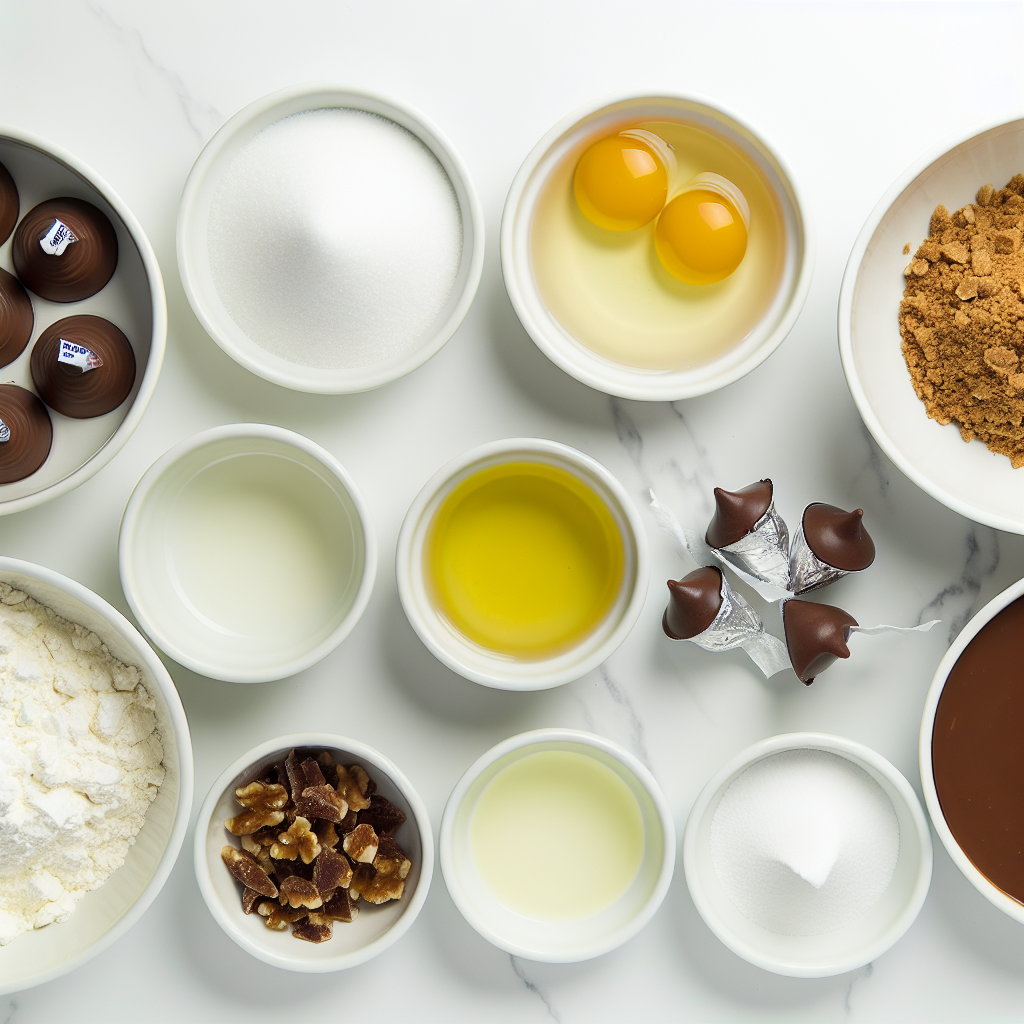
To make these delightful cookies, the ingredient list is wonderfully simple, yet each element plays a crucial role in creating the cookie’s signature taste, texture, and appearance. From creamy butter to rich cocoa powder, each component complements the others perfectly.
- Butter (1/2 cup): Softened butter provides richness and tender crumb to the cookie dough.
- Sugar (2/3 cup): Adds the necessary sweetness while helping the cookies brown slightly.
- Egg (1 large, separated): The yolk enriches the dough, while the white is used for coating to help nuts stick.
- 2% Milk (2 tablespoons): Adds moisture to the dough for a soft texture.
- Vanilla Extract (1 teaspoon): Injects warm, fragrant flavor that ties the ingredients together.
- All-Purpose Flour (1 cup): The structure builder for perfect cookie consistency.
- Baking Cocoa (1/3 cup): Provides that deep chocolate flavor and rich color.
- Salt (1/4 teaspoon): Balances sweetness and enhances the chocolate notes.
- Finely Chopped Walnuts (1 cup): Adds crunch and a nutty contrast to the soft cookie.
- Confectioners’ Sugar (1/2 cup, for filling): Creates a smooth, sweet filling with a delicate texture.
- Butter (1 tablespoon, softened, for filling): Ensures the filling is creamy and melts in your mouth.
- 2% Milk (2 teaspoons, for filling): Softens the filling for easy spreading or piping.
- Vanilla Extract (1/4 teaspoon, for filling): Adds depth and warmth to the filling.
- Milk Chocolate Kisses (24): The grand finale that sits in the center, melting into a delightful surprise.
How to Make Chocolate Thumbprint Cookies with Nut Filling and Chocolate Kisses Recipe
Step 1: Prepare the Cookie Dough
Start by creaming the butter and sugar together in a large bowl or with your stand mixer until the mixture is light and fluffy—it should take about 5 to 7 minutes. This step is key because it incorporates air, allowing your cookies to be tender and soft. Next, beat in the egg yolk (reserve the egg white for later), along with the milk and vanilla extract, which together add moisture and a lovely aroma. Then combine the dry ingredients—the all-purpose flour, baking cocoa, and salt—and gradually mix them into the wet ingredients. This forms the chocolatey dough base. Cover this dough and refrigerate it for about an hour to firm up, which will make it easier to handle and help the cookies hold their shape while baking.
Step 2: Shape, Dip, and Bake
Preheat your oven to 350 degrees Fahrenheit to get ready for baking. While the oven warms, whisk the reserved egg white until it’s foamy—this will help the nuts stick beautifully. Shape the chilled dough into one-inch balls, dip each into the egg white, and then roll them in the finely chopped walnuts so they are perfectly coated and crunchy on the outside. Place the nut-covered balls on a greased baking sheet. Now for the thumbprint magic—use the handle of a wooden spoon to gently press an indentation into the center of each cookie without pushing all the way through. Bake them for 10 to 12 minutes, just until the centers set but the cookies stay soft, creating the perfect nest for the filling.
Step 3: Fill and Finish with Chocolate Kisses
While the cookies are still warm (this is important), prepare the filling by mixing the confectioners’ sugar, softened butter, milk, and vanilla in a small bowl until you achieve a smooth, spreadable consistency. Carefully spoon or pipe about a quarter teaspoon of this filling into the indentation of each cookie. Then, gently press a milk chocolate kiss into the filling center. The warmth from the cookie and filling slightly melts the kiss, creating a luscious, gooey center that is simply heavenly. Allow the cookies to cool completely on a wire rack before serving so the filling and kisses set properly.
How to Serve Chocolate Thumbprint Cookies with Nut Filling and Chocolate Kisses Recipe
Garnishes
Although these cookies are stunning on their own, you can add a little extra pizzazz by lightly dusting the finished cookies with more confectioners’ sugar or a drizzle of melted white chocolate for a color contrast that really makes them pop. A sprinkle of finely chopped nuts around the edges can enhance the nutty flavor and texture even more.
Side Dishes
Pair these Chocolate Thumbprint Cookies with a warm cup of coffee or a glass of cold milk for a classic treat experience. Hot cocoa or a silky latte are also excellent companions, especially if you want a cozy indulgence during chilly evenings or festive gatherings.
Creative Ways to Present
Presentation is part of the fun! Arrange the cookies on a decorative platter layered with parchment paper tied with a rustic twine or a bright ribbon. You might even serve them in a pretty tin or gift box if you’re sharing them as a thoughtful homemade gift. For parties, consider stacking them in little towers and securing with edible glitter to make an eye-catching centerpiece.
Make Ahead and Storage
Storing Leftovers
Once completely cool, these cookies keep wonderfully in an airtight container at room temperature for up to a week. Storing them correctly ensures the nuts stay crisp and the filling remains soft and luscious without drying out your cookies.
Freezing
You can freeze these cookies either before adding the filling and chocolate kisses or fully assembled. If freezing beforehand, shape and nut-coat the dough balls, freeze on a baking sheet until solid, then transfer to a freezer bag. When ready to bake, pop them straight into the oven. Fully assembled cookies should be stored in an airtight container with parchment between layers and consumed within 2 months for best quality.
Reheating
Reheat leftovers gently in a warm oven (about 300°F for 5 minutes) if you want that fresh-baked feel again. Avoid microwaving, which can make the nuts soggy and the chocolate melt too quickly, losing the texture contrast that makes these cookies so delightful.
FAQs
Can I substitute the walnuts with other nuts?
Absolutely! Pecans, almonds, or even hazelnuts work beautifully in this recipe. Just make sure to chop them finely so they stick well and give the same crunch and nutty flavor.
What if I don’t have milk chocolate kisses?
You can use any small chocolates in place of the traditional milk chocolate kisses—dark chocolate chips or mini peanut butter cups add a fun twist and are delicious alternatives.
Is it okay to use margarine instead of butter?
Butter is recommended for the best flavor and texture, but if necessary, margarine can be used. Keep in mind that the cookies may be less rich and slightly different in texture.
Can I make these cookies gluten-free?
Yes! Use a 1:1 gluten-free flour blend instead of all-purpose flour. Just be sure the blend includes xanthan gum or another binder for the best results.
How do I keep the cookies from spreading too much?
Chilling the dough before baking is a crucial step to prevent spreading. Also, avoid over-mixing the dough once the flour is added to maintain cookie structure.
Final Thoughts
If you’re craving a cookie that’s more than just a cookie—one that brings comfort, elegance, and a little joyful surprise with every bite—you have to try this Chocolate Thumbprint Cookies with Nut Filling and Chocolate Kisses Recipe. These cookies are simple enough for weeknight baking yet impressive enough to wow your guests. Trust me, once you make this recipe, it will quickly become one of your favorite sweet treats to bake and share with those you love.
Print
Chocolate Thumbprint Cookies with Nut Filling and Chocolate Kisses Recipe
- Prep Time: 25 minutes
- Cook Time: 10 minutes
- Total Time: 1 hour 35 minutes
- Yield: about 2-1/2 dozen (approximately 24-30 cookies)
- Category: Dessert
- Method: Baking
- Cuisine: American
Description
Delight in these classic Chocolate Thumbprint Cookies featuring a rich cocoa dough rolled in crunchy walnuts, filled with a smooth confectioners’ sugar mixture, and topped with a melty milk chocolate kiss. Perfectly tender with a luscious chocolate center, these cookies are a timeless treat for any occasion.
Ingredients
Cookie Dough
- 1/2 cup butter, softened
- 2/3 cup sugar
- 1 large egg, separated, room temperature
- 2 tablespoons 2% milk
- 1 teaspoon vanilla extract
- 1 cup all-purpose flour
- 1/3 cup baking cocoa
- 1/4 teaspoon salt
- 1 cup finely chopped walnuts
Filling
- 1/2 cup confectioners’ sugar
- 1 tablespoon butter, softened
- 2 teaspoons 2% milk
- 1/4 teaspoon vanilla extract
- 24 milk chocolate kisses
Instructions
- Prepare the Dough: In a large bowl or stand mixer, cream together the softened butter and sugar until the mixture is light and fluffy, which should take about 5 to 7 minutes. Beat in the egg yolk (reserve the egg white in a separate bowl), milk, and vanilla extract. In another bowl, whisk together the flour, baking cocoa, and salt, then gradually add the dry ingredients to the creamed mixture, mixing thoroughly. Cover the dough and refrigerate for about 1 hour or until it is easy to handle.
- Shape and Bake: Preheat your oven to 350°F (175°C). Whisk the reserved egg white until frothy in a small bowl. Shape the chilled dough into 1-inch balls, dip each in the egg white, then roll them in the finely chopped walnuts to coat. Arrange the balls on a greased baking sheet. Using the handle of a wooden spoon, press an indentation in the center of each cookie. Bake for 10 to 12 minutes until the centers are set but cookies are not hard.
- Prepare the Filling and Assemble: While the cookies bake, combine confectioners’ sugar, softened butter, milk, and vanilla until smooth to create the filling. Once the cookies are out of the oven but still warm, spoon or pipe about 1/4 teaspoon of the filling into each cookie indentation, then gently press a milk chocolate kiss into the center. Carefully transfer cookies to wire racks and let cool completely before serving.
Notes
- Refrigerating the dough helps the cookies keep their shape during baking.
- Using room temperature eggs helps achieve a smooth and well-emulsified dough.
- If walnuts aren’t preferred, pecans or almonds can be used as alternatives.
- Ensure not to overbake; cookies should be soft and set in the center.
- Store cookies in an airtight container at room temperature for up to 5 days.


