
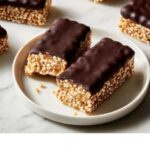
If you are searching for a nutritious and delicious snack, the Chocolate Quinoa Protein Bars Recipe has got you covered. These bars combine the satisfying crunch of puffed quinoa with the rich flavor of dark chocolate and the wholesome goodness of protein powder, creating the perfect balance between indulgence and nourishment. Whether you need a quick energy boost before your workout or a guilt-free treat during the day, these bars bring texture, flavor, and simple ingredients together in a way that’s both satisfying and easy to make.
Ingredients You’ll Need
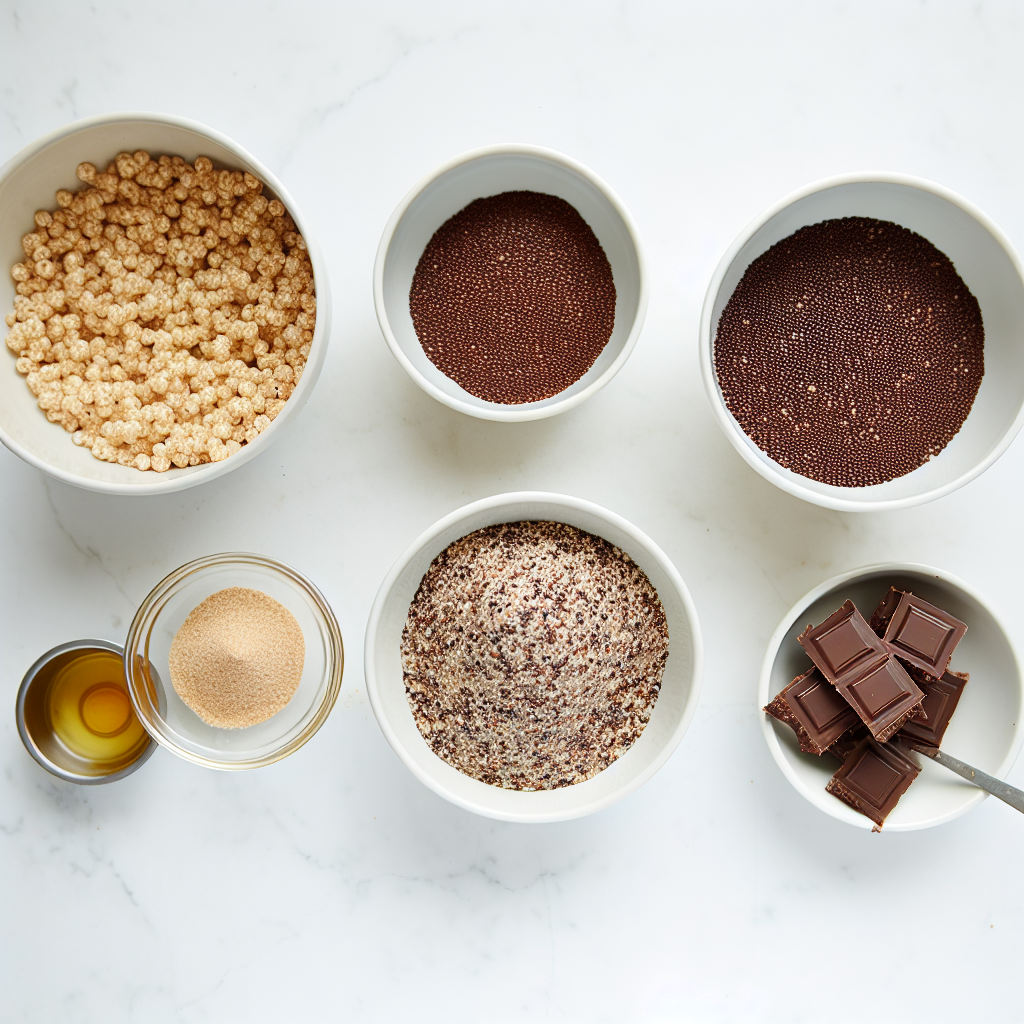
This recipe relies on straightforward yet essential ingredients that each add their unique touch to the final product. From puffed quinoa’s airy crunch to almond butter’s creamy richness, every item plays a crucial role in taste, texture, and appearance.
- Puffed quinoa: Provides a light, crunchy base that holds everything together effortlessly.
- Vanilla or chocolate protein powder: Adds a boost of protein while enhancing flavor—choose plant-based or whey depending on your preference.
- Chia seeds or ground flaxseed (optional): A fiber-packed addition for extra nutrition without altering texture much.
- Almond butter (or peanut butter): Acts as the creamy binder with subtle nutty notes that complement chocolate perfectly.
- Honey or maple syrup: Natural sweeteners that lend moisture and a hint of floral sweetness.
- Vanilla extract: Enhances depth and warmth in flavor.
- Sea salt (pinch): Balances sweetness and accentuates chocolate richness.
- Dark chocolate chips or chopped dark chocolate: The luscious topping that melts into a glossy, indulgent finish.
- Coconut oil: Helps achieve a smooth, shiny chocolate coating.
How to Make Chocolate Quinoa Protein Bars Recipe
Step 1: Prep the Pan
Start by lining an 8×8-inch baking dish with parchment paper, ensuring you leave enough overhang on the sides. This little trick will make lifting out the bars effortlessly after they’re set, so don’t skip it. Once done, set the pan aside and get ready for the magic.
Step 2: Mix the Dry Ingredients
In a large bowl, combine puffed quinoa, your choice of protein powder, and chia or flaxseed if you’re using it. Stir until everything is evenly incorporated — this ensures each bite of your bars has that perfect blend of crunch and protein.
Step 3: Heat the Binder
On low heat in a small saucepan, warm almond butter, honey or maple syrup, vanilla extract, and a pinch of sea salt. Stir this gently until smooth and warm—never boiling—to preserve the natural flavors and keep a silky texture.
Step 4: Combine Wet and Dry
Pour the warm binder mixture over the dry ingredients, then stir thoroughly with a spatula. Your goal is a sticky, uniform mix where every piece of quinoa is coated, making it easy to press into the pan.
Step 5: Press Into Pan
Transfer the mix to your prepared baking dish and press it down firmly into an even layer. Using a spatula, the back of a spoon, or even parchment paper on top makes this step smooth and ensures your bars hold together nicely.
Step 6: Chill the Base
Pop the pan into the fridge and let the base chill for 20 to 30 minutes. This resting time allows the bars to firm up, so the chocolate topping will adhere perfectly without mixing or melting into the base.
Step 7: Make the Chocolate Coating
Melt dark chocolate chips and coconut oil either in a microwave-safe bowl (stirring every 20 seconds) or over a double boiler. Aim for a glossy, smooth melted chocolate that’s ready to spread.
Step 8: Top with Chocolate
Pour the melted chocolate over the chilled quinoa base and spread it evenly to the edges using an offset spatula or the back of a spoon. Give the pan a gentle tap on the countertop to remove air bubbles for a perfect finish.
Step 9: Chill Until Set
Return the pan to the refrigerator for at least an hour. This time is crucial to let the chocolate layer harden and the bars firm up completely, ready to slice without crumbling.
Step 10: Slice and Store
Use the parchment overhang to lift the set bar slab from the pan. With a sharp knife, cut into 10 to 12 bars depending on your preferred size. These bars store wonderfully in an airtight container in the fridge for up to a week or freeze beautifully for longer keeping.
How to Serve Chocolate Quinoa Protein Bars Recipe
Garnishes
Adding a sprinkle of sea salt, a few cacao nibs, or even a dusting of shredded coconut on the chocolate before chilling offers extra texture and visual appeal. This little finishing touch can elevate your bars from everyday treats to show-stopping snacks.
Side Dishes
Serve these bars alongside a refreshing smoothie, a hot cup of herbal tea, or a cold glass of almond milk. Their rich, chocolatey goodness pairs exceptionally well with light, refreshing drinks that balance out the protein-packed bite.
Creative Ways to Present
Turn your bars into colorful dessert boxes by layering them with fresh berries and nuts in mini jars. You can also cut them into bite-sized squares for party platters or wrap individually in parchment and ribbon for a charming homemade gift.
Make Ahead and Storage
Storing Leftovers
Once cut, store your Chocolate Quinoa Protein Bars in an airtight container in the refrigerator to keep them fresh and firm. They’ll last about a week, so you can enjoy a healthy snack anytime without extra prep.
Freezing
If you want to keep your bars around longer, they freeze beautifully. Wrap each bar individually in parchment or plastic wrap, then place in a freezer-safe container or zip-top bag. They can be frozen for up to three months without losing texture or flavor.
Reheating
To enjoy thawed bars, simply remove them from the freezer the night before and let them defrost in the fridge. If you prefer them slightly softer, a few seconds in the microwave will do the trick, but be careful not to melt the chocolate coating.
FAQs
Can I use a different nut butter?
Absolutely! Peanut butter, cashew butter, or sunflower seed butter work just as well. Each nut butter will bring a slightly different flavor profile but keeps the bars moist and binding perfectly.
Is it possible to make these bars vegan?
Yes, just swap honey for maple syrup and use plant-based protein powder. Ensure the chocolate you choose is dairy-free for a completely vegan-friendly bar.
Why is puffed quinoa important in this recipe?
Puffed quinoa adds a wonderful crunch and lightness without overwhelming the bars. It also boosts the protein and fiber content, making the bars filling and satisfying.
Can I add other mix-ins like nuts or dried fruit?
For sure! Chopped nuts, dried cranberries, or seeds can be folded into the base mixture before pressing into the pan for extra texture and variety.
How long do these bars stay fresh at room temperature?
Because of the almond butter and honey, it’s best to keep these bars refrigerated. They might become a bit soft at room temperature, especially in warmer climates, and their shelf life shortens without refrigeration.
Final Thoughts
I truly believe the Chocolate Quinoa Protein Bars Recipe is a game changer for anyone craving healthy, homemade snacks that don’t skimp on flavor or texture. Once you try making them, you’ll know how easy it is to nourish yourself with something that feels indulgent yet wholesome. So go ahead, whip up a batch and savor every bite—it’s one snack you’ll want in your life forever.
Print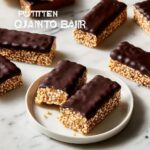
Chocolate Quinoa Protein Bars Recipe
- Prep Time: 15 minutes
- Cook Time: 0 minutes
- Total Time: 1 hour 15 minutes (includes chilling time)
- Yield: 12 bars
- Category: Snack
- Method: No-Cook
- Cuisine: American
- Diet: Gluten Free
Description
These Chocolate Quinoa Protein Bars are a nutritious and delicious no-bake treat perfect for snacking or post-workout fuel. Packed with protein from puffed quinoa and protein powder, combined with natural almond butter and honey for binding, and topped with a decadent dark chocolate coating, they offer a satisfying and wholesome snack that is both easy to prepare and naturally gluten free.
Ingredients
For the Dry Base
- 1 ½ cups puffed quinoa
- ½ cup vanilla or chocolate protein powder (plant-based or whey)
- 2 tbsp chia seeds or ground flaxseed (optional for extra fiber)
For the Binding Mixture
- ½ cup almond butter (or peanut butter)
- ⅓ cup honey or maple syrup
- 1 tsp vanilla extract
- Pinch of sea salt
For the Chocolate Coating
- 1 ½ cups dark chocolate chips or chopped dark chocolate
- 1 tbsp coconut oil (for smoother melting)
Instructions
- Prep the Pan: Line an 8×8-inch baking dish with parchment paper, leaving enough overhang to lift out the bars easily once set. Set the pan aside.
- Mix the Dry Ingredients: In a large mixing bowl, combine puffed quinoa, protein powder, and chia seeds or flaxseed if using. Stir well to evenly distribute all the dry ingredients.
- Heat the Binder: In a small saucepan over low heat, combine almond butter, honey or maple syrup, vanilla extract, and a pinch of sea salt. Stir continuously until the mixture is smooth and warmed through, ensuring it does not boil.
- Combine Wet and Dry: Pour the warm binding mixture over the dry bowl ingredients. Using a spatula, mix thoroughly until all dry ingredients are fully coated, and a sticky, uniform mixture forms.
- Press into Pan: Transfer the mixture into the prepared baking dish. Press down firmly and evenly using a spatula, the back of a spoon, or parchment paper to create a compact base layer.
- Chill the Base: Place the pan in the refrigerator for 20 to 30 minutes to let the base firm up before adding the chocolate topping.
- Make the Chocolate Coating: Melt the dark chocolate chips and coconut oil together in a microwave-safe bowl or double boiler. Stir every 20 seconds if microwaving, until fully melted and smooth.
- Top with Chocolate: Pour the melted chocolate evenly over the chilled quinoa base. Spread gently with an offset spatula or spoon, tapping the pan lightly to remove air bubbles.
- Chill Until Set: Return the pan to the refrigerator and chill for at least 1 hour until the chocolate hardens and bars are firm.
- Slice and Store: Lift the set bars out of the pan using the parchment overhang. Cut into 10 to 12 bars. Store in an airtight container in the refrigerator for up to 1 week or freeze for longer storage.
Notes
- The recipe is naturally gluten free and can be made vegan by using maple syrup and plant-based protein powder.
- Chia seeds or flaxseed add extra fiber and omega-3s but can be omitted if desired.
- Ensure the almond butter and honey are warmed gently to avoid burning or boiling.
- Pressing the mixture firmly into the pan prevents crumbly bars.
- Use a sharp knife warmed under hot water to slice bars cleanly without cracking the chocolate.
- Bars keep well refrigerated and also freeze nicely for extended shelf life.
- Feel free to customize the chocolate topping by adding nuts or shredded coconut before chilling.