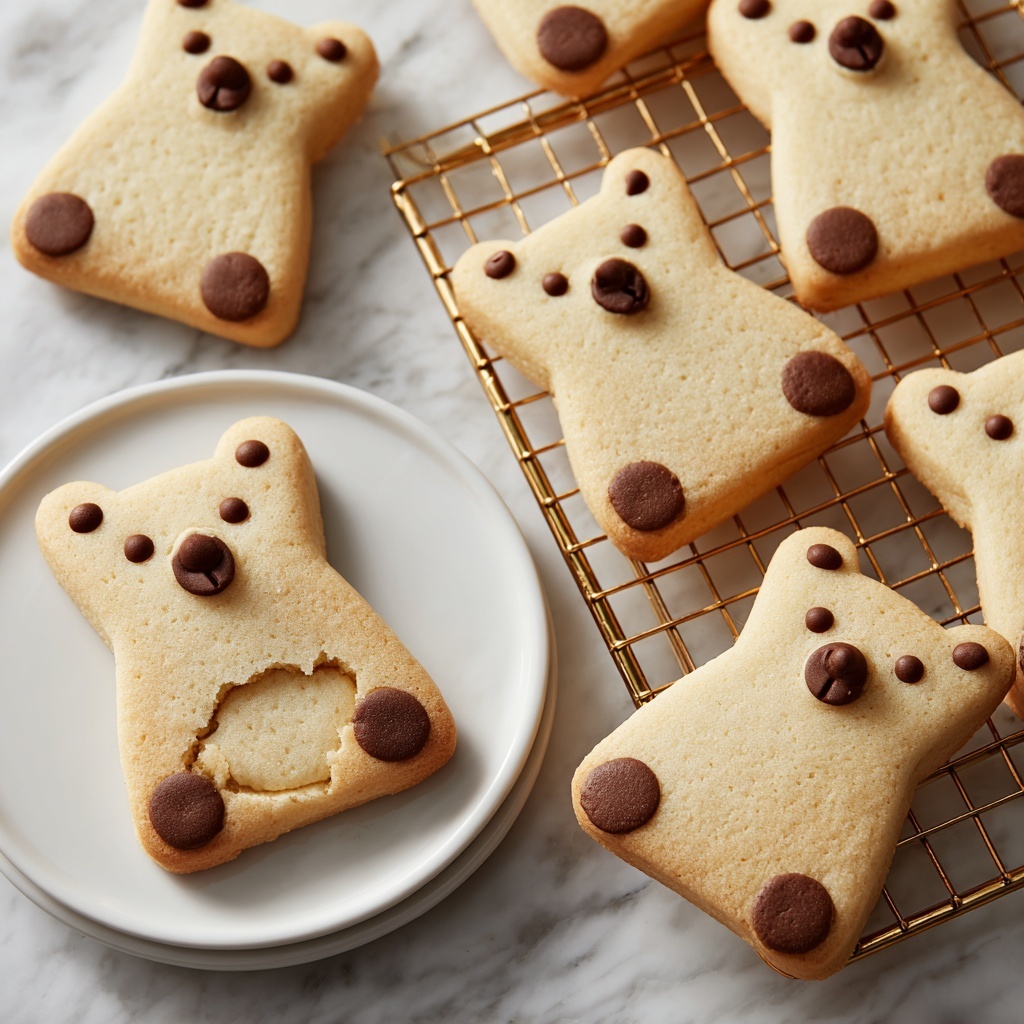
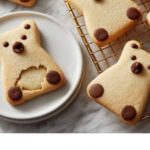
Get ready to fall in love with a treat that’s as delightful to make as it is to eat. This Chocolate Chip Bear Cookies Recipe combines tender, buttery cookie dough with playful bear shapes and charming chocolate decorations. They’re perfect for sharing with family or surprising friends with a homemade gift that’s truly one of a kind. Whether it’s a cozy afternoon snack or a fun baking project, these cookies bring joy to the kitchen and smiles to the table.
Ingredients You’ll Need
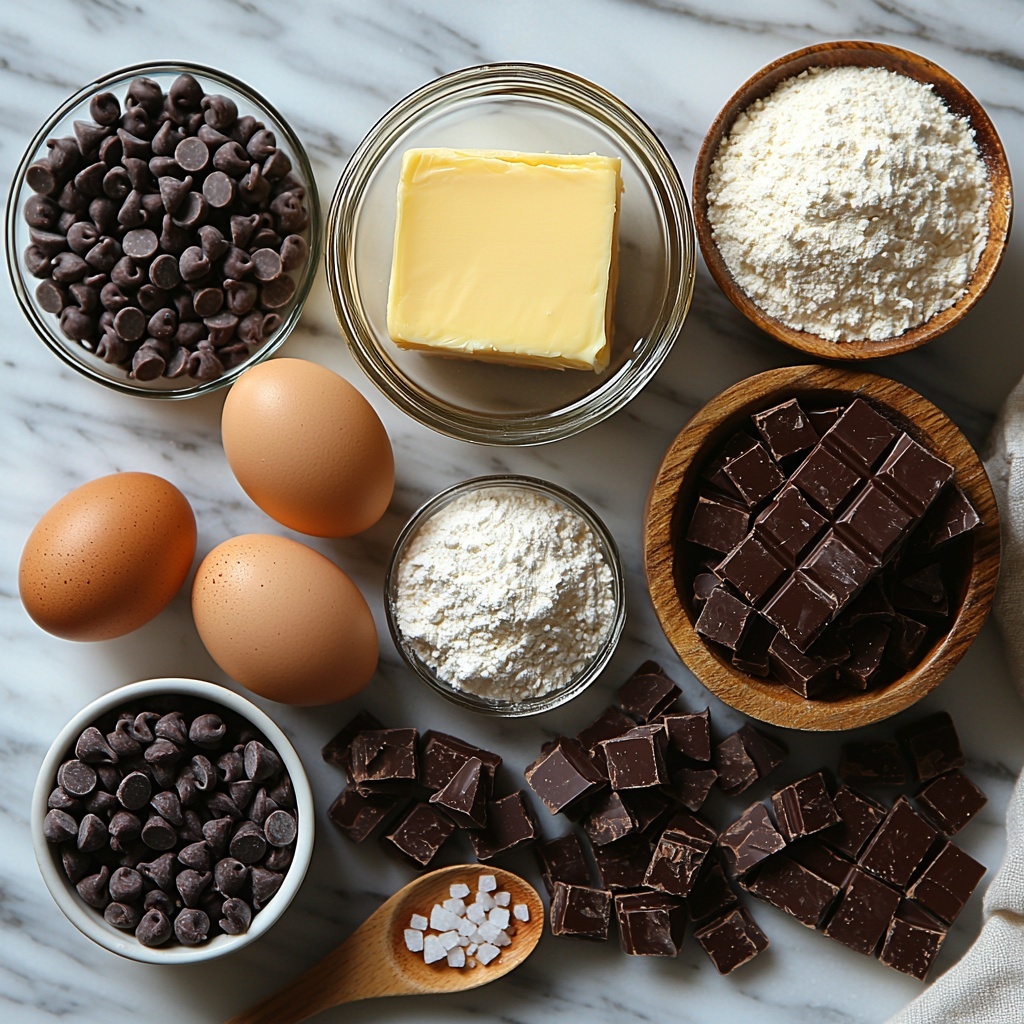
This recipe keeps things wonderfully simple and relies on classic, pantry-friendly ingredients. Each one plays a key role: butter lends creaminess, sugars add caramelized sweetness and chewiness, eggs bind everything harmoniously, and the flour base delivers the perfect tender crumb. The chocolate accents? Just the cherry on top to bring these bears to life!
- 1 cup unsalted butter, softened: Ensures a rich, creamy cookie base that melts in your mouth.
- 3/4 cup granulated sugar: Adds a subtle sweetness and crisp texture to balance the soft dough.
- 1/2 cup light brown sugar, packed: Brings moistness and a hint of caramel flavor that deepens the cookie’s charm.
- 2 large eggs: Provide structure and moisture for the perfect tender bite.
- 2 teaspoons vanilla extract: Introduces warmth and rounds out the sweetness with aromatic depth.
- 3 cups all-purpose flour: The foundation that holds everything together with just the right chew.
- 1 teaspoon baking soda: Helps the cookies rise lightly for a soft but sturdy texture.
- 1/2 teaspoon salt: Enhances all the flavors and balances the sweetness beautifully.
- Chocolate chips (standard size): Perfect for adorning the bears’ bellies and ears with fun and flavor.
- Mini chocolate chips or melted chocolate: Ideal for drawing expressive eyes and mouths.
- Chocolate-covered candies or drops: Serve as a cute and tasty nose on each bear.
How to Make Chocolate Chip Bear Cookies Recipe
Step 1: Cream Butter and Sugars
Start by beating the softened butter together with granulated and brown sugars until the mixture becomes pale and fluffy. This aeration step is crucial because it creates a light texture and helps the cookies rise beautifully. Using a hand mixer or stand mixer set at medium speed, about 2 to 3 minutes will do the trick.
Step 2: Add Eggs and Vanilla
Introduce the eggs one at a time, mixing well after each addition to make sure everything is fully incorporated. Pour in the vanilla extract next and beat together until smooth. This step brings the dough together and infuses it with that homemade warmth and aroma you crave.
Step 3: Mix in Dry Ingredients
Whisk the flour, baking soda, and salt in a separate bowl to evenly distribute the leavening agent and salt throughout. Gradually add this dry mixture to your wet ingredients while mixing gently, just until a smooth dough forms. Overmixing can lead to tough cookies, so keep it light and tender.
Step 4: Chill the Dough
Wrap your freshly mixed dough tightly in plastic wrap and pop it in the fridge for at least 30 minutes. Chilling this dough is essential because it firms up the butter, making the dough easier to shape and ensuring the bears keep their adorable forms while baking.
Step 5: Shape Your Bears
Line a baking sheet with parchment paper to prevent sticking and for easy cleanup. Now comes the fun part! Shape the dough into your bears: a 2-inch oval or ball forms the body, a 1.5-inch ball makes the head, while smaller ovals become arms and legs, and little 0.5-inch rounds serve as ears and nose. Assemble each bear directly on the sheet, gently pressing the parts together for a secure hold. A toothpick or the back of a spoon can help blend the connections for a polished finish.
Step 6: Decorate Before Baking
Add character to your bears by pressing standard chocolate chips onto their bellies as charming buttons, place chocolate-covered candies or drops for noses, and use mini chocolate chips or melted chocolate to create eyes. You can also add chocolate chips to the ears for extra detail. Avoid mixing the chips into the dough for better control over your bears’ individual expressions and cuteness.
Step 7: Bake to Golden Perfection
Preheat your oven to 350°F (175°C). Bake your bears for 10 to 12 minutes until their edges just start to turn golden and they feel set to the touch. Let them cool on the baking sheet for about 5 minutes—this helps them firm up more—then transfer them to a wire rack. For a finishing touch, use melted chocolate and a toothpick to draw little smiles or other sweet facial details once the cookies are completely cool.
How to Serve Chocolate Chip Bear Cookies Recipe
Garnishes
These bears are delightful on their own, but you can elevate presentation with a dusting of powdered sugar or a drizzle of melted white chocolate. A sprinkle of colorful sugar crystals can add whimsy for kids’ parties or special occasions, making every bite feel celebration-ready.
Side Dishes
Pair your Chocolate Chip Bear Cookies with a cold glass of milk or a warm cup of tea for the ultimate comforting snack. They also pair wonderfully with vanilla or chocolate ice cream if you want to serve them as a dessert that’s both playful and nostalgic.
Creative Ways to Present
Arrange your bear cookies in a forest-themed platter with leafy greens and edible flowers for a nature-inspired display. They make charming edible invitations at birthday parties or baby showers when wrapped individually in clear bags tied with twine and a little tag. Share these sweet creations and watch smiles light up the room.
Make Ahead and Storage
Storing Leftovers
Keep leftover bears fresh by storing them in an airtight container at room temperature. They will stay soft and delicious for up to 5 days, perfect for sneaking an extra treat throughout your week. Adding a slice of bread to the container can help maintain moisture and softness.
Freezing
If you want to make these ahead for a special occasion, you can freeze the shaped but unbaked dough. Wrap each bear separately in plastic wrap, then place them in a freezer-safe container for up to 3 months. When ready to bake, thaw in the fridge overnight before decorating and baking as usual.
Reheating
To revive stored cookies, pop them in a preheated oven at 300°F (150°C) for about 5 minutes. This warms the chocolate and brings back that freshly baked texture. Avoid microwaving as it can make the cookies rubbery.
FAQs
Can I use salted butter in this Chocolate Chip Bear Cookies Recipe?
While you can use salted butter, it’s best to reduce the added salt slightly in the recipe to avoid an overly salty bite. Unsalted butter gives you more control over flavor balance, which is ideal for these sweet, delicate cookies.
What if I don’t have mini chocolate chips for the eyes?
Not a problem! You can use melted chocolate piped on with a toothpick or small chocolate sprinkles as a substitute. The key is to keep the eyes small and cute so the bears maintain their charming expressions.
How can I make these cookies dairy-free?
To make this recipe dairy-free, substitute the unsalted butter with a plant-based vegan butter. Make sure your chocolate chips are dairy-free too. The texture might be slightly different but will still be delicious and bear-shaped!
Why is it important to chill the dough?
Chilling firms up the butter, which helps maintain the cookie’s shape during baking. It also slows down spreading, ensuring your bear shapes stay defined and adorable rather than melting into flat blobs.
Can I double the recipe?
Absolutely! This recipe scales well, just be sure your bowl and mixer can handle the larger batch. Also, consider baking the cookies in batches so they bake evenly and you don’t overcrowd your oven.
Final Thoughts
Making the Chocolate Chip Bear Cookies Recipe is a joyful experience that brings a little magic to your baking routine. The combination of buttery dough, sweet chocolate accents, and whimsical bear shapes makes each cookie a tiny work of edible art. I hope you have as much fun making and sharing these as I do. So roll up your sleeves, grab your ingredients, and create some bear-y sweet memories!
Print
Chocolate Chip Bear Cookies Recipe
- Prep Time: 30 minutes
- Cook Time: 12 minutes
- Total Time: 42 minutes
- Yield: 16 cookies
- Category: Dessert
- Method: Baking
- Cuisine: American
Description
These charming Chocolate Chip Bear Cookies are perfect for a fun baking project that yields adorable, flavorful treats. Soft and buttery with a delightful vanilla aroma, each cookie is carefully shaped and decorated with chocolate chips and candies to resemble a cute bear. Ideal for kids’ parties, holiday baking, or anytime you want to impress with creative cookies.
Ingredients
Cookie Dough Ingredients
- 1 cup (227g) unsalted butter, softened
- 3/4 cup (150g) granulated sugar
- 1/2 cup (100g) light brown sugar, packed
- 2 large eggs
- 2 teaspoons vanilla extract
- 3 cups (375g) all-purpose flour
- 1 teaspoon baking soda
- 1/2 teaspoon salt
Decoration Ingredients
- Chocolate chips (standard size, for belly buttons and ears)
- Mini chocolate chips or melted chocolate (for eyes and mouth)
- Chocolate-covered candies or chocolate drops (for the nose)
Instructions
- Cream Butter and Sugars: In a large bowl, beat the softened butter with granulated sugar and light brown sugar until the mixture turns pale and fluffy, about 2 to 3 minutes using a hand or stand mixer on medium speed.
- Add Eggs and Vanilla: Incorporate the eggs one at a time, mixing well after each addition to ensure even distribution. Pour in the vanilla extract and beat until fully combined, creating a smooth batter.
- Mix in Dry Ingredients: In a separate bowl, whisk together the all-purpose flour, baking soda, and salt. Gradually add this dry mix to the wet ingredients, stirring just until a smooth, soft dough forms without overmixing.
- Chill the Dough: Wrap the dough tightly in plastic wrap and refrigerate for at least 30 minutes. This firms the dough, making it easier to shape into bear forms and improves the final texture of the cookies.
- Shape Your Bears: Line a baking sheet with parchment paper. Form the dough into bear parts: use a 2-inch oval or ball for the body, a 1.5-inch ball for the head, smaller ovals for arms and legs, and tiny 0.5-inch balls for ears and nose. Assemble each bear directly on the baking sheet, gently pressing pieces together. Use a toothpick or the back of a spoon to blend and secure the shapes.
- Decorate Before Baking: Press standard chocolate chips into the belly to represent buttons, add chocolate candies or drops for the nose, and use mini chocolate chips for eyes. Optionally, place chocolate chips in the ears for extra detail. Avoid mixing chips into the dough so decoration control remains precise.
- Bake to Golden Perfection: Preheat your oven to 350°F (175°C). Bake the cookies for 10 to 12 minutes, until the edges are lightly golden and the cookies have set. Allow them to cool on the baking sheet for 5 minutes, then transfer to a wire rack. Once fully cool, use melted chocolate and a toothpick to add smiles or other facial features for a finishing touch.
Notes
- Chilling the dough is essential for easier shaping and better texture.
- Use parchment paper to prevent sticking and for easy cleanup.
- Be gentle when assembling the bear shapes to avoid cracks or breaks.
- Adding the decorations before baking helps them adhere well during cooking.
- Allow cookies to cool completely before adding melted chocolate details to prevent smudging.