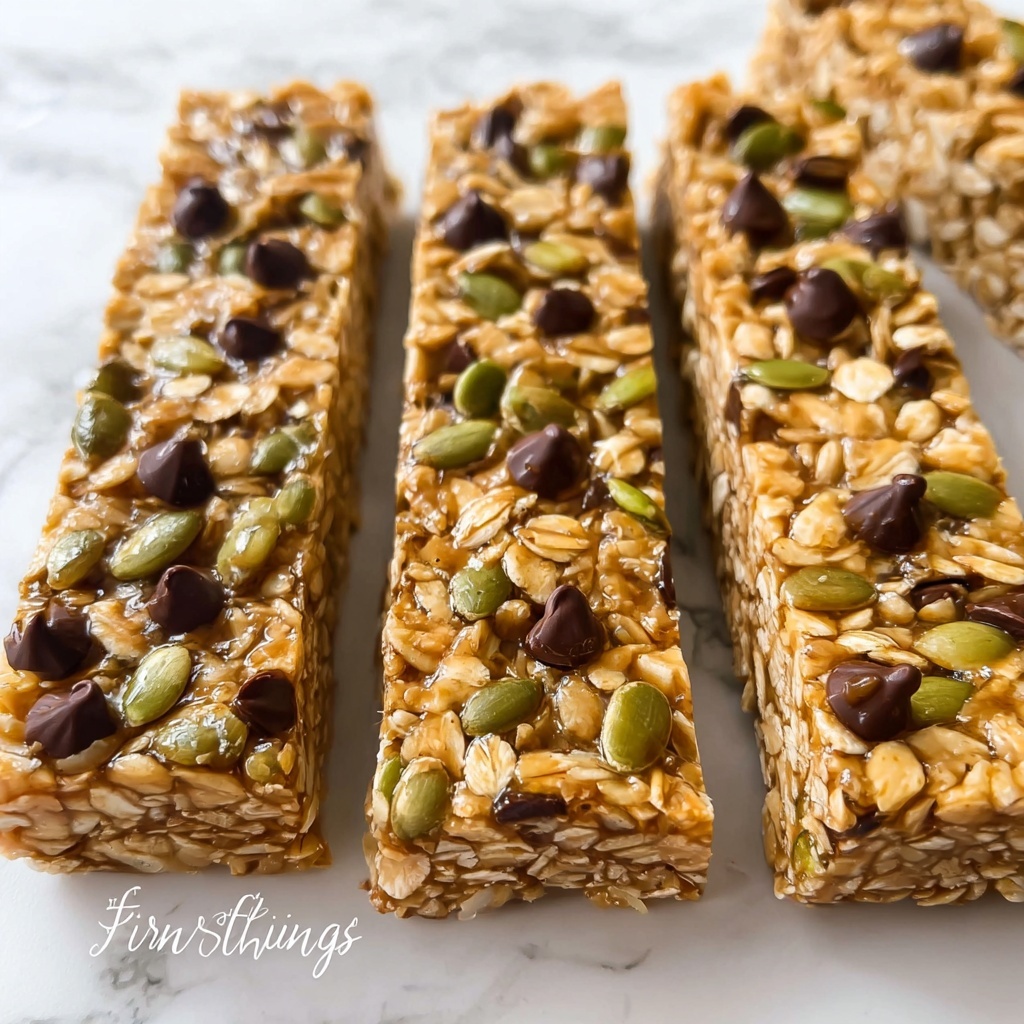
If you’re on the lookout for a snack that’s not only delicious but also quick and satisfying, let me introduce you to this Chewy 9-Minute Homemade Granola Bars Recipe. These bars strike the perfect balance between sweet and salty, with a comforting chewiness that will keep you coming back for more. Using simple ingredients like peanut butter, honey, oats, and a hint of vanilla, this recipe crafts wholesome bars that require minimal effort and zero baking. Whether you’re packing lunchboxes, prepping post-workout snacks, or just craving something delightful, these granola bars hit all the marks swiftly and effortlessly.
Ingredients You’ll Need
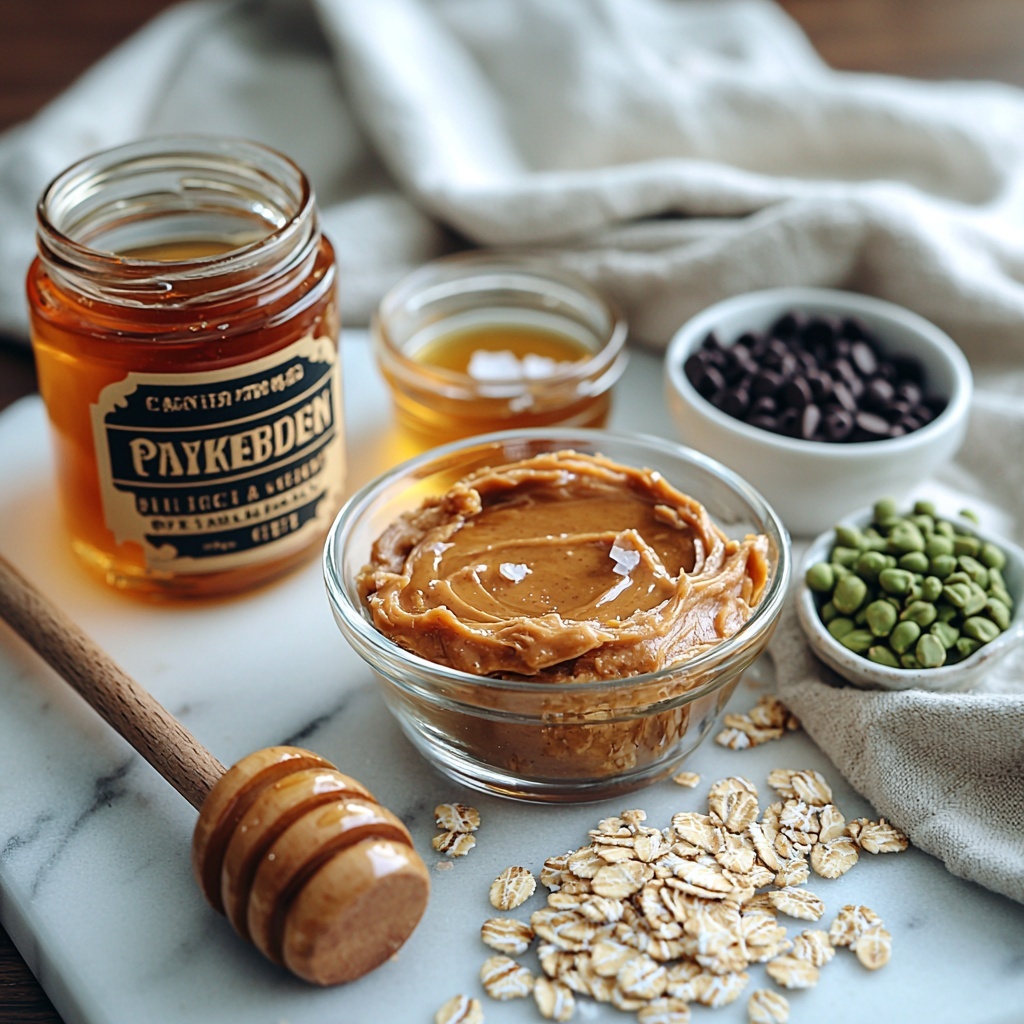
Gathering the right ingredients is key to nailing this recipe. Don’t worry, the list is short but each component plays a vital role in crafting the taste, texture, and that lovely golden color that makes these bars so inviting.
- 1 cup creamy peanut butter: Acts as a rich, binding base with natural creaminess and protein.
- ⅓ cup honey: Adds natural sweetness and helps hold everything together.
- 1 teaspoon vanilla extract: Infuses a warm, aromatic flavor that brightens the mixture.
- ½ teaspoon fine sea salt: Balances sweetness and enhances flavor depth.
- 2½ cups old fashioned rolled oats: Provides hearty texture and wholesome bite.
- ⅓ cup mini chocolate chips: Introduces bursts of melty chocolate that pair perfectly with peanut butter.
- 3 tablespoons pepitas: Adds subtle crunch and a nutty undertone for extra interest.
How to Make Chewy 9-Minute Homemade Granola Bars Recipe
Step 1: Prepare Your Pan
Start by lining an 8 by 8 inch baking pan with parchment paper. Don’t forget to leave some overhang on the sides; it makes lifting the bars out so much easier once they’re set. This simple step saves you a lot of mess and frustration later.
Step 2: Blend the Wet Ingredients
In a large bowl, combine the creamy peanut butter, honey, vanilla extract, and fine sea salt. Stir them together until the mixture is silky smooth and fully blended. This blend offers the perfect sweet and savory foundation that holds the granola bars together.
Step 3: Fold in the Dry Ingredients
Now add the old fashioned rolled oats, mini chocolate chips, and pepitas directly into your peanut butter mixture. These ingredients bring texture variety and subtle flavor surprises that elevate the bars from simple to sensational.
Step 4: Mix Until Evenly Combined
Stir the entire mixture thoroughly. You want every oat, chip, and pumpkin seed coated and held together by the peanut butter blend. It should start to feel firm and clump nicely, indicating the right consistency.
Step 5: Press into the Pan
Transfer this delicious mixture into your prepared pan. Spread it evenly across the surface, making sure there are no gaps or air pockets. A smooth top ensures uniform bars once set.
Step 6: Compact the Mixture
Place another sheet of parchment paper on top and press down firmly using the back of a measuring cup or a similar flat utensil. Compacting the mixture tightly is essential to get that perfect chewy texture.
Step 7: Chill Until Firm
Pop the pan into the refrigerator and let it rest for at least 1 hour. This chilling time allows the bars to set properly without any baking, transforming them into a chewy, sliceable treat that holds its shape.
Step 8: Slice and Enjoy
Once firm, use the parchment paper overhang to lift the whole block from the pan. Place it on a cutting board and slice into eight generous bars. Now you have ready-to-go snacks that satisfy any time of day.
How to Serve Chewy 9-Minute Homemade Granola Bars Recipe
Garnishes
If you want to add a special touch when serving, consider sprinkling a few extra pepitas or mini chocolate chips on top just before chilling. A light dusting of cinnamon or a drizzle of melted dark chocolate can also elevate these bars for a fancy snack time.
Side Dishes
These granola bars pair wonderfully with a cold glass of milk or a warm cup of coffee or tea. They also complement fresh fruit beautifully—think crisp apple slices or juicy berries for a wholesome and balanced snack experience.
Creative Ways to Present
For gifting or parties, wrap individual bars in parchment paper tied with twine, or place them in cute mason jars layered with yogurt and fruit for a grab-and-go breakfast parfait. Serving them alongside a nut butter dip or a drizzle of honey can make your snack spread even more inviting.
Make Ahead and Storage
Storing Leftovers
These bars keep nicely stored in an airtight container at room temperature for up to a week. Keeping them sealed preserves their chewiness and prevents them from drying out. For longer storage, the refrigerator is also a great option.
Freezing
If you want to stock up, wrap each bar tightly in plastic wrap and place them in a freezer-safe bag or container. They freeze well for up to 3 months and thaw quickly when you’re ready to enjoy a nutritious snack.
Reheating
These granola bars are delicious straight from the fridge or freezer, but if you prefer them warmer, a 10-15 second zap in the microwave softens them up without melting the chocolate chips completely—just enough to enhance their chewiness and aroma.
FAQs
Can I substitute the peanut butter?
Absolutely! You can replace peanut butter with almond butter, cashew butter, or sunflower seed butter to suit your taste or dietary needs. Just make sure the substitute is creamy to help bind the bars properly.
Are these granola bars gluten-free?
They can be, as long as you use certified gluten-free rolled oats. Always check your oats packaging if gluten is a concern to ensure safety and avoid cross-contamination.
Can I add other mix-ins like dried fruit or nuts?
Yes! Feel free to get creative with dried cranberries, raisins, chopped nuts, or seeds. Just remember to keep the total dry ingredients roughly the same to maintain the right texture and chew.
Do I have to refrigerate the bars?
If your kitchen is warm or you want a firmer texture, refrigeration is best. However, in cooler climates or air-conditioned spaces, keeping them at room temperature in an airtight container works well too.
Can I make these bars without chocolate chips?
Of course! The chocolate chips add a delightful sweetness, but swapping them for extra pepitas, nuts, or even shredded coconut will still result in tasty and satisfying bars.
Final Thoughts
These Chewy 9-Minute Homemade Granola Bars Recipe are a total game-changer for quick, wholesome snacks that taste like a treat. Easy to make, adaptable to your favorite ingredients, and perfectly chewy every time, they truly deserve a spot in your kitchen rotation. I encourage you to try making them today and enjoy how simple it is to create something so satisfying and delicious!
Print
Chewy 9-Minute Homemade Granola Bars Recipe
- Prep Time: 10 minutes
- Cook Time: 0 minutes
- Total Time: 1 hour 10 minutes
- Yield: 8 bars
- Category: Snack
- Method: No-Cook
- Cuisine: American
- Diet: Vegetarian
Description
These chewy homemade granola bars are simple, no-bake snacks packed with creamy peanut butter, honey, oats, chocolate chips, and pepitas. Ready in just 9 minutes of active prep plus chilling time, they’re perfect for a quick, wholesome treat or breakfast on the go.
Ingredients
Wet Ingredients
- 1 cup creamy peanut butter
- ⅓ cup honey
- 1 teaspoon vanilla extract
- ½ teaspoon fine sea salt
Dry Ingredients
- 2½ cups old fashioned rolled oats
- ⅓ cup mini chocolate chips
- 3 tablespoons pepitas
Instructions
- Prepare the Pan: Line an 8 by 8 inch baking pan with parchment paper, leaving an overhang on the sides for easy removal of the bars later.
- Combine Wet Ingredients: In a large bowl, stir together the creamy peanut butter, honey, vanilla extract, and fine sea salt until the mixture is smooth and fully combined.
- Add Dry Ingredients: Add the rolled oats, mini chocolate chips, and pepitas to the wet mixture in the bowl.
- Mix Thoroughly: Stir all ingredients thoroughly until the mixture is evenly combined and begins to hold together well.
- Transfer to Pan: Transfer the sticky mixture into the prepared baking pan and spread it out evenly.
- Press Firmly: Place a sheet of parchment paper on top of the mixture and press down firmly using the back of a measuring cup to compact the mixture into a solid layer.
- Chill: Refrigerate the pan for at least 1 hour to allow the bars to firm up properly.
- Slice and Serve: Once firm, lift the mixture out of the pan using the parchment overhang and slice into 8 bars.
Notes
- Store bars in an airtight container in the refrigerator for up to one week or freeze for longer storage.
- You can substitute almond butter or sunflower seed butter for peanut butter to suit allergies.
- Add other mix-ins like dried fruit or nuts for variety.
- Pressing the mixture firmly is key to ensuring the bars hold together well after slicing.
