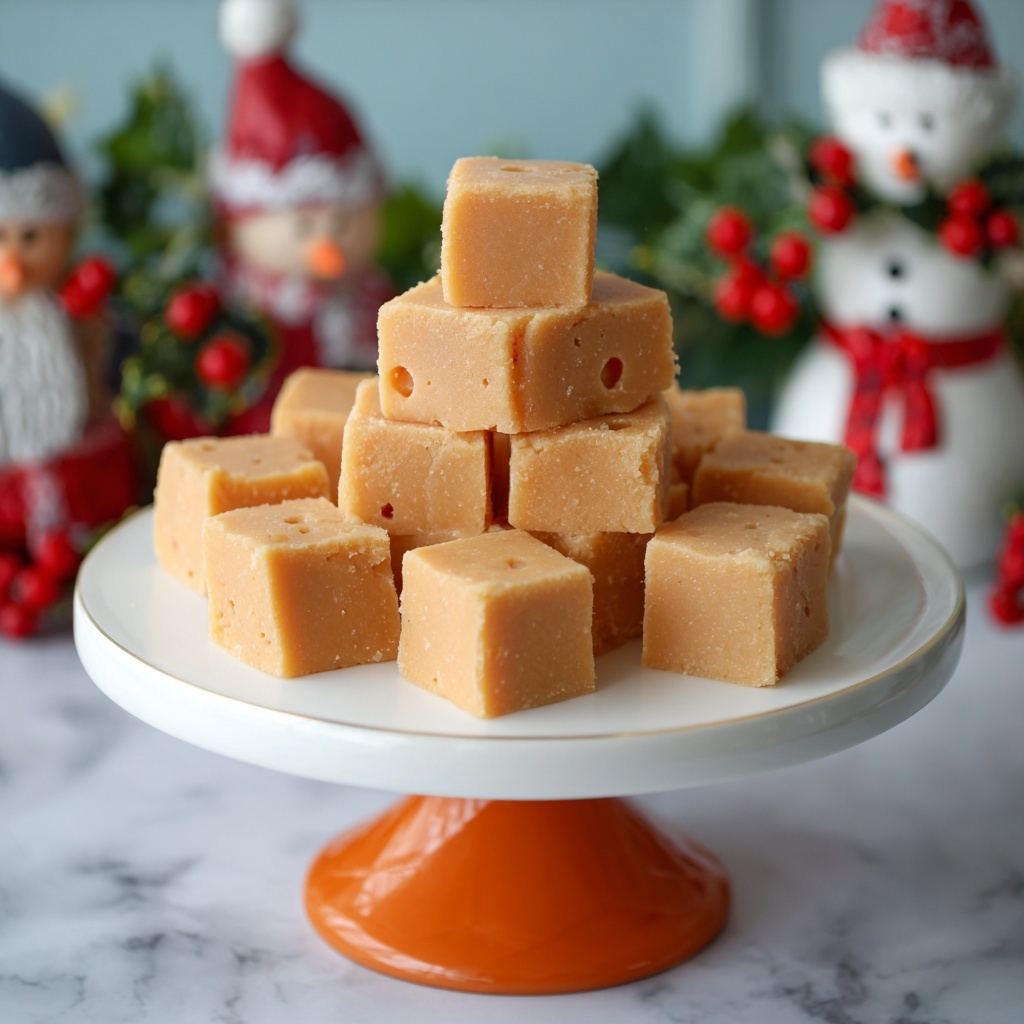
If you have a sweet tooth that longs for something creamy, rich, and utterly addictive, then this Biscoff Fudge Recipe is about to become your new obsession. Combining the unique caramelized flavor of Biscoff spread with the classic smoothness of fudge, this delightful treat brings a perfect balance of buttery sweetness and melt-in-your-mouth texture. Whether you’re making it for a festive gathering or a cozy night in, this fudge is guaranteed to wow your friends and family with every bite.
Ingredients You’ll Need
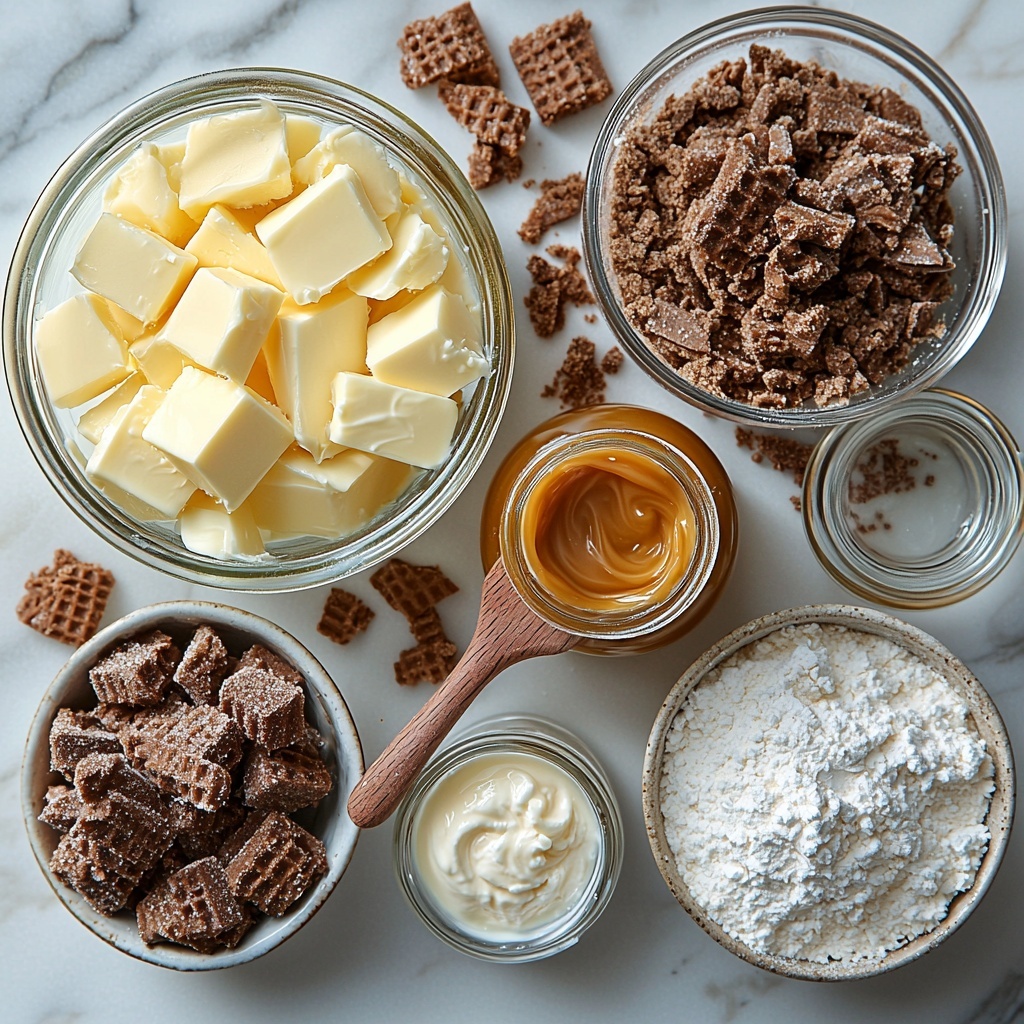
Getting the ingredients right is the first step to creating the perfect batch of fudge. Each component in this Biscoff Fudge Recipe plays an essential role—whether it’s the butter for creaminess, the brown sugar for depth, or the Biscoff spread to provide that signature flavor everyone loves.
- Butter (1 cup): Provides richness and helps achieve that silky smooth texture.
- Brown sugar (2 cups): Adds caramel undertones and depth of flavor.
- Milk (½ cup): Balances the sweetness and lends creaminess to the mixture.
- Biscoff spread (1 cup, creamy): The star ingredient delivering that irresistible spiced caramel flavor.
- Vanilla extract (1 teaspoon): Enhances all the flavors for a well-rounded taste.
- Powdered sugar (3 cups): Sweetens and helps the fudge set with a smooth finish.
How to Make Biscoff Fudge Recipe
Step 1: Prepare Your Ingredients and Pan
Begin by measuring out the powdered sugar into a large mixing bowl and set it aside for now. Then, line an 8×8-inch pan with parchment paper, which ensures your fudge will come out easily and keep its perfect shape once chilled.
Step 2: Cook the Butter, Sugar, and Milk
In a medium saucepan, melt the butter over medium heat. Stir in the brown sugar and milk, then bring everything to a boil. Once boiling, let it continue to cook for 2 minutes while stirring frequently. This step creates the luscious base for your fudge and is key to getting the texture just right.
Step 3: Add Biscoff Spread and Vanilla
Remove the saucepan from heat and stir in the creamy Biscoff spread alongside the vanilla extract. Keep stirring until the Biscoff spread has completely melted and blended smoothly into the mixture—that beautiful caramel flavor is what sets this fudge apart.
Step 4: Combine with Powdered Sugar
Pour the hot buttery mixture over the powdered sugar and give it a good stir to start combining. Next, grab a hand mixer and blend the ingredients until the fudge batter is silky and free of lumps. This mixing step is crucial for achieving that classic fudge consistency everyone loves.
Step 5: Chill and Cut
Pour the smooth mixture evenly into your parchment-lined pan. Spread it out gently and place it in the fridge to chill for at least one hour or until firm. Once set, cut into one-inch squares and get ready to enjoy the creamy, dreamy bites of your homemade Biscoff Fudge Recipe.
How to Serve Biscoff Fudge Recipe
Garnishes
A little extra garnish turns your fudge into a charming treat. Sprinkle crushed Biscoff cookies on top for added crunch or a light dusting of powdered sugar for a snowy effect. You can even drizzle melted chocolate over the fudge for a decadent touch that contrasts beautifully with the caramel notes.
Side Dishes
This fudge pairs wonderfully with a strong cup of coffee or a rich hot chocolate, creating a cozy snack or dessert experience. You can also serve it alongside fresh fruit or nuts to add an interesting texture contrast, making each bite even more delightful.
Creative Ways to Present
Present your Biscoff Fudge Recipe on a decorative plate lined with doilies or in little cupcake liners to make sharing easy and stylish. For gifting, wrap pieces in wax paper tied with twine for a homemade touch that friends and family will adore. Personalized tags with the recipe name add that perfect finishing detail.
Make Ahead and Storage
Storing Leftovers
Store leftover fudge in an airtight container at room temperature or in the fridge for up to two weeks. Keeping it sealed prevents it from drying out, ensuring each piece stays soft and chewy.
Freezing
If you want to keep your fudge fresh for longer, freezing is a great option. Wrap individual pieces in plastic wrap and place them in a freezer-safe bag or container. When properly stored, the fudge will maintain its flavor and texture for up to three months.
Reheating
To enjoy frozen fudge, simply let it thaw at room temperature for about 30 minutes. Avoid microwaving to preserve the perfect creamy texture. If you want a slightly softer bite, let it sit at room temp for longer before serving.
FAQs
Can I use crunchy Biscoff spread instead of creamy?
While creamy Biscoff spread works best for smooth fudge, using crunchy Biscoff will add texture with little cookie bits. Just keep in mind it might slightly change the fudge’s texture and spread consistency.
Is it possible to lighten this fudge recipe?
This classic Biscoff Fudge Recipe is indulgently rich, but you can substitute half the butter for a lighter alternative like coconut oil. However, this will slightly alter the texture and flavor profile.
How long does the fudge take to set?
The fudge usually needs at least one hour in the fridge to become firm enough to cut. For best results, chill it for up to two hours for perfect slices that hold their shape.
Can I add nuts or other mix-ins?
Absolutely! Stirring in chopped nuts, mini chocolate chips, or even dried fruit before chilling adds extra flavor and texture to your Biscoff Fudge Recipe.
What’s the best pan size to use?
The recipe calls for an 8×8-inch pan to achieve the ideal fudge thickness, but you can adjust cooking and chilling times if using a different size. Just keep in mind thinner fudge will set faster and might be easier to cut into smaller squares.
Final Thoughts
I can’t recommend this Biscoff Fudge Recipe enough if you’re craving a sweet treat that’s easy to make but feels like a special indulgence. From the buttery base to the unique Biscoff flavor, every bite is pure joy. So grab your ingredients and get ready to impress yourself and everyone around you with this utterly scrumptious fudge!
Print
Biscoff Fudge Recipe
- Prep Time: 5 minutes
- Cook Time: 5 minutes
- Total Time: 10 minutes plus 1 hour chilling
- Yield: 64 pieces
- Category: Dessert
- Method: Stovetop
- Cuisine: American
Description
This rich and creamy Biscoff Fudge combines the beloved flavor of Biscoff spread with a smooth, buttery base for a decadent treat. Quick to prepare and chill, this fudge makes a perfect dessert or gift-worthy sweet snack.
Ingredients
Fudge Ingredients
- 1 cup butter
- 2 cups brown sugar
- ½ cup milk
- 1 cup Biscoff spread (creamy)
- 1 teaspoon vanilla extract
- 3 cups powdered sugar (confectioners)
Instructions
- Prepare Ingredients and Pan: Measure the powdered sugar into a large mixing bowl and set aside. Line an 8×8-inch pan with parchment paper to prevent sticking and ensure easy removal of the fudge.
- Melt Butter and Combine Sugar & Milk: In a medium saucepan, melt the butter over medium heat. Stir in the brown sugar and milk. Bring the mixture to a boil, then boil for 2 minutes while stirring frequently to fully combine and dissolve the sugar.
- Add Biscoff Spread and Vanilla: Remove the pan from heat. Add the Biscoff spread and vanilla extract, stirring until the spread is melted completely and fully incorporated into the mixture to infuse the fudge with its signature flavor.
- Combine with Powdered Sugar: Pour the hot mixture over the powdered sugar in the large bowl. Use a hand mixer to stir and beat the mixture until the fudge becomes smooth and well blended.
- Chill and Set: Pour the smooth fudge mixture into the prepared pan, spreading it evenly. Chill it in the refrigerator until firm, at least 1 hour. Once set, cut the fudge into one-inch squares to serve.
Notes
- Line the pan with parchment paper for easy removal and cleaner cuts.
- Boiling the sugar mixture briefly ensures proper consistency for fudge that sets well.
- Use a hand mixer to avoid lumps and achieve a creamy texture.
- Store fudge in an airtight container in the refrigerator to maintain freshness.
- For a twist, sprinkle chopped nuts or sea salt on top before chilling if desired.


