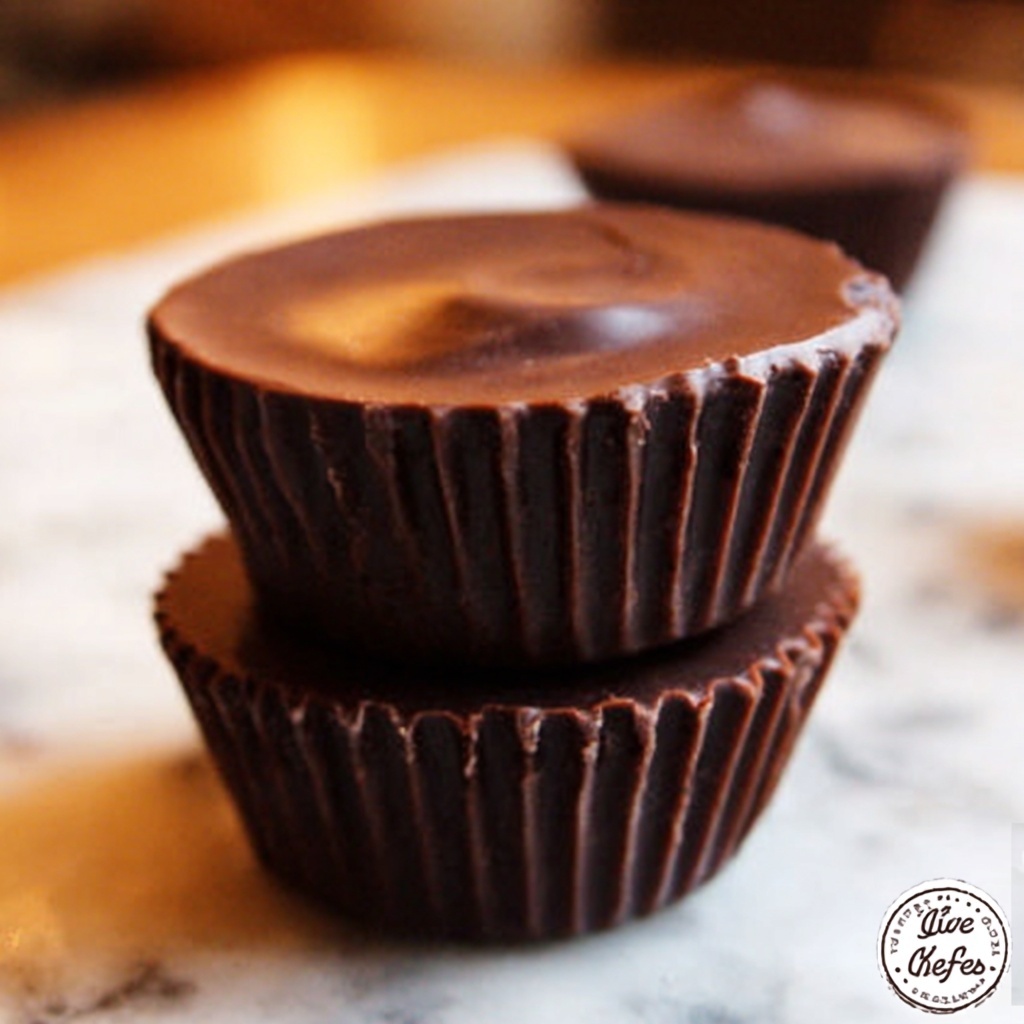
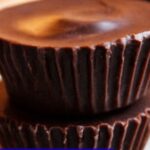
If you have a soft spot for the perfect treat that combines the rich, velvety taste of chocolate with the irresistible creaminess of peanut butter, then this Homemade Chocolate Peanut Butter Cups Recipe is about to become your new favorite. It’s an incredibly satisfying dessert that feels indulgent yet is surprisingly simple to make at home. Each bite offers that nostalgic mix of sweet and salty, smooth and slightly crumbly, all wrapped up in a glossy chocolate shell. Whether you want to impress friends with a thoughtful homemade gift or just treat yourself to a delightful snack, these cups bring joy with every mouthful.
Ingredients You’ll Need
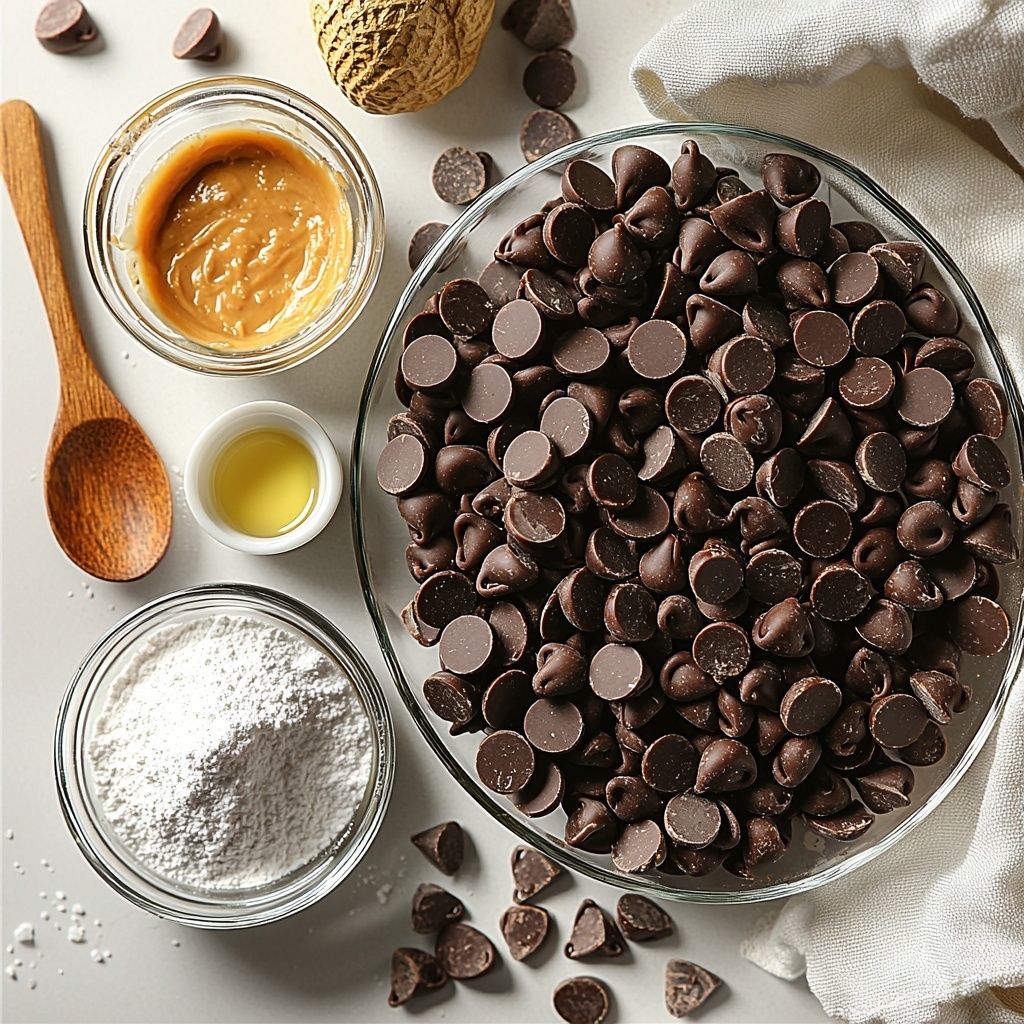
To make these Homemade Chocolate Peanut Butter Cups, you only need a handful of straightforward ingredients that come together beautifully. Each component is essential, whether it’s to create a silky chocolate coating, a smooth peanut butter filling, or to bring out the perfect texture and flavor balance.
- 16 ounces chocolate chips (divided): Choose high-quality chocolate for the best melting and flavor experience.
- 3 teaspoons coconut oil (divided, optional): Adds gloss and smoothness to the melted chocolate for an irresistible finish.
- ½ cup creamy peanut butter: Shelf-stable peanut butter works best to keep the filling firm and spreadable.
- ¼ cup powdered sugar: Sweetens and firms up the peanut butter filling to a perfect soft-dough texture.
- ½ teaspoon vanilla extract: Enhances the flavor depth of the peanut butter mixture with a subtle warmth.
- ¼ teaspoon table salt: Balances sweetness and elevates the overall taste of the filling.
How to Make Homemade Chocolate Peanut Butter Cups Recipe
Step 1: Prepare the Pan
Line a 6-cup muffin tin with silicone or paper liners, or use mini cupcake liners if you’d prefer smaller peanut butter cups. This setup keeps everything neat and makes removal a breeze once the cups have hardened.
Step 2: Assemble the Chocolate Base
Start by melting 1 cup of chocolate chips in a microwave-safe bowl. Heat in 30-second bursts, stirring well in between, until mostly melted but leaving a few chunks to finish melting with residual heat. Stir in 1 teaspoon of coconut oil to add a beautiful shine and smooth texture.
Step 3: Form the Chocolate Base
Carefully spoon about ½ tablespoon of the melted chocolate into each muffin cup, spreading it into a thin, even layer. Pop the tin into the fridge or freezer for 5 minutes to let the chocolate set firmly before adding the filling.
Step 4: Prepare Peanut Butter Filling
While the chocolate chills, whisk together the creamy peanut butter, powdered sugar, vanilla extract, and salt using a handheld mixer until the mixture becomes smooth and resembles soft cookie dough. If you use natural peanut butter, toss in 1-2 extra tablespoons of powdered sugar to get that perfect firmness.
Step 5: Shape Peanut Butter Discs
Once the chocolate base is ready, remove the muffin tin from the fridge and shape about 1 tablespoon of the peanut butter mixture into discs, slightly smaller than the bottom chocolate layer. Place each disc carefully on top of the hardened chocolate.
Step 6: Melt Remaining Chocolate
Next, melt the rest of the chocolate chips (1½ cups) in a clean bowl using the same microwave technique, stirring often. Add the remaining 2 teaspoons of coconut oil to keep it glossy and fluid for easy pouring.
Step 7: Cover Peanut Butter
Pour approximately 2 teaspoons of melted chocolate over each peanut butter disc, smoothing the tops with the back of a spoon. Allow the chocolate to drip down the sides, fully enveloping the filling in a luscious coat.
Step 8: Harden Peanut Butter Cups
Return the prepared tray to the fridge and chill for about an hour or use the freezer for 10-15 minutes to speed things up. When fully set, the peanut butter cups will hold their shape beautifully and boast a shiny, firm chocolate shell.
How to Serve Homemade Chocolate Peanut Butter Cups Recipe
Garnishes
While these cups are fantastic on their own, you can sprinkle a pinch of flaky sea salt or crushed roasted peanuts on top before the chocolate hardens for an added textural surprise and taste pop. Even a light drizzle of white chocolate can make them look extra special for gifting.
Side Dishes
Pair these sweet treats with a glass of cold milk, a warm cup of coffee, or even a rich hot cocoa. The contrast between the creamy peanut butter cups and a slightly bitter beverage is nothing short of dreamy. They also work wonderfully alongside fresh fruit for a balanced snack plate.
Creative Ways to Present
Try placing individual peanut butter cups in small decorative paper cups or clear boxes tied with a ribbon for thoughtful gifts. You can also arrange several on a dessert platter, garnished with chopped nuts and a dusting of cocoa powder, making a stunning centerpiece for parties.
Make Ahead and Storage
Storing Leftovers
Once your Homemade Chocolate Peanut Butter Cups have fully set, store them in an airtight container in the refrigerator. They will keep perfectly fresh for up to 5 days, maintaining both flavor and texture.
Freezing
You can freeze these delicious cups for longer storage. Place them in a freezer-safe container with parchment paper layers to prevent sticking. When stored this way, they can last for several weeks without any loss of quality.
Reheating
Allow frozen peanut butter cups to thaw in the refrigerator before serving, and then bring to room temperature for about 5-10 minutes for the best flavor and creaminess. Avoid microwaving, as it might cause the chocolate to seize or the filling to become too soft.
FAQs
Can I use natural peanut butter instead of creamy peanut butter?
Yes, natural peanut butter can be used, but it’s best to add an extra tablespoon or two of powdered sugar to thicken the filling since natural peanut butter tends to be looser and more oily.
Is coconut oil necessary?
While optional, coconut oil improves the melt and shine of the chocolate, giving the cups a beautiful glossy finish and smoother texture. It’s a small addition that makes a noticeable difference.
Can I make these peanut butter cups vegan?
Absolutely! Use dairy-free chocolate chips and ensure your peanut butter and powdered sugar are vegan-friendly. The recipe adapts nicely without sacrificing flavor.
How long do homemade peanut butter cups last?
Stored properly in the refrigerator, your homemade peanut butter cups will stay fresh and tasty for up to 5 days. For longer storage, freezing is a great option.
Can I add other flavors to the filling?
Definitely! For a fun twist, try mixing in a pinch of cinnamon, a dash of espresso powder, or even mini chocolate chips into the peanut butter filling. It’s a great way to customize your Homemade Chocolate Peanut Butter Cups Recipe.
Final Thoughts
This Homemade Chocolate Peanut Butter Cups Recipe captures the magic of a beloved candy in a homemade form that’s easy to make and utterly satisfying. Once you try making these at home, you’ll wonder why you ever bought store-bought versions. They’re perfect for sharing or indulging whenever you crave a sweet, nutty treat.
Print
Homemade Chocolate Peanut Butter Cups Recipe
- Prep Time: 20 minutes
- Cook Time: 15 minutes (including melting chocolate and chilling times)
- Total Time: 1 hour 10 minutes
- Yield: 12 peanut butter cups
- Category: Dessert
- Method: No-Cook
- Cuisine: American
Description
This homemade chocolate peanut butter cups recipe creates rich, creamy, and perfectly portioned treats combining smooth peanut butter filling encased in glossy layers of milk chocolate. Easy to make with simple ingredients, these peanut butter cups are ideal for snacking, gifting, or satisfying your sweet cravings with a delightful contrast of flavors and textures.
Ingredients
Chocolate Layers
- 16 ounces chocolate chips (divided; approximately 2½ cups)
- 3 teaspoons coconut oil (divided, optional)
Peanut Butter Filling
- ½ cup creamy peanut butter (shelf-stable preferred)
- ¼ cup powdered sugar
- ½ teaspoon vanilla extract
- ¼ teaspoon table salt
Instructions
- Prepare Pan: Line a 6-cup muffin tin with silicone or paper liners, or use 12-cup mini cupcake liners if you prefer smaller peanut butter cups.
- Assemble Chocolate Base: Place 1 cup of the chocolate chips into a heat-safe bowl. Microwave in 30-second increments, stirring after each interval until mostly melted but still with small chunks. Stir vigorously to fully melt with residual heat. Add 1 teaspoon coconut oil and stir until the chocolate is glossy and well combined.
- Form Chocolate Base: Spoon about ½ tablespoon of the melted chocolate into each muffin cup. Spread the chocolate thinly and evenly using the back of a spoon. Chill the muffin tin in the fridge or freezer for 5 minutes until the chocolate hardens.
- Prepare Peanut Butter Filling: While the chocolate sets, mix the creamy peanut butter, powdered sugar, vanilla extract, and salt together in a medium bowl using a handheld mixer on medium speed until smooth and well combined. If using natural peanut butter, add 1-2 tablespoons more powdered sugar to achieve a firmer consistency that can be shaped like soft dough.
- Shape Peanut Butter Discs: Remove the muffin tin from the fridge or freezer. Using about 1 tablespoon of the peanut butter mixture per cup, shape each into a small disc slightly smaller than the chocolate base layer. Gently place each disc inside the muffin cup on top of the hardened chocolate layer.
- Melt Remaining Chocolate: Put the remaining 1½ cups chocolate chips into a clean heat-safe bowl. Microwave in 30-second intervals, stirring well between each until mostly melted with a few solid chunks. Stir thoroughly to finish melting. Add the remaining 2 teaspoons coconut oil and stir until smooth and glossy.
- Cover Peanut Butter: Pour about 2 teaspoons of the melted chocolate over each peanut butter disc, smoothing it with the back of a spoon and letting some chocolate drip down the sides, fully encasing the peanut butter center.
- Harden Peanut Butter Cups: Return the muffin tin to the refrigerator to harden for about 1 hour, or place in the freezer for 10-15 minutes to speed up the setting process.
- Store and Serve: Once hardened, remove the peanut butter cups from the muffin tin and liners if preferred. Store them in an airtight container in the refrigerator for up to 5 days. For the best flavor and texture, let them sit at room temperature for 5-10 minutes before eating.
Notes
- Using shelf-stable peanut butter helps the filling hold shape better.
- If natural peanut butter is used, increase powdered sugar to achieve proper consistency.
- Allowing peanut butter cups to sit at room temperature before serving enhances flavor and texture.
- Silicone liners make it easier to remove cups without breaking.
- Chocolate can be melted using a double boiler instead of microwave if preferred.