
If you have a soft spot for nostalgic treats and crave the perfect balance of chewy cookie and sweet filling, then you are going to adore this Brown Sugar Pop Tart Cookies: The Ultimate Recipe & Baking Guide Recipe. Imagine a pop tart reimagined into a cookie sandwich, bursting with rich brown sugar filling, a hint of cinnamon, and topped with a glossy glaze sprinkled with your favorite colorful accents. It’s buttery, cozy, and downright irresistible—a treat that will have your kitchen smelling like warm comfort and leave everyone asking for more.
Ingredients You’ll Need
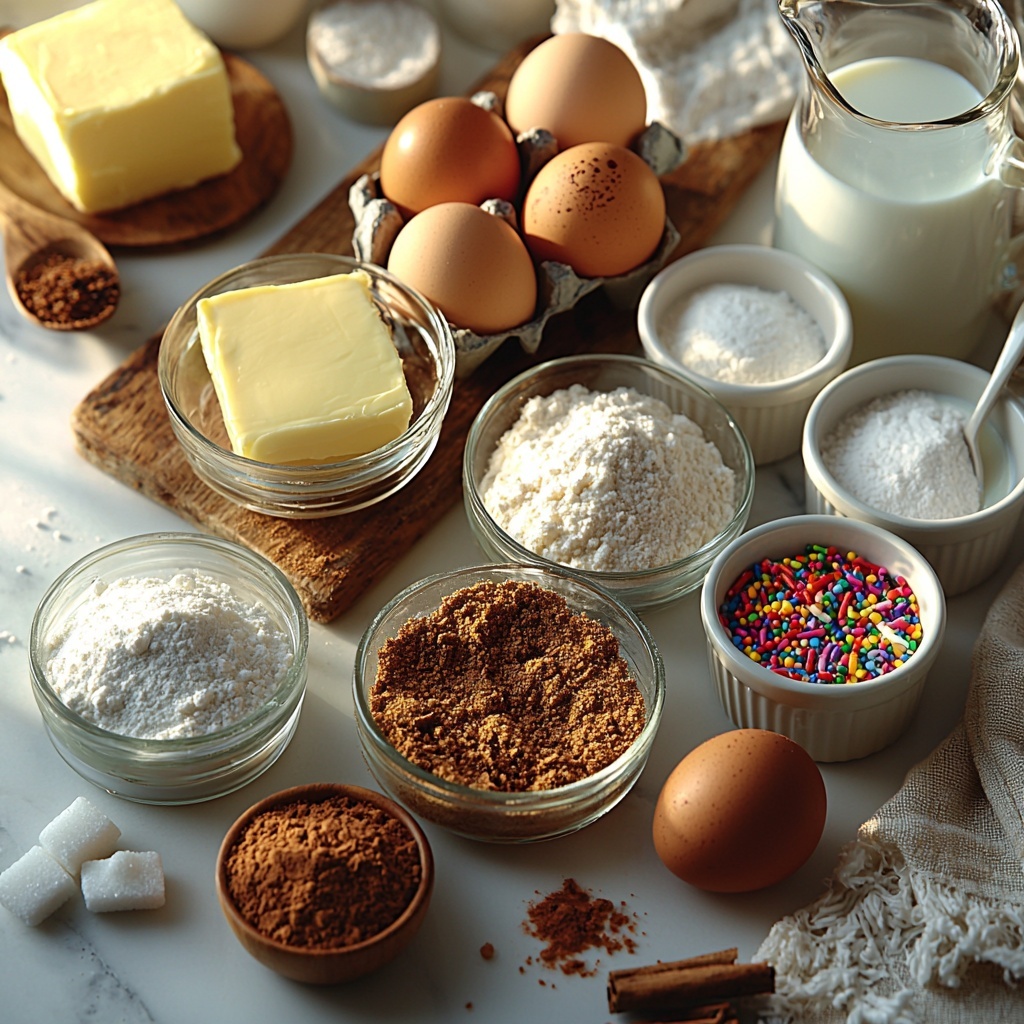
This recipe calls for simple, pantry-friendly ingredients that come together to create something truly special. Each element plays a key role: the flour and leaveners build the cookie’s structure, the sugars add sweetness and moisture, while butter ensures tender crumb and flavor depth.
- 2 1/4 cups (281g) all-purpose flour: The foundation that gives structure and texture to the cookies.
- 1 teaspoon baking powder: Helps the cookies rise just the right amount for a tender bite.
- 1/2 teaspoon baking soda: Works with baking powder to create the perfect crumb.
- 1/4 teaspoon salt: Enhances the sweetness and balances flavors beautifully.
- 1 cup (2 sticks, 226g) unsalted butter, softened: Adds richness and melt-in-your-mouth texture.
- 3/4 cup (150g) granulated sugar: Provides sweetness and a bit of crunch to the cookies.
- 3/4 cup (165g) packed light brown sugar: Brings a lovely molasses undertone that’s essential for the signature flavor.
- 2 large eggs: Bind everything together and keep the cookies soft.
- 1 teaspoon vanilla extract: Infuses warm, fragrant notes into the dough.
- 1 cup (200g) packed light brown sugar (for filling): The star of the filling—deep, caramel-like sweetness.
- 1/4 cup (57g) unsalted butter, softened (for filling): Adds creaminess and smooth texture to the filling.
- 2 tablespoons all-purpose flour (for filling): Gives the filling slight thickness and stability.
- 1 tablespoon milk (for filling): Softens and loosens the filling to perfect spreadability.
- 1/2 teaspoon vanilla extract (for filling): Enhances the filling’s warmth and complexity.
- 1/4 teaspoon ground cinnamon (for filling): A hint of spice that perfectly complements the brown sugar.
- Pinch of salt (for filling): Balances sweetness and highlights flavors.
- 1 cup (120g) powdered sugar (for glaze): Creates a smooth, sweet drizzle for finishing touches.
- 2-3 tablespoons milk (for glaze), or more as needed: Adjusts glaze consistency for easy drizzling.
- 1/2 teaspoon vanilla extract (for glaze): Adds an extra layer of fragrant sweetness.
- Your favorite sprinkles for decorating: Fun, colorful toppings that make these cookies irresistible and festive.
How to Make Brown Sugar Pop Tart Cookies: The Ultimate Recipe & Baking Guide Recipe
Step 1: Combine Dry Ingredients
Start by whisking together the flour, baking powder, baking soda, and salt in a medium bowl. This pre-mixing ensures that the leavening agents are evenly distributed throughout the dough, giving your cookies an even rise and texture.
Step 2: Cream Butter and Sugars
In a large bowl or stand mixer, beat the softened butter with both granulated sugar and light brown sugar until the mixture is light and fluffy—this usually takes about 3 to 5 minutes. This step is crucial because it incorporates air, resulting in lighter, tender cookies. Remember to scrape down the sides occasionally to ensure even creaming.
Step 3: Add Eggs and Vanilla
Beat in the eggs one at a time, mixing thoroughly after each addition. Then stir in the vanilla extract. These ingredients enrich the dough and help bind everything together for that perfect chew.
Step 4: Gradually Add Dry Ingredients
Slowly incorporate the flour mixture into the wet ingredients, mixing on low speed just until combined. Overmixing will develop gluten and make your cookies tough, so stop mixing as soon as you see no streaks of flour.
Step 5: Chill the Dough
Divide the dough in half and flatten each portion into a disc. Wrap them tightly in plastic wrap and refrigerate for at least one hour, but ideally two hours. Chilling firms up the dough, making it easier to roll and helping prevent the cookies from spreading too much while baking.
Step 6: Make the Filling
While your dough chills, combine the filling ingredients—brown sugar, softened butter, flour, milk, vanilla extract, cinnamon, and a pinch of salt—in a medium bowl. Mix until smooth and paste-like. This filling is what sets these cookies apart with its gooey, cinnamon-kissed caramel goodness.
Step 7: Preheat Oven and Prepare Baking Sheets
Set your oven to 375°F (190°C) and line two baking sheets with parchment paper. Proper prep here ensures your cookies bake evenly without sticking.
Step 8: Roll Out the Dough
On a lightly floured surface, roll one dough disc out to about 1/8 inch thickness. Use a 3-inch cookie cutter to cut out cookies. Be sure to reroll scraps to maximize your yield without sacrificing texture.
Step 9: Assemble the Cookies
Place half of the cut cookies on your baking sheets. Spoon about 1 tablespoon of the brown sugar filling onto the center of each cookie, leaving a small border so the filling doesn’t ooze out while baking.
Step 10: Top and Seal
Roll out the second dough disc and cut matching cookies. Carefully place one cookie on top of each filled one, gently pressing edges to seal. Use a fork to crimp the edges for a pretty, decorative finish and to ensure they stay sealed during baking.
Step 11: Bake the Cookies
Bake for 8 to 10 minutes, or until the edges turn lightly golden brown. This timing ensures the cookies are baked through but still soft and chewy in the middle.
Step 12: Cool the Cookies
Allow the cookies to cool on the baking sheets for a few minutes before transferring to a wire rack. Cooling on the rack prevents sogginess and keeps the edges crisp.
Step 13: Prepare the Glaze
Whisk together powdered sugar, milk, and vanilla extract until smooth. Adjust the glaze consistency with more milk if needed until it’s perfect for drizzling.
Step 14: Glaze the Cookies
Once the cookies are completely cool, drizzle the glaze generously over the tops. This sweet finish adds a delightful shine and extra sweetness to every bite.
Step 15: Add Sprinkles (Optional)
Sprinkle your favorite colorful decorations immediately after glazing to allow them to stick before the glaze sets. It’s a playful touch that makes these cookies perfect for any celebration or just brightening up a regular day.
Step 16: Let the Glaze Set
Allow about 30 minutes to an hour for the glaze to harden before serving or storing. This ensures the glaze won’t smudge and gives the cookies a beautiful presentation.
How to Serve Brown Sugar Pop Tart Cookies: The Ultimate Recipe & Baking Guide Recipe
Garnishes
While the glaze and sprinkles are delightful, you can elevate these cookies further with a light dusting of cinnamon sugar or a sprinkle of coarse sea salt to contrast the sweetness. Fresh mint leaves served alongside can add a surprising freshness that complements the warm flavors.
Side Dishes
Serve these Brown Sugar Pop Tart Cookies alongside a chilled glass of milk, a warm cup of coffee, or a frothy chai latte to balance the sweetness and bring extra comfort to your snack or dessert time.
Creative Ways to Present
Want to impress at your next gathering? Arrange these cookies beautifully on a rustic wooden platter or tiered dessert tray. Add colorful napkins or a sprinkle of edible glitter for a magical touch. You could even turn them into mini dessert sandwiches by pairing them with a scoop of vanilla ice cream for an elevated treat.
Make Ahead and Storage
Storing Leftovers
After the glaze has fully set, store your Brown Sugar Pop Tart Cookies in an airtight container at room temperature. They will stay fresh and delicious for 3 to 4 days. This timeframe keeps the cookies soft while maintaining that irresistible filling texture.
Freezing
If you want to keep these cookies longer, you can freeze them after glazing. Place them between sheets of parchment paper in a freezer-safe container or bag. They’ll keep well for up to 2 months. Just thaw at room temperature for several hours before serving.
Reheating
To enjoy these cookies warm (and who wouldn’t?), reheat them gently in a microwave for about 10 to 15 seconds or in a preheated oven at 300°F (150°C) for 5 minutes. Reheating breathes life back into the soft filling and buttery cookie while preserving the glaze’s lovely texture.
FAQs
Can I substitute the all-purpose flour with gluten-free flour?
Yes, you can substitute a gluten-free all-purpose flour blend that contains xanthan gum for structure. However, texture might slightly differ, and it may be a good idea to chill the dough a bit longer to prevent spreading.
Is it necessary to chill the dough? What happens if I skip this step?
Chilling the dough is important to keep the cookies from spreading too much during baking, which helps maintain their shape and texture. Skipping this step might result in thinner, crispier cookies rather than soft, chewy ones.
Can I prepare the filling ahead of time?
Absolutely! The filling can be made up to two days in advance and stored tightly covered in the refrigerator. Bring it to room temperature before assembling to make spreading easier.
Are these cookies suitable for making ahead for a party?
Yes! You can bake the cookies and glaze them a day ahead. Just store them in an airtight container at room temperature, and they will stay fresh and delicious for 3 to 4 days.
Can I use different sprinkles or toppings?
Definitely! Feel free to customize with your favorite sprinkles, edible pearls, or even crushed nuts to add texture and personality to your Brown Sugar Pop Tart Cookies. The sky’s the limit!
Final Thoughts
If you’re looking for a show-stopping twist on classic cookies that will wow friends and family, this Brown Sugar Pop Tart Cookies: The Ultimate Recipe & Baking Guide Recipe is the perfect pick. From the rich, aromatic filling to the tender, flaky dough and sparkling glaze, every bite is pure joy. So go ahead—try this recipe, and let your kitchen fill with warmth and sweet memories.
Print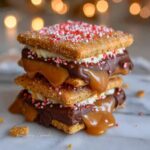
Brown Sugar Pop Tart Cookies: The Ultimate Recipe & Baking Guide Recipe
- Prep Time: 30 minutes
- Cook Time: 10 minutes
- Total Time: 2 hours 40 minutes
- Yield: 24 cookie sandwiches
- Category: Dessert
- Method: Baking
- Cuisine: American
Description
Delight in these indulgent Brown Sugar Pop Tart Cookies, a heavenly twist on classic pop tarts featuring a buttery, tender cookie exterior filled with a rich brown sugar cinnamon filling, topped with a sweet vanilla glaze and festive sprinkles. Perfect for a nostalgic treat or a special dessert to share.
Ingredients
Cookie Dough
- 2 1/4 cups (281g) all-purpose flour, plus more for dusting
- 1 teaspoon baking powder
- 1/2 teaspoon baking soda
- 1/4 teaspoon salt
- 1 cup (2 sticks, 226g) unsalted butter, softened
- 3/4 cup (150g) granulated sugar
- 3/4 cup (165g) packed light brown sugar
- 2 large eggs
- 1 teaspoon vanilla extract
Brown Sugar Filling
- 1 cup (200g) packed light brown sugar
- 1/4 cup (57g) unsalted butter, softened
- 2 tablespoons all-purpose flour
- 1 tablespoon milk
- 1/2 teaspoon vanilla extract
- 1/4 teaspoon ground cinnamon
- Pinch of salt
Vanilla Glaze
- 1 cup (120g) powdered sugar
- 2–3 tablespoons milk, or more as needed
- 1/2 teaspoon vanilla extract
- Your favorite sprinkles for decorating
Instructions
- Combine Dry Ingredients: In a medium bowl, whisk together the flour, baking powder, baking soda, and salt until well blended. Set aside for later use.
- Cream Butter and Sugars: Using a large bowl or stand mixer, beat the softened butter, granulated sugar, and brown sugar together until the mixture is light and fluffy, about 3-5 minutes. Scrape down the sides of the bowl to ensure even mixing.
- Add Eggs and Vanilla: Add the eggs one at a time to the creamed butter mixture, beating well after each addition. Stir in the vanilla extract until fully incorporated.
- Gradually Add Dry Ingredients: Slowly add the bowl of dry ingredients to the wet ingredients, mixing on low speed just until combined. Avoid overmixing to keep the dough tender.
- Chill the Dough: Divide the dough into two equal portions, flatten each into a disc shape. Wrap each disc tightly with plastic wrap and refrigerate for at least 1 hour, preferably 2 hours, to firm up.
- Combine Filling Ingredients: In a medium bowl, mix together the brown sugar, softened butter, flour, milk, vanilla extract, ground cinnamon, and a pinch of salt until you achieve a smooth, paste-like consistency perfect for filling.
- Preheat Oven and Prepare Baking Sheets: Preheat the oven to 375°F (190°C). Line two baking sheets with parchment paper to prevent sticking and ease cleanup.
- Roll Out the Dough: On a lightly floured surface, roll out one chilled dough disc to approximately 1/8 inch thickness. Use a 3-inch cookie cutter to cut out as many cookies as possible. Collect scraps to reroll and cut additional cookies.
- Assemble the Cookies: Arrange half of the cookie cutouts on prepared baking sheets. Spoon about 1 tablespoon of the brown sugar filling onto the center of each, leaving a small border around the edges free of filling.
- Top with Second Cookie: Roll out the second disc of chilled dough and cut out cookies similarly. Carefully place each cookie on top of the filled ones, pressing gently around the edges to seal. Crimp edges with a fork for a decorative finish and secure seal.
- Bake the Cookies: Bake the assembled cookies in the preheated oven for 8-10 minutes, or until the edges turn a light golden brown, indicating doneness.
- Cool the Cookies: Allow cookies to cool on the baking sheets for a few minutes before transferring them to a wire rack to cool completely, preventing sogginess.
- Prepare the Glaze: In a small bowl, whisk together powdered sugar, milk, and vanilla extract until smooth. Add more milk one teaspoon at a time if needed to reach a drizzling consistency.
- Glaze the Cookies: Once the cookies are fully cooled, drizzle the vanilla glaze over each cookie evenly for a sweet finish.
- Add Sprinkles (Optional): Immediately after glazing, sprinkle your favorite colorful sprinkles on top before the glaze sets for added texture and festive appearance.
- Let the Glaze Set: Allow the glazed cookies to sit at room temperature for 30 minutes to 1 hour, letting the glaze fully harden before serving or storing.
Notes
- Do not overmix the dough once the dry ingredients are added to keep cookies tender and flaky.
- Chilling the dough is crucial for easy handling and preventing excessive spreading during baking.
- For best results, use room temperature eggs and butter to ensure proper creaming and dough consistency.
- You can substitute whole milk for regular milk in the filling and glaze if desired.
- Store cookies in an airtight container at room temperature for up to 5 days, or freeze for longer storage.
- Use parchment paper or silicone baking mats on your baking sheets to prevent sticking and aid cleanup.
