
“`html
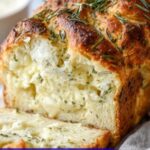
If you are craving a warm, irresistible treat that combines gooey cheese, fragrant herbs, and a delightful garlic punch, look no further than the Cheesy Herb Garlic Bread Squares Recipe. This dish transforms simple bread into a show-stopping centerpiece perfect for sharing with friends or family, full of melty mozzarella, cheddar, and parmesan cheeses layered with fresh parsley and chives. Every bite bursts with flavor and a perfect balance of savory notes that will make you want to savor this comforting bread again and again.
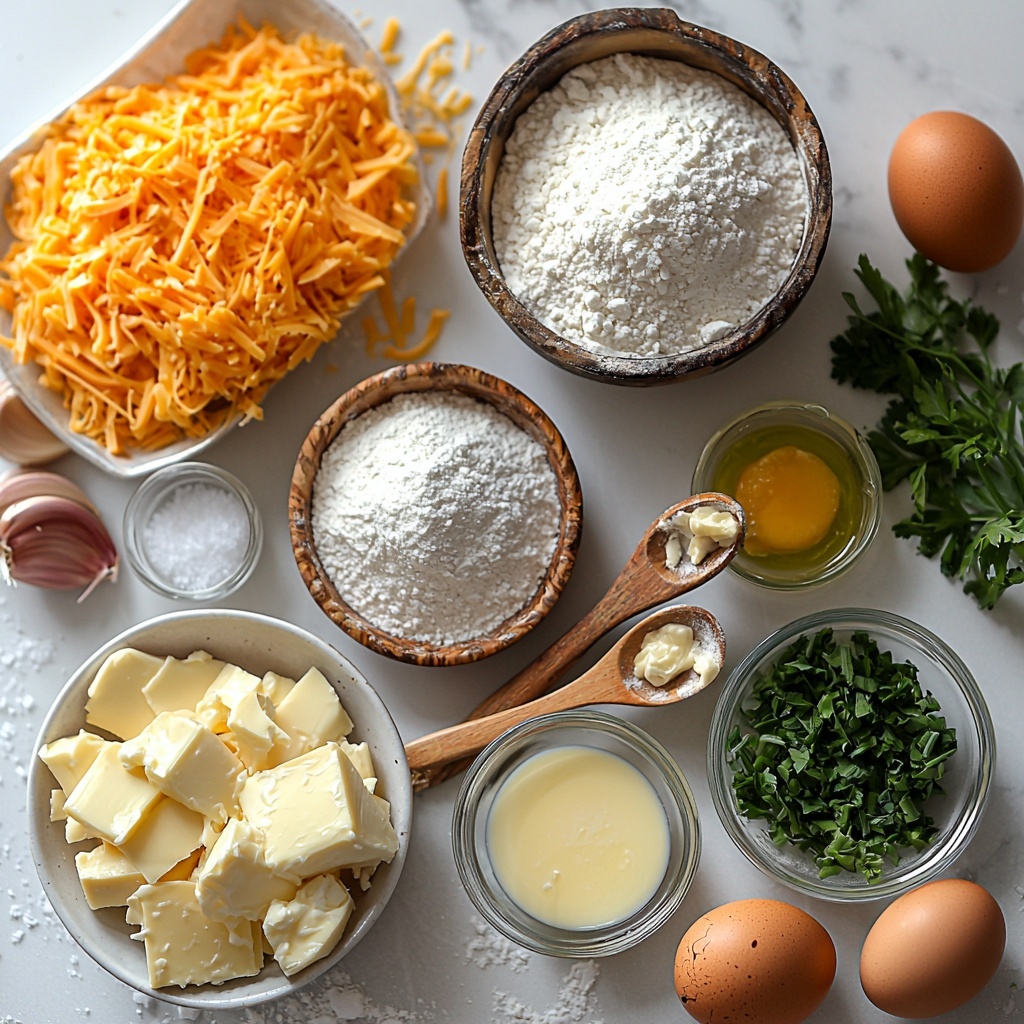
Ingredients You’ll Need
The magic of the Cheesy Herb Garlic Bread Squares Recipe comes from a handful of wholesome ingredients, each chosen to contribute to the dough’s tender texture, the rich cheesy flavor, and the vibrant herbaceous freshness that make these squares so addictive.
- 3½ cups all-purpose flour: The foundation of your bread, providing structure and a soft crumb.
- 1 tablespoon sugar: Just enough sweetness to enhance the yeast’s activity without overpowering the savory cheese blend.
- 1½ teaspoons salt: Balances flavors and strengthens the dough.
- 2¼ teaspoons instant dry yeast: The essential leavening agent that helps your bread rise beautifully.
- ¾ cup whole milk: Adds richness and tenderness to the dough.
- ¼ cup water: Hydrates the flour helping to develop gluten.
- 2 tablespoons unsalted butter, melted: Imparts richness and a delicate crumb.
- 2 eggs: Bind the ingredients and add moistness to the dough.
- 1½ cups shredded mozzarella cheese: Melts into that gooey, stretchy texture everyone loves.
- 1 cup grated cheddar cheese: Adds sharpness and depth of flavor.
- ¼ cup grated parmesan cheese: Brings a nutty, salty kick to the cheesy trio.
- 3 cloves garlic, minced: Packs a punch of savory aroma that infuses the bread.
- 3 tablespoons chopped fresh parsley: Freshness and bright color to balance the richness.
- 2 tablespoons chopped fresh chives: Adds a mild onion flavor that complements garlic perfectly.
- 3 tablespoons olive oil: Used to create a flavorful garlic herb brush to coat the dough.
- Salt and pepper to taste: Enhances all the layers of flavor.
How to Make Cheesy Herb Garlic Bread Squares Recipe
Step 1: Mix the Dry Ingredients
Start by whisking together the all-purpose flour, sugar, salt, and instant dry yeast in a large bowl. This ensures your dry ingredients are evenly combined before adding the liquids, setting the stage for a perfectly textured dough.
Step 2: Prepare the Wet Ingredients
Warm the whole milk, water, and melted butter until just warm to the touch—avoid overheating, as this could kill the yeast. Add the eggs to this warm mixture, then pour it into the bowl with the dry ingredients, mixing gently until a soft dough forms.
Step 3: Knead the Dough
Turn the dough onto a lightly floured surface and knead it for about 8 to 10 minutes. This process develops the gluten network, giving your bread structure and elasticity while ensuring it becomes smooth and supple.
Step 4: First Rise
Place the dough into a lightly oiled bowl, cover it with a clean cloth, and let it rise in a warm spot for 1 hour or until it has doubled in size. This step is crucial for a light, airy crumb in your bread squares.
Step 5: Prepare the Garlic Herb Oil
In a small bowl, combine the minced garlic, chopped parsley, chives, olive oil, and a pinch of salt and pepper. This fragrant mixture will be brushed onto the dough to infuse it with rich, herbal garlic flavor that will bake into every bite.
Step 6: Roll, Brush, and Layer
Once the dough has risen, punch it down gently and roll it out on a lightly floured surface into a large rectangle. Brush the entire surface evenly with the garlic herb oil, then sprinkle the shredded mozzarella, cheddar, and parmesan cheeses generously on top.
Step 7: Cut and Stack
Cut the cheesy dough into squares, then stack these squares upright inside a greased loaf pan. This stacking method creates layers that pull apart beautifully after baking. Cover the pan and allow the dough to rise again for 30 to 40 minutes, letting those flavors meld together perfectly.
Step 8: Bake to Golden Perfection
Preheat your oven to 350°F (175°C). Bake the bread squares for 30 to 35 minutes until they are golden brown and the cheese is bubbling happily. Let them cool slightly before serving warm, so you get the perfect gooey pull-apart effect.
How to Serve Cheesy Herb Garlic Bread Squares Recipe
Garnishes
For an extra touch of freshness and a pop of color, sprinkle some additional chopped parsley or chives over your bread squares just before serving. A light drizzle of extra virgin olive oil or a sprinkle of flaky sea salt can elevate the flavor even more.
Side Dishes
Cheesy Herb Garlic Bread Squares are wonderful alongside crisp salads, hearty soups, or pasta dishes. Think about pairing them with a tomato basil soup or a zesty Caesar salad to complement the richness of the bread while keeping your meal balanced.
Creative Ways to Present
Try serving these bread squares stacked on a rustic wooden board alongside small bowls of marinara sauce, pesto, or a creamy cheese dip for dipping. They also make fantastic finger food for game day or a cozy movie night—warm, cheesy, and perfectly shareable.
Make Ahead and Storage
Storing Leftovers
You can store any leftover Cheesy Herb Garlic Bread Squares in an airtight container at room temperature for 3 to 4 days. Keeping them sealed helps preserve their freshness and prevents drying out.
Freezing
If you want to enjoy these cheesy bites later, freeze the bread squares tightly wrapped in plastic wrap and foiled for up to 2 months. Thaw them overnight in the refrigerator before reheating to maintain their texture and flavor.
Reheating
To bring back the fresh-out-of-the-oven taste, reheat the bread squares at 350°F (175°C) for about 10 to 15 minutes. This method crisps the outer crust while melting the cheese inside, restoring their irresistible chewiness and aroma.
FAQs
Can I use a different type of cheese?
Absolutely! While mozzarella, cheddar, and parmesan create a wonderful flavor combo, feel free to experiment with provolone, gouda, or even fontina to suit your taste preferences.
Is it necessary to let the dough rise twice?
Yes, the first rise allows the dough to develop air pockets for a light texture, and the second rise after layering the cheese helps the bread squares puff up nicely, creating soft, pull-apart layers.
Can I make this recipe vegan?
You can substitute the dairy with plant-based milk and cheeses, and replace eggs with flaxseed eggs or other vegan binders. Keep in mind that texture and flavor will vary a bit, but it’s a delicious option for vegan diets.
How can I make the garlic flavor more intense?
Increasing the amount of minced garlic in the herb oil or allowing the bread to rest longer after brushing the garlic herb oil will amplify the garlic aroma and taste.
Are these bread squares suitable for freezing after baking?
Yes, you can freeze them once baked. Make sure they’re completely cooled, then wrap them well to preserve freshness. Reheat thoroughly before serving for the best experience.
Final Thoughts
I truly hope you give this Cheesy Herb Garlic Bread Squares Recipe a try because it’s the kind of recipe that brings joy with every warm, cheesy bite. Whether for a casual family night or a party snack, these squares never fail to impress and satisfy. Grab your ingredients, enjoy the process, and prepare for some serious compliments at the table!
“`
Print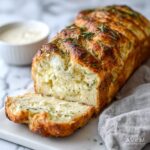
Cheesy Herb Garlic Bread Squares Recipe
- Prep Time: 20 minutes
- Cook Time: 35 minutes
- Total Time: 2 hours 35 minutes
- Yield: 1 loaf, 8-10 servings
- Category: Bread
- Method: Baking
- Cuisine: American
Description
This savory pull-apart cheese bread features a soft, fluffy dough layered with a flavorful blend of mozzarella, cheddar, and parmesan cheeses, infused with garlic and fresh herbs. Perfect as a snack or side dish, this recipe involves kneading, rising, layering, and baking to create a golden, cheesy treat that’s easy to share.
Ingredients
Dough
- 3½ cups all-purpose flour
- 1 tablespoon sugar
- 1½ teaspoons salt
- 2¼ teaspoons instant dry yeast
- ¾ cup whole milk
- ¼ cup water
- 2 tablespoons unsalted butter, melted
- 2 eggs
Cheese Mixture and Topping
- 1½ cups shredded mozzarella cheese
- 1 cup grated cheddar cheese
- ¼ cup grated parmesan cheese
- 3 cloves garlic, minced
- 3 tablespoons chopped fresh parsley
- 2 tablespoons chopped fresh chives
- 3 tablespoons olive oil
- Salt and pepper to taste
Instructions
- Prepare Dry Ingredients: In a large bowl, combine the all-purpose flour, sugar, salt, and instant dry yeast ensuring even distribution.
- Warm Liquids: Heat the whole milk, water, and melted butter together until warm to the touch but not hot, creating the perfect temperature to activate the yeast.
- Form Dough: Add the warm liquid mixture and eggs to the bowl with dry ingredients. Mix until a soft dough forms, combining all ingredients into a cohesive mass.
- Knead Dough: Transfer the dough to a lightly floured surface and knead for 8–10 minutes until it becomes smooth and elastic, developing gluten structure.
- First Rise: Place the kneaded dough into a lightly oiled bowl. Cover with a clean cloth and let it rise in a warm place for about 1 hour or until doubled in size.
- Prepare Garlic Herb Oil: In a small bowl, combine minced garlic, chopped fresh parsley, chopped fresh chives, olive oil, salt, and pepper. Stir well and set aside to allow flavors to meld.
- Shape Dough: After the dough has risen, punch it down to release air. Roll it out on a lightly floured surface into a large rectangle, ready for layering.
- Layer Cheese and Herb Oil: Brush the surface of the rolled dough generously with the prepared garlic herb oil. Evenly sprinkle the shredded mozzarella, grated cheddar, and grated parmesan cheeses on top.
- Cut and Stack: Cut the cheesy dough into squares. Stack the squares upright in a greased loaf pan, layering to create pull-apart sections.
- Second Rise: Cover the loaf pan and let the dough rise again for 30–40 minutes, allowing it to puff up before baking.
- Preheat Oven and Bake: Preheat your oven to 350°F (175°C). Bake the bread for 30–35 minutes until it is golden brown on top and the cheese is bubbling.
- Cool and Serve: Remove from oven and let the bread cool slightly. Serve warm to enjoy the melty cheese and aromatic herbs at their best.
Notes
- You can substitute whole milk with 2% milk for a lighter bread, but whole milk gives a richer flavor.
- Ensure the milk mixture is warm and not hot to prevent killing the yeast and ensure proper rising.
- Use fresh herbs for the best flavor; dried herbs can be used but reduce the amount accordingly.
- The bread is best served warm but can be reheated gently in the oven to refresh the melty texture.
- For a different flavor profile, experiment with other cheese blends such as provolone or gouda.


